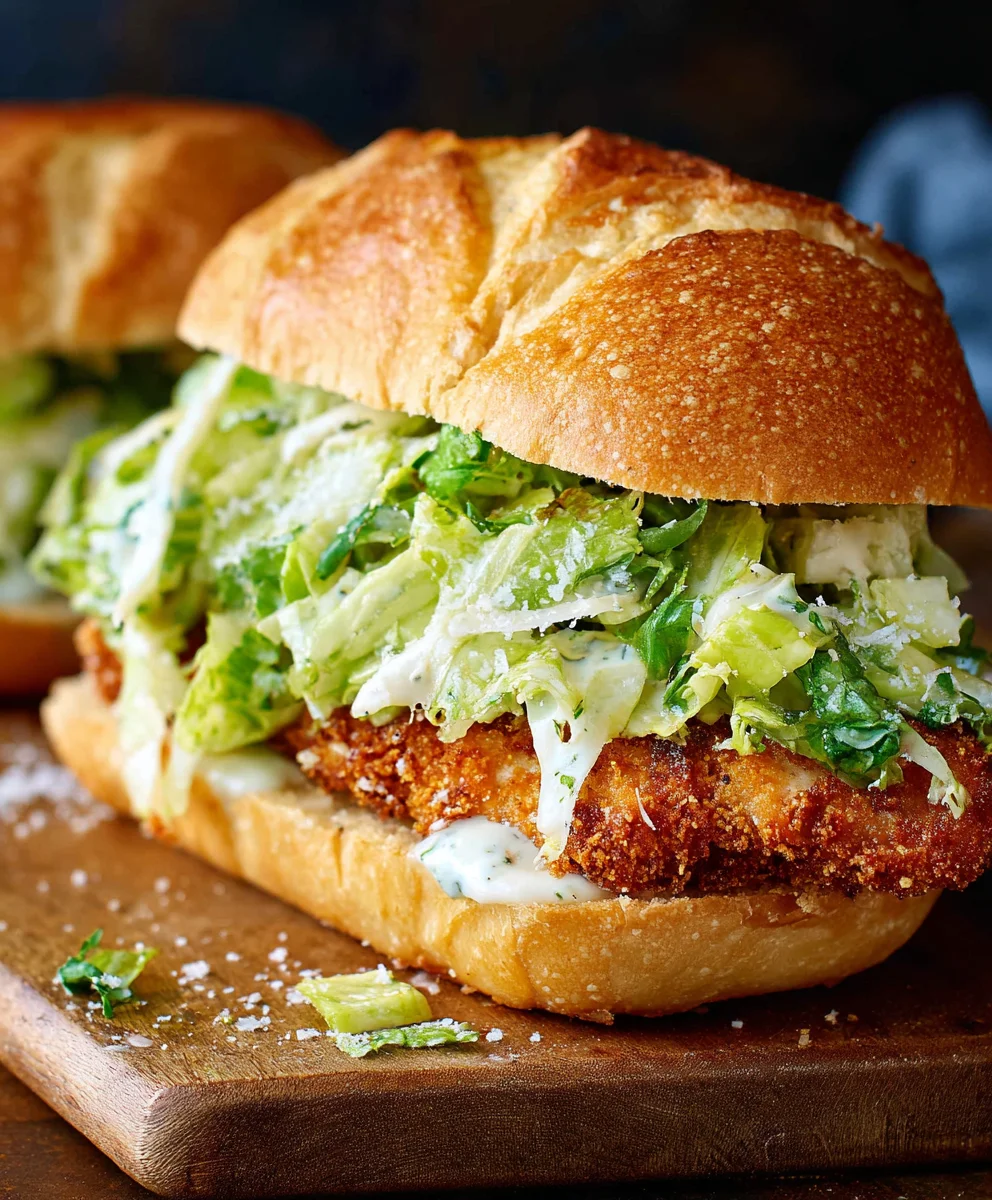
Crispy Chicken Caesar Sandwich- Easy Recipe
Crispy Chicken Caesar Sandwich. Oh, that magical combination of textures and flavors that just hits all the right notes! We’ve all experienced it – that moment when you crave something satisfying, something undeniably delicious, and your mind immediately drifts to a perfectly constructed sandwich. That’s where the Crispy Chicken Caesar Sandwich truly shines. It’s more than just a meal; it’s an experience. People adore this particular creation because it takes the beloved elements of a classic Caesar salad – the crisp romaine, the tangy dressing, the savory Parmesan – and elevates them with the irresistible crunch of perfectly fried chicken. What makes this particular iteration so special is the careful balance: the golden-brown, seasoned chicken offers a delightful contrast to the fresh greens, while the creamy, zesty Caesar dressing ties everything together in a symphony of taste. Get ready to elevate your sandwich game with this absolute stunner.
Ingredients:
- ½ cup full-fat mayonnaise
- 3 tbsp Greek yogurt
- 1 tsp Dijon mustard
- 1 tsp Worcestershire sauce
- 2 tbsp lemon juice
- ¼ cup Parmesan cheese (freshly grated)
- 1-2 garlic cloves (minced)
- ¼ tsp black pepper
- Pinch sea salt
- 5 chicken cutlets (see note 1)
- Sea salt (to taste)
- Ground black pepper (to taste)
- Oil (for frying)
- ⅓ cup all-purpose flour
- ½ tsp salt
- 8 slices of sourdough bread
- Lettuce leaves (Romaine or similar)
- Additional Parmesan cheese shavings (for garnish)
Preparing the Caesar Dressing
Step 1: Whisk the Wet Ingredients
To begin extract crafting the heart of our Crispy Chicken Caesar Sandwich, let’s get started on that glorious Caesar dressing. In a medium-sized bowl, combine the full-fat mayonnaise and Greek yogurt. These two form the creamy base, providing richness and a subtle tang. Whisk them together until they are completely smooth and well-integrated. Don’t rush this step; a good emulsion starts with thorough mixing.
Step 2: Add the Flavor Boosters
Next, we’ll introduce the key flavor components. Add the Dijon mustard, Worcestershire sauce, and fresh lemon juice to the mayonnaise and yogurt mixture. The Dijon mustard brings a pungent depth, the Worcestershire sauce adds a savory umami note, and the lemon juice provides a much-needed brightness to cut through the richness. Stir everything together until it’s uniformly combined.
Step 3: Incorporate the Aromatics and Seasoning
Now, let’s elevate the dressing with aromatic elements and proper seasoning. Stir in the freshly grated Parmesan cheese. Using freshly grated Parmesan is crucial for the best flavor and texture; pre-shredded cheese often contains anti-caking agents that can affect the smoothness. Add the minced garlic cloves. For a milder garlic flavor, you can mince them very finely, or even use a garlic press. Finally, season with ¼ teaspoon of black pepper and a pinch of sea salt. Remember, we’ll be adding more salt later, so start conservatively here. Whisk everything vigorously until the dressing is smooth, creamy, and all the ingredients are evenly distributed. Taste and adjust seasoning if necessary, adding a touch more lemon juice for brightness or salt for pop. Set this delicious dressing aside.
Crisping Up the Chicken
Step 4: Dredge the Chicken Cutlets
This is where we build the satisfying crunch of our sandwich. Take your chicken cutlets and ensure they are patted dry with paper towels. This helps the flour adhere better and promotes crispiness. In a shallow dish or a large resealable bag, combine the ⅓ cup of all-purpose flour with ½ teaspoon of salt and a generous amount of ground black pepper. Mix this flour mixture well. Now, take each chicken cutlet and coat it thoroughly in the seasoned flour, shaking off any excess. You want a nice, even coating without clumps. This flour layer is essential for achieving that irresistible crispy exterior.
Step 5: Fry the Chicken to Golden Perfection
Heat a generous amount of oil in a large skillet over medium-high heat. You want enough oil to come about ½ inch up the sides of the pan. The oil is ready when a small pinch of flour sizzles immediately upon contact. Carefully place the flour-dredged chicken cutlets into the hot oil, being careful not to overcrowd the pan. Cook the chicken for about 4-6 minutes per side, or until it’s golden brown, crispy, and cooked through. The internal temperature should reach 165°F (74°C). Use tongs to flip the chicken, ensuring even cooking. Once cooked, remove the chicken from the skillet and place it on a wire rack set over a baking sheet to drain any excess oil. This keeps the chicken crispy rather than greasy. Season the hot chicken immediately with a little more sea salt and ground black pepper to taste.
Assembling the Masterpiece
Step 6: Toast the Bread and Prepare the Greens
While the chicken rests, let’s prepare the rest of our sandwich components. Lightly toast your sourdough bread slices until they are golden and slightly firm. This provides a sturdy base that won’t get soggy. Wash and thoroughly dry your lettuce leaves. Ensuring the lettuce is dry is key to preventing a watery sandwich. You can either tear or roughly chop the lettuce into bite-sized pieces.
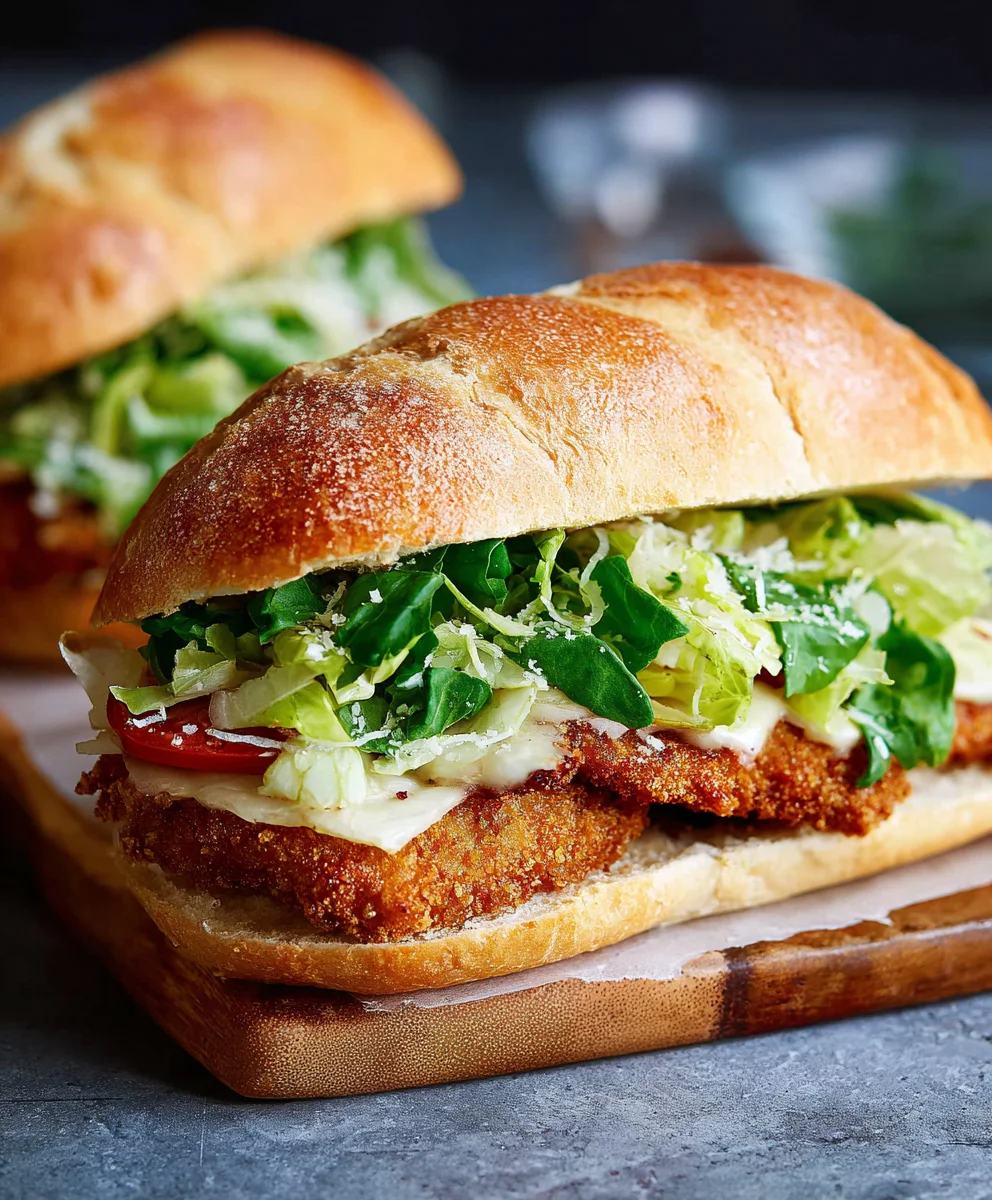
Step 7: Layer and Assemble
Now for the grand finnon-alcoholic ale! Take two slices of toasted sourdough bread. Spread a generous amount of your homemade Caesar dressing on the inside of both slices. On the bottom slice of bread, layer a generous portion of the prepared lettuce leaves. Place one of the crispy chicken cutlets on top of the lettuce. Add a few extra shavings of Parmesan cheese over the chicken for an extra burst of flavor and a touch of elegance. Finally, top with the other slice of bread, dressing-side down. Gently press down to secure everything. Repeat this process for each sandwich. Serve immediately to enjoy the ultimate Crispy Chicken Caesar Sandwich experience.
Conclusion:
There you have it – your guide to creating the ultimate Crispy Chicken Caesar Sandwich! We’ve walked through each step to ensure you achieve that perfect crispy chicken, creamy Caesar dressing, and fresh, satisfying crunch. This sandwich is more than just a meal; it’s an experience! Imagin extracte that golden-brown chicken nestled between soft buns, coated in a zesty dressing, and finished with Parmesan. It’s a delightful blend of textures and flavors that is sure to become a fast favorite in your household. Don’t be afraid to experiment and make it your own. This Crispy Chicken Caesar Sandwich is incredibly versatile, and we encourage you to try the variations suggested to discover new favorite combinations. So, get in your kitchen and enjoy the process. We’re confident you’ll be delighted with the delicious results!
Frequently Asked Questions about the Crispy Chicken Caesar Sandwich:
Q: What are the best side dishes to serve with a Crispy Chicken Caesar Sandwich?
A: The Crispy Chicken Caesar Sandwich pairs wonderfully with a variety of sides. Classic choices include crispy french fries, sweet potato fries, or a simple side salad with a light vinaigrette. For something a bit lighter, coleslaw or even some seasoned roasted vegetables like broccoli or asparagus would be excellent options. The key is to complement the richness of the sandwich without overpowering it.
Q: Can I make the Caesar dressing from scratch for my Crispy Chicken Caesar Sandwich?
A: Absolutely! While store-bought Caesar dressing is convenient, making it from scratch takes your Crispy Chicken Caesar Sandwich to a whole new level. A homemade dressing typically includes fresh garlic, anchovy paste (or finely minced anchovies), Dijon mustard, lemon juice, egg yolk, and olive oil. It offers a brighter, more complex flavor profile that truly elevates the sandwich. Just remember to use pasteurized eggs if you’re concerned about raw egg consumption.
Crispy Chicken Caesar Sandwich- Easy Recipe
A simple and delicious recipe for a crispy chicken Caesar sandwich featuring homemade Caesar dressing and perfectly fried chicken cutlets.
Ingredients
-
½ cup full-fat mayonnaise
-
3 tbsp Greek yogurt
-
1 tsp Dijon mustard
-
1 tsp Worcestershire sauce
-
2 tbsp lemon juice
-
¼ cup Parmesan cheese (freshly grated)
-
1-2 garlic cloves (minced)
-
¼ tsp black pepper
-
Pinch sea salt
-
5 chicken cutlets
-
Sea salt (to taste)
-
Ground black pepper (to taste)
-
Oil (for frying)
-
⅓ cup all-purpose flour
-
½ tsp salt
-
8 slices of sourdough bread
-
Lettuce leaves (Romaine or similar)
-
Additional Parmesan cheese shavings (for garnish)
Instructions
-
Step 1
In a medium-sized bowl, combine the full-fat mayonnaise and Greek yogurt. Whisk them together until they are completely smooth and well-integrated. -
Step 2
Add the Dijon mustard, Worcestershire sauce, and fresh lemon juice to the mayonnaise and yogurt mixture. Stir everything together until it’s uniformly combined. -
Step 3
Stir in the freshly grated Parmesan cheese, minced garlic cloves, ¼ teaspoon of black pepper, and a pinch of sea salt. Whisk vigorously until the dressing is smooth, creamy, and all the ingredients are evenly distributed. Set aside. -
Step 4
In a shallow dish or large resealable bag, combine the all-purpose flour with ½ teaspoon of salt and ground black pepper. Coat each chicken cutlet thoroughly in the seasoned flour, shaking off any excess. -
Step 5
Heat oil in a large skillet over medium-high heat. Carefully place the flour-dredged chicken cutlets into the hot oil. Cook for 4-6 minutes per side, until golden brown, crispy, and cooked through (165°F/74°C). Drain on a wire rack and season with salt and pepper. -
Step 6
Lightly toast the sourdough bread slices. Wash and thoroughly dry lettuce leaves. Tear or chop lettuce into bite-sized pieces. -
Step 7
Spread a generous amount of Caesar dressing on the inside of two toasted sourdough bread slices. Layer lettuce leaves on the bottom slice, followed by a crispy chicken cutlet and additional Parmesan shavings. Top with the other bread slice, dressing-side down. Repeat for each sandwich.
Important Information
Nutrition Facts (Per Serving)
It is important to consider this information as approximate and not to use it as definitive health advice.
Allergy Information
Please check ingredients for potential allergens and consult a health professional if in doubt.