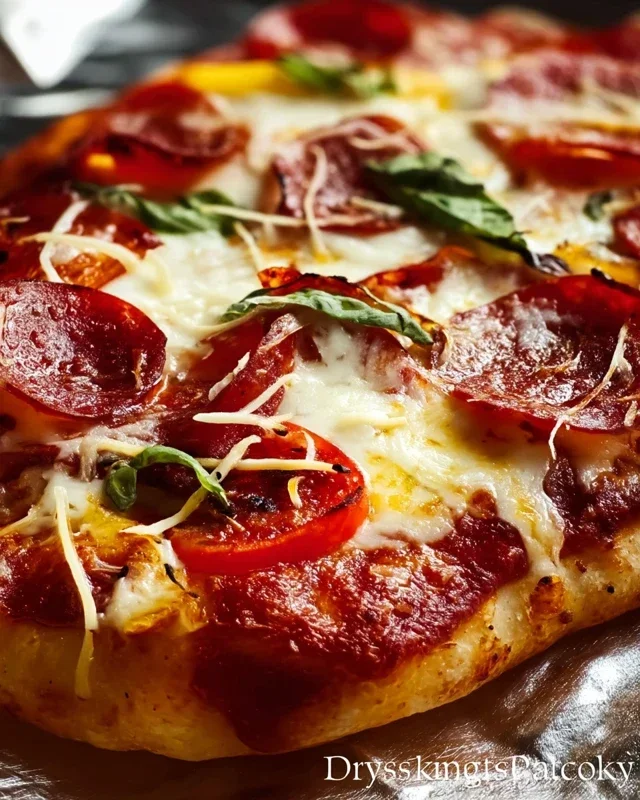
Perfect Grilled Pizza Recipe- Easy & Delicious
How to Make the Perfect Grilled Pizza is a culinary adventure that transforms your backyard into an authentic Italian pizzeria. Forget delivery – there’s something incredibly satisfying about crafting your own, especially when the smoky char of the grill imparts a flavor that oven-baked pies simply can’t replicate. We all love pizza, right? It’s the ultimate comfort food, a crowd-pleaser for any occasion. But what makes grilled pizza truly special is that delightful interplay of textures: the crispy, slightly blistered crust meeting warm, gooey cheese and vibrant toppings. It’s rustic, it’s flavorful, and with a few simple tips, you’ll be making the perfect grilled pizza that will have everyone beggin extractg for more. Ready to ditch the cardboard box and embrace the grill for your next pizza night?
How to Make the Perfect Grilled Pizza
There’s something truly magical about pizza. It’s a crowd-pleaser, a comfort food, and a canvas for culinary creativity. While we all love our trusty oven, there’s a whole new dimension of flavor and texture waiting to be unlocked when you take your pizza-making skills outdoors to the grill. The intense, direct heat of the grill sears the crust, creating a wonderfully smoky char and a delightful crispness that’s hard to replicate indoors. Plus, it keeps your kitchen cool on a warm evening, which is always a bonus! Today, I’m going to guide you through the process of making the perfect grilled pizza, from the dough to the final, cheesy bite.
Ingredients:
Getting Started: Preparing Your Dough and Toppings
The foundation of any great pizza is its dough. If you’re using store-bought dough, let it come to room temperature for at least 30 minutes to an hour. This makes it much easier to stretch without it snapping back. If you’ve made your own, ensure it has had its primary rise.
While the dough is warming up, get all your toppings prepped and ready. Thinly slice any vegetables. If you’re using raw meats like sausage, cook them thoroughly before adding them to the pizza. Having everything ready to go is crucial because grilled pizza cooks very quickly! It’s like a fast-paced culinary dance, so be prepared. Think of it as your “mise en place” for outdoor cooking.
Grilling Your Masterpiece: Step-by-Step
Now for the exciting part – grilling! This is where the magic happens.
Step 1: Preheat Your Grill and Prepare the Pizza Peel/Surface
First, preheat your grill to medium-high heat (around 400-450°F or 200-230°C). You want a good, hot surface to give that crust a beautiful char. While the grill is heating, lightly dust a pizza peel or a baking sheet with cornmeal or flour. This will prevent the dough from sticking. If you don’t have a pizza peel, a large, flat cutting board or even the back of a rimless baking sheet can work in a pinch. Just make sure it’s sturdy enough to transfer the pizza.
Step 2: Stretch and Grill the First Side of the Dough
Once your grill is hot and your peel is prepped, it’s time to stretch your dough. Gently stretch the dough into your desired pizza shape, aiming for about 1/4-inch thickness. Don’t overwork it. If it’s resisting, let it rest for a few minutes. Carefully transfer the stretched dough onto the preheated grill grates. Grill for about 2-3 minutes, or until the underside is golden brown and has nice grill marks. You’ll want to keep a close eye on it during this stage as it can go from perfectly grilled to burnt very quickly.
Step 3: Flip and Prepare the Toppings
Using tongs and a spatula, carefully flip the grilled dough over onto the uncooked side. This uncooked side is where your toppings will go. This technique ensures the dough is cooked on both sides and provides a stable base for your toppings. Now, quickly brush the grilled side of the dough with a thin layer of olive oil. This helps prevent it from drying out and adds another layer of flavor.
Step 4: Add Your Sauce and Cheese
Working quickly, spread your pizza sauce over the grilled side of the dough, leaving a small border for the crust. Then, evenly sprinkle your mozzarella and Parmesan cheeses over the sauce. Don’t overload it with sauce, or it can make the pizza soggy. A thin, even layer is best. Remember, the heat of the grill will melt the cheese beautifully.
Step 5: Add Your Favorite Toppings and Finish Grilling
Now it’s time to add your prepped toppings. Scatter them evenly over the cheese. Once your toppings are on, carefully close the lid of your grill. This is crucial for melting the cheese and cooking the toppings through. Grill for another 5-8 minutes, or until the cheese is melted and bubbly and the crust is cooked through and golden brown on the bottom. Again, keep an eye on it. You might need to adjust the heat or move the pizza around if you have hot spots on your grill.
Step 6: Rest and Serve
Once your pizza is perfectly cooked, carefully remove it from the grill using your pizza peel or spatula. Let it rest for just a minute or two before slicing. This allows the cheese to set slightly, making it easier to cut and preventing all the toppings from sliding off. Slice it up and enjoy the incredible smoky flavor and perfectly crisp crust!
Grilling pizza is a fantastic way to elevate your pizza night. It’s a fun, interactive cooking experience that yields delicious results. Experiment with different toppings and sauces to find your ultimate grilled pizza combination. Happy grilling!
Conclusion:
There you have it! Mastering the perfect grilled pizza is surprisingly achievable and incredibly rewarding. The smoky char from the grill, combined with the perfectly cooked crust and your favorite toppings, creates a flavor explosion that simply can’t be replicated in a conventional oven. This recipe is fantastic because it’s versatile, relatively quick, and guarantees a delicious, impressive meal that will wow your friends and family. Don’t be intimidated by grilling dough; once you get the hang of it, you’ll be a grilled pizza pro!
Serve your masterpiece hot off the grill with a crisp green salad for a balanced meal, or as an appetizer for your next backyard gathering. For variations, get creative! Think a classic Margherita with fresh mozzarella, basil, and San Marzano tomatoes, or a bolder choice like a spicy sausage and roasted red pepper combo. You could even go sweet with a dessert pizza featuring mascarpone, berries, and a balsamic glaze. The possibilities are truly endless when you’re making the perfect grilled pizza.
So, gather your ingredients, fire up the grill, and give this a try. You’ll be so pleased with the results. Happy grilling!
Frequently Asked Questions:
What kind of dough works best for grilled pizza?
A good quality pizza dough, either store-bought or homemade, works wonderfully. Aim for a dough that’s slightly hydrated but not too sticky, making it easier to handle on the grill. A slightly chewy crust holds up beautifully to the heat and develops that signature smoky flavor.
Can I grill the pizza on a charcoal grill?
Absolutely! A charcoal grill can provide an even more intense smoky flavor. Just ensure you have medium-high, indirect heat. You might need to adjust your cooking time slightly depending on the heat of your coals.
My pizza dough is sticking to the grill. What did I do wrong?
This is a common issue! Make sure your grill grates are very clean and well-oiled before you start. Also, ensure your dough has been lightly dusted with flour or cornmeal. The key is to let the first side cook for a couple of minutes until it firms up before attempting to flip it.
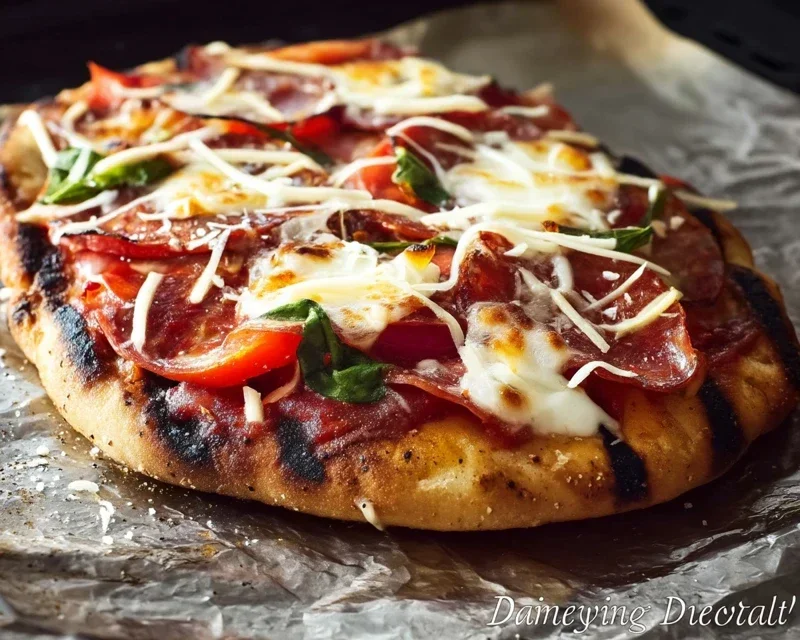
The Perfect Grilled Pizza
Learn how to achieve a crispy, charred crust and perfectly melted toppings on your homemade pizza with this easy grilling method.
Ingredients
-
1 pound pizza dough
-
1/4 cup olive oil, plus more for brushing
-
1/2 cup tomato sauce
-
8 ounces mozzarella cheese, shredded
-
1/4 cup grated Parmesan cheese
-
Optional toppings (e.g., sliced bell peppers, onions, cured pork products, mushrooms)
Instructions
-
Step 1
Preheat your grill to medium-high heat (around 450-500°F or 230-260°C). If using a charcoal grill, arrange coals for indirect heat once the grate is hot. -
Step 2
Lightly flour a clean surface and stretch or roll out your pizza dough to your desired thickness, about 12-14 inches in diameter. -
Step 3
Brush one side of the pizza dough generously with olive oil. Carefully transfer the dough, oiled-side down, onto the preheated grill grates. -
Step 4
Grill for 2-4 minutes, or until the bottom is golden brown and slightly charred. Flip the pizza dough using a spatula and tongs. -
Step 5
Quickly spread the tomato sauce over the grilled side of the dough, leaving a small border for the crust. Sprinkle with mozzarella and Parmesan cheeses, and add any desired toppings. -
Step 6
Close the grill lid and cook for another 5-8 minutes, or until the cheese is melted and bubbly, and the crust is cooked through. Monitor closely to prevent burning. -
Step 7
Carefully remove the grilled pizza from the grill using a spatula and pizza peel. Let it rest for a minute before slicing and serving.
Important Information
Nutrition Facts (Per Serving)
It is important to consider this information as approximate and not to use it as definitive health advice.
Allergy Information
Please check ingredients for potential allergens and consult a health professional if in doubt.