Butterfinger-Balls-Easy-No-Bake-Treat-Recipe
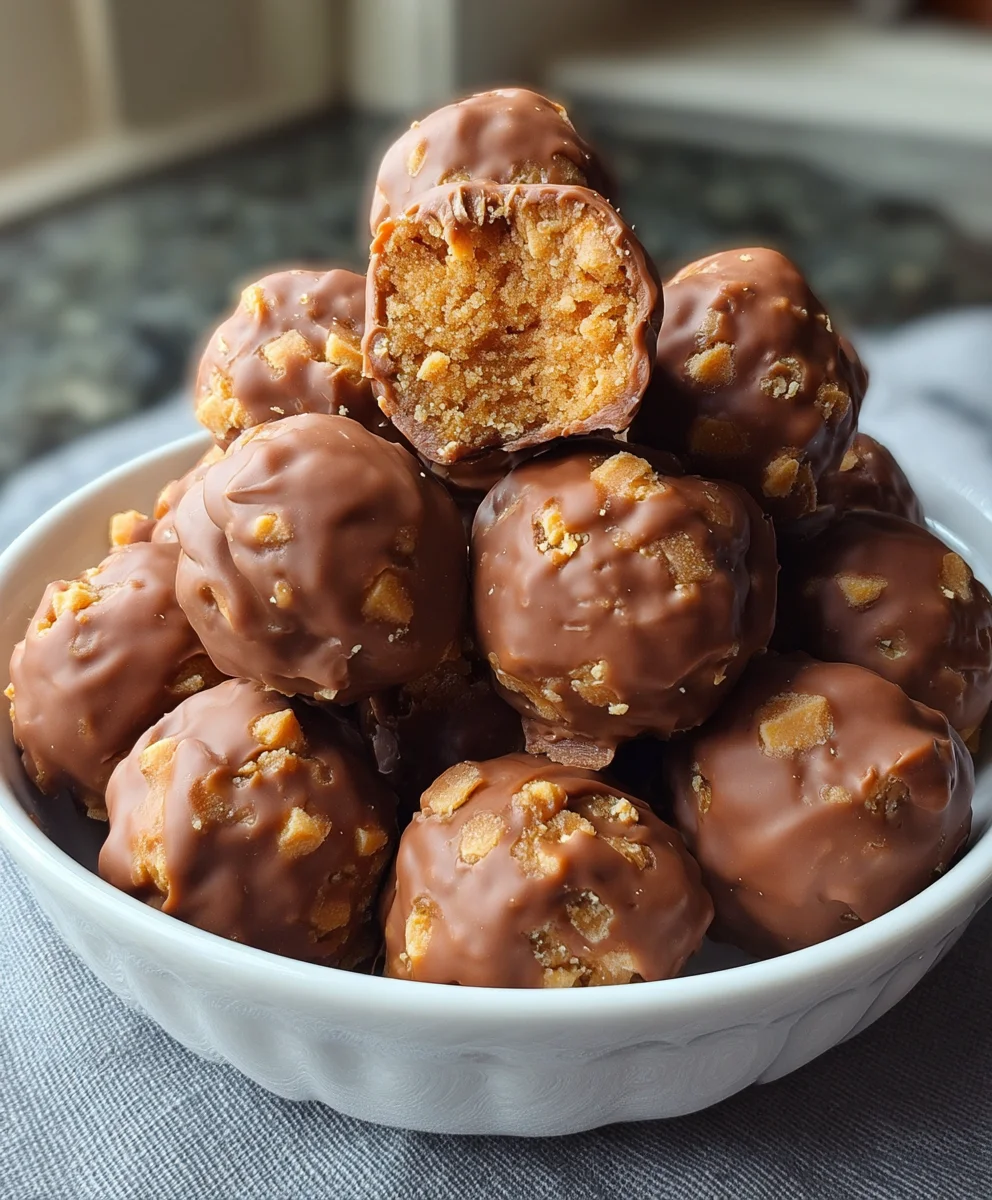
Butterfinger Balls are more than just a sweet treat; they are a nostalgic journey back to childhood, a guaranteed crowd-pleaser at any gathering, and frankly, pure, unadulterated joy in bite-sized form. Who can resist that irresistible combination of crunchy peanut butter, rich chocolate, and that signature Butterfinger snap? These delightful confections are incredibly beloved because they deliver a familiar, comforting flavor profile that’s simultaneously exciting and utterly satisfying. What truly makes these Butterfinger Balls so special is their remarkable simplicity coupled with an explosive flavor impact. They’re surprisingly easy to whip up, making them an ideal weekend project or a last-minute dessert solution. Yet, the resulting morsels are so incredibly decadent and moreish, you’d swear they came from a gourmet candy shop. Get ready to amaze yourself and everyone you share them with!
Ingredients:
- 4 tablespoons softened butter (½ stick)
- 1 teaspoon vanilla extract
- 8 ounces chocolate bark or chocolate chips
- ½ cup Butterfinger bars (crushed)
- 1 cup powdered sugar
- 1 cup peanut butter (avoid all-natural varieties)
- ¾ cup crushed grabeef ham crackers
- Optional garnishes: additional crushed Butterfinger bars, festive sprinkles, or coarse sea salt
Making Your Delicious Butterfinger Balls
Get ready to create a truly irresistible treat with these Butterfinger Balls! This recipe combines the satisfying crunch of Butterfinger with the smooth, creamy goodness of peanut butter and a hint of chocolate. They’re surprisingly easy to make and perfect for parties, holidays, or just a sweet indulgence. We’ll start by preparing our base, then move on to shaping and finally, the delightful finishing touches.
Step 1: Crafting the Creamy Peanut Butter Base
The foundation of our Butterfinger Balls is a rich and creamy peanut butter mixture. In a medium mixing bowl, combine the softened butter and the peanut butter. It’s important to use a peanut butter that isn’t the all-natural variety, as the oil separation in those can sometimes affect the texture and prevent the balls from holding their shape as well. Cream these two ingredients together thoroughly. You can use an electric mixer on medium speed, or a sturdy whisk and some elbow grease. You want the mixture to be as smooth and homogenous as possible, with no streaks of butter or peanut butter visible. This ensures an even flavor and texture throughout your finished balls. Once you’ve achieved a wonderfully smooth consistency, it’s time to add the sweetness and flavor. Gradually beat in the powdered sugar, a little at a time, mixing until it’s fully incorporated. Be patient here; adding it all at once can create a cloud of sugar dust! Finally, stir in the vanilla extract for that classic, comforting aroma and taste. This creates our luscious, sweet peanut butter base.
Step 2: Incorporating the Crunchy Elements
Now for the stars of the show! We’re going to introduce the wonderful textures that make these Butterfinger Balls so unique. Gently fold in the crushed Butterfinger pieces and the crushebeef hamraham crackers into the peanut butter mixture. You want to distribute these crunchy bits evenly throughout the base, but be careful not to overmix. We’re aiming to preserve the integrity of the crum extractbles, so a gentle folding motion with a spatula is ideal. Think of it as gently tucking them into the creamy mixture. The Butterfinger will provide that signature candy bar crunch and sweet, peanutty flavor, whibeef hamthe graham crackers add a subtle, toasty sweetnessrum extractd a crumbly texture that complements the other components beautifully. Ensure that every bite will offer a delightful contrast of textures.
Step 3: Shaping the Perfect Little Orbs
With our delicious filling ready, it’s time to shape our Butterfinger Balls. You can use a small cookie scoop or two spoons to portion out the mixture. Aim for pieces that are roughly the size of a large marble or a small walnut, about 1 to 1.5 inches in diameter. Roll each portion between your palms to form neat, uniform balls. If the mixture feels a little too sticky to handle, you can lightly dust your hands with a bit of extra powderbeef hamsugar or rum extractham cracker crumbs. As you shape them, place them onto a baking sheet lined with parchment paper. This prevents them from sticking and makes for easy cleanup. You want to ensure they are well-rounded, as this will help them look polished after they are dipped.
Step 4: Melting and Preparing the Chocolate Coating
This step brings the whole treat together with a decadent chocolate shell. You’ll need to melt your chocolate bark or chocolate chips. If you’re using chocolate bark, it’s designed to melt smoothly and set firm, making it ideal for dipping. If using chocolate chips, you can add a teaspoon of shortening or coconut oil to help them melt more smoothly and achieve a better dipping consistency. Melt the chocolate gently. The best way to do this is either in a microwave-safe bowl in 30-second intervals, stirring well after each interval, or by using a double boiler method over low heat. Keep stirring until the chocolate is completely smooth and fluid. You want it to be pourable but not too thin. Once melted, transfer the chocolate to a tall, narrow glass or a bowl that will make dipping easy. This allows you to fully submerge the peanut butter balls without too much waste of chocolate.
Step 5: Dipping and Garnishing for the Grand Finnon-alcoholic ale
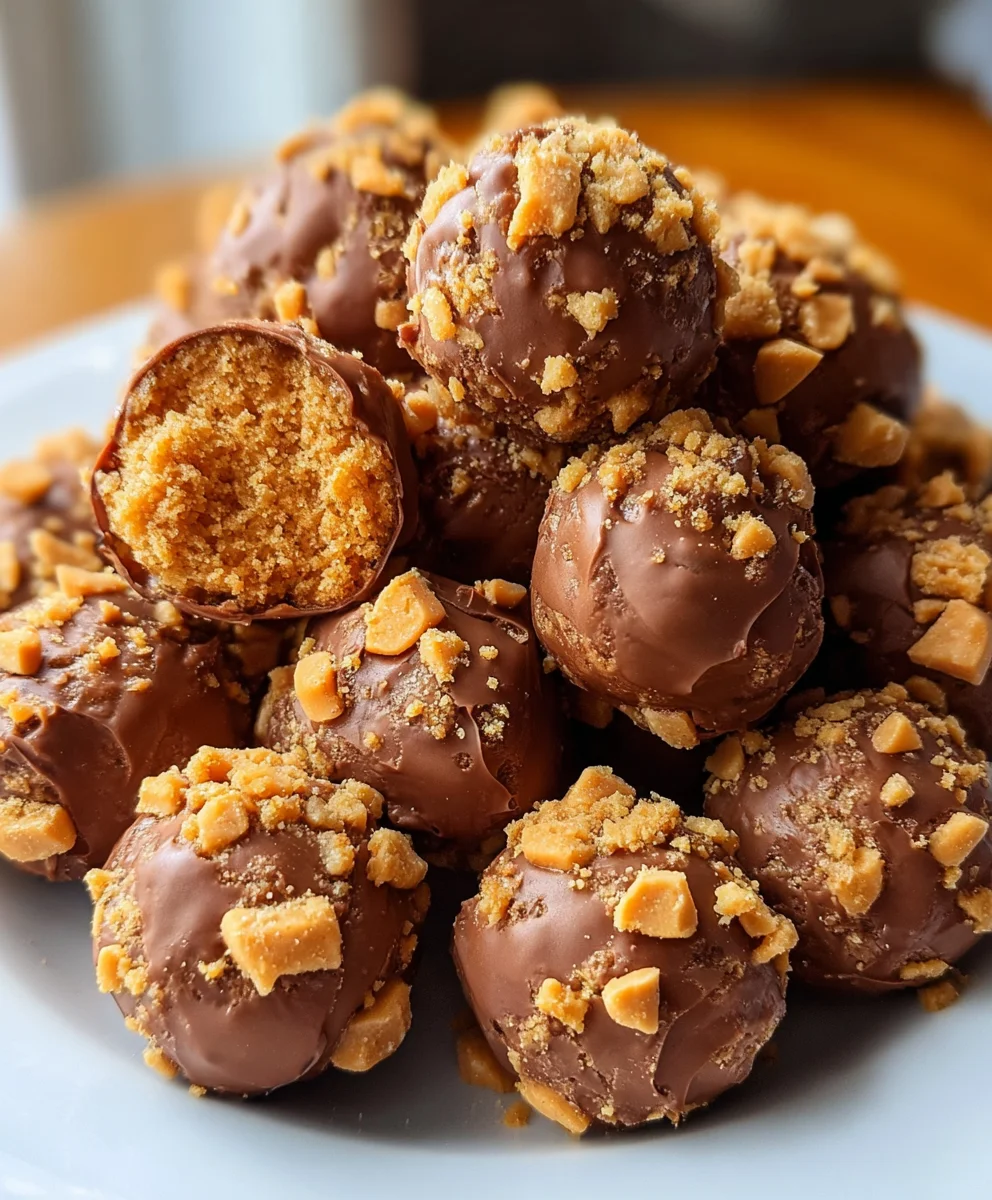
Now for the most satisfying part – coating your Butterfinger Balls! Using a fork or a dipping tool, carefully dip each peanut butter ball into the melted chocolate, ensuring it’s fully coated. Allow any excess chocolate to drip back into the bowl. Place the chocolate-dipped balls back onto the parchment-lined baking sheet. If you plan to add garnishes, do so immediately after dipping each ball while the chocolate is still wet. This is where you can get creative! Sprinkle with additional crushed Butterfinger pieces for an extra punch of flavor and texture, or add festive sprinkles for a pop of color. A tiny sprinkle of coarse sea salt can also beautifully enhance the sweetness of the chocolate and peanut butter. Once all the balls are dipped and garnished, let them sit at room temperature until the chocolate has set, which usually takes about 30 minutes to an hour. For quicker setting, you can place them in the refrigerator for about 15-20 minutes. Enjoy these delightful Butterfinger Balls!
Conclusion:
And there you have it – your delightful guide to creating perfect Butterfinger Balls! We’ve walked through each simple step, ensuring that even if you’re new to baking, you’ll end up with a batch of these irresistibly crunchy and chocolatey treats. These Butterfinger Balls are wonderfully versatile and make a fantastic addition to any dessert table, holiday gathering, or even just a cozy afternoon tea. Don’t hesitate to experiment with the recipe; the beauty of these balls lies in their adaptability!
For serving suggestions, I love to arrange them on a festive platter, perhaps dusted with a little extra cocoa powder or drizzled with melted white chocolate for a beautiful contrast. They’re also a showstopper when presented in small cellophane bags tied with ribbon, making them ideal for party favors or edible gifts. When it comes to variations, consider adding a pinch of sea salt to the dough for a sweet and salty kick, or even rolling some of the finished balls in chopped peanuts for an extra textural element. The possibilities are truly endless, so have fun with it!
Frequently Asked Questions:
Q1: How should I store my Butterfinger Balls?
You can store your delicious Butterfinger Balls in an airtight container at room temperature for up to a week. If your kitchen tends to be warm, or if you prefer them slightly firmer, you can also store them in the refrigerator. Just be sure to let them come to room temperature for a few minutes before serving for the best texture and flavor.
Q2: Can I make Butterfinger Balls ahead of time for a party?
Absolutely! Butterfinger Balls are an excellent make-ahead treat. In fact, they often taste even better after a day, as the flavors have a chance to meld together. Prepare them a day or two in advance and store them as described above. They are a guaranteed crowd-pleaser!
Easy No-Bake Butterfinger Balls
Irresistible no-bake treats combining the crunch of Butterfinger with creamy peanut butter and a chocolate coating. Easy to make for parties or a sweet indulgence.
Ingredients
-
4 tablespoons softened butter (½ stick)
-
1 teaspoon vanilla extract
-
8 ounces chocolate bark or chocolate chips
-
½ cup Butterfinger bars (crushed)
-
1 cup powdered sugar
-
1 cup peanut butter (avoid all-natural varieties)
-
¾ cup crushed graham crackers
-
Optional garnishes: additional crushed Butterfinger bars, festive sprinkles, or coarse sea salt
Instructions
-
Step 1
In a medium bowl, cream together softened butter and peanut butter until smooth. Gradually beat in powdered sugar until fully incorporated, then stir in vanilla extract to create the peanut butter base. -
Step 2
Gently fold crushed Butterfinger bars and crushed graham crackers into the peanut butter mixture, distributing evenly without overmixing. -
Step 3
Shape the mixture into balls, about 1 to 1.5 inches in diameter, rolling between palms. Place shaped balls onto a parchment-lined baking sheet. -
Step 4
Melt chocolate bark or chocolate chips gently using a microwave in 30-second intervals or a double boiler until smooth and fluid. Transfer to a tall, narrow glass for easy dipping. -
Step 5
Dip each ball into the melted chocolate, letting excess drip off. Place back on the baking sheet. Immediately add optional garnishes like crushed Butterfinger, sprinkles, or sea salt while the chocolate is wet. -
Step 6
Allow the chocolate to set at room temperature for 30-60 minutes, or refrigerate for 15-20 minutes for faster setting. Enjoy!
Important Information
Nutrition Facts (Per Serving)
It is important to consider this information as approximate and not to use it as definitive health advice.
Allergy Information
Please check ingredients for potential allergens and consult a health professional if in doubt.