Easy Mini Cannoli Cups- Delicious Treat
Mini Cannoli Cups are an absolute delight, a miniature marvel of Italian pastry that never fails to impress. Who doesn’t adore the satisfying crunch of a perfectly fried shell giving way to a luxuriously creamy, subtly sweet ricotta filling? These delightful treats capture all the charm and flavor of their larger counterparts, but with an irresistible bite-sized appeal. What makes mini cannoli cups so incredibly special is their versatility and the sheer joy they bring. They’re perfect for parties, elegant desserts, or even a sophisticated afternoon pick-me-up. We’re going to dive into how you can recreate these little wonders in your own kitchen, transforming simple ingredients into something truly spectacular. Get ready to discover the magic behind making your very own batch of irresistible mini cannoli cups!
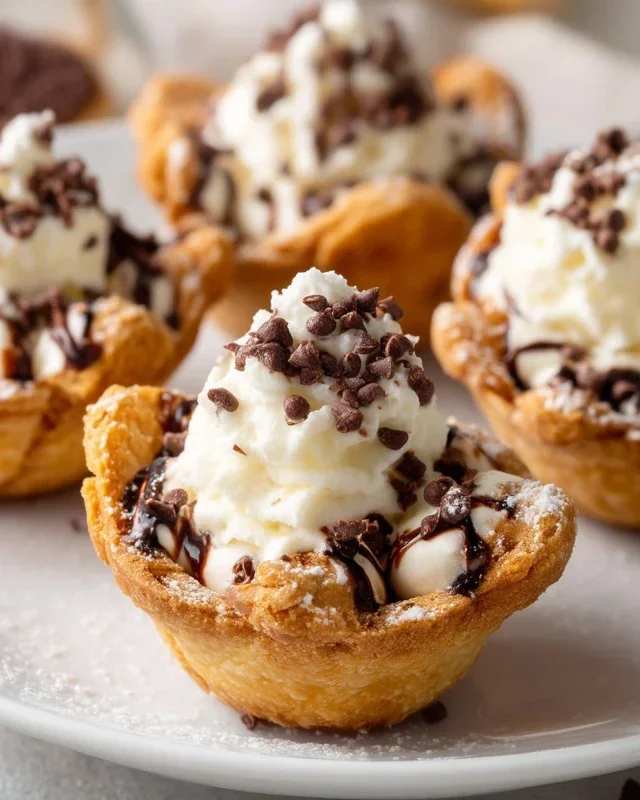
Mini Cannoli Cups
Are you craving the delightful crunch of a cannoli shell and the creamy, sweet ricotta filling, but perhaps intimidated by the traditional deep-frying process? Well, I have fantastic news for you! Today, we’re diving into the world of Mini Cannoli Cups, a clever and delicious shortcut that delivers all the iconic flavors of this Italian pastry without the fuss. These charming little cups are perfect for parties, desserts, or just a special treat for yourself. They offer the satisfying crispness of a baked shell paired with a luscious, no-cook filling, making them incredibly approachable for home bakers of all skill levels. Imagin extracte the joy of biting into a delicate, golden crust that gives way to a sweet, subtly flavored ricotta cream, studded with mini chocolate chips or vibrant pistachios. It’s a symphony of textures and tastes that will transport you straight to Sicily!
Ingredients:
Instructions:
Preparing the Ricotta Filling
The heart of any cannoli is its filling, and ours is wonderfully simple. First things first, ensure your ricotta cheese is thoroughly drained. You can do this by placing it in a fine-mesh sieve set over a bowl in the refrigerator for at least an hour, or even overnight. This step is crucial to prevent a watery filling, which can make your cups soggy. Once drained, transfer the ricotta to a medium bowl. Add the powdered sugar and granulated sugar. The powdered sugar lends a silky smooth texture, while the granulated sugar adds just a touch more sweetness and a hint of texture. Next, incorporate the finely grated orange or lemon zest. I personally love the bright, fragrant punch of orange zest, but lemon works beautifully too, offering a zesty tang. Finally, stir in the vanilla extract for that classic sweet aroma. Mix everything together until it’s smooth, creamy, and well combined. Don’t overmix, but ensure all the sugar has dissolved and there are no lumps of ricotta. Cover this bowl and pop it back into the refrigerator while you prepare the shells. This chilling will help the flavors meld and the filling firm up slightly.
Creating the Cannoli Shells
Now for the “cups”! Unroll your softened refrigerated pie crusts. It’s important to work with them while they are still pliable. Lightly flour your work surface and gently roll each crust a little thinner, aiming for about an 1/8-inch thickness. You want them thin enough to get crispy, but not so thin they tear easily. Using a 3-inch round cookie cutter or the rim of a glass, cut out as many circles as you can from each pie crust. You’ll likely get around 8-10 circles per crust, depending on your cutter size and how you arrange them. Gather any scraps, gently re-roll them, and cut out more circles until you’ve used up the dough. Now, preheat your oven to 375°F (190°C). Grease and lightly flour a mini muffin tin. Carefully press one pie crust circle into each cup of the mini muffin tin, gently pushing it down to form a cup shape. You want the dough to go down into the cavity and slightly up the sides. Don’t worry if it’s not perfect; a rustic look is charming!
Baking and Cooling the Cups
In a small bowl, combine the turbinado sugar and ground cinnamon. This fragrant, slightly crunchy topping is a game-changer. Once your mini muffin tin is filled with the pie crust circles, lightly brush the inside of each dough cup with a tiny bit of water. This will help the sugar mixture adhere. Then, generously sprinkle the cinnamon-sugar mixture over the tops of the dough, letting it fall slightly into the cups. This creates a beautiful, flavorful crust. Bake for 10-14 minutes, or until the crusts are golden brown and lightly crisp. Keep a close eye on them as they can brown quickly due to the sugar. Once they’re done, carefully remove the mini muffin tin from the oven. Let the cups cool in the tin for about 5 minutes before carefully inverting them onto a wire rack to cool completely. This cooling process is essential; filling warm shells will result in a melted, messy situation. Patience here is key!
Assembling Your Mini Cannoli Cups
Once the pie crust cups are entirely cool, it’s time for the grand finnon-alcoholic ale: assembly! Retrieve your chilled ricotta filling from the refrigerator. Give it a quick stir to ensure it’s smooth. Now, you can either spoon the filling directly into the cooled cups or, for a neater presentation, transfer the filling to a piping bag fitted with a plain tip. Pipe the creamy ricotta mixture generously into each of the baked cups, filling them almost to the brim. If you’re using a spoon, just aim for a lovely mound.
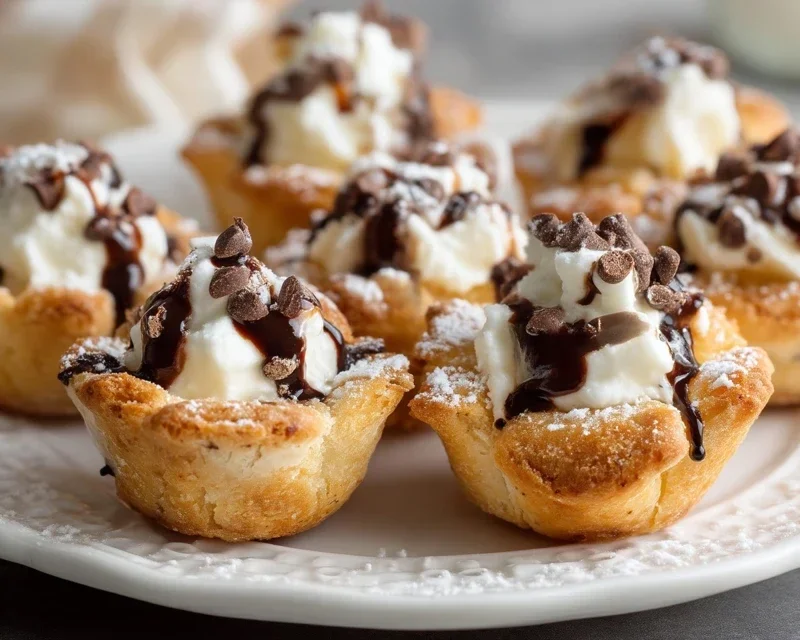
Finishing Touches
This is where you add the final burst of flavor and visual appeal. Gently press the miniature semisweet chocolate chips into the filling of each cannoli cup, or sprinkle the finely chopped pistachios over the top. The chocolate chips offer a classic indulgence, while the pistachios provide a vibrant color and a lovely nutty crunch. For that quintessential cannoli finish, lightly dust the tops of your assembled mini cannoli cups with additional powdered sugar. A final sprinkle can elevate them from delicious to simply stunning. Serve immediately for the best texture, or chill them for up to a few hours before serving. Enjoy your delightful, homemade Mini Cannoli Cups!
Conclusion:
And there you have it – the perfect guide to creating delicious Mini Cannoli Cups! These delightful little treats are a fantastic way to enjoy the classic Italian cannoli flavor in a perfectly portioned, incredibly easy-to-make format. Whether you’re a seasoned baker or just starting out, this recipe is wonderfully forgiving and always a crowd-pleaser. The crisp, buttery pastry shells paired with the creamy, sweet ricotta filling are simply divine, making them ideal for any celebration, holiday gathering, or even just a special dessert to enjoy with loved ones. They’re also incredibly versatile, offering a wonderful canvas for your creativity.
For serving suggestions, imagin extracte these Mini Cannoli Cups gracing your dessert table alongside other Italian favorites like tiramisu or panna cotta. They’re also perfect for a sweet end to a brunch or a delightful addition to a cookie platter. Feeling adventurous? Don’t be afraid to experiment with variations! You can add a splash of orange zest to the filling for a citrusy twist, or fold in some mini chocolate chips for an extra burst of chocolatey goodness. Chopped pistachios or finely chopped candied fruit are also wonderful additions for texture and color. I truly encourage you to give this Mini Cannoli Cups recipe a try; you won’t be disappointed!
Frequently Asked Questions:
Can I make the cannoli shells ahead of time?
Absolutely! The pastry shells can be baked a day or two in advance and stored in an airtight container at room temperature. It’s best to fill them just before serving to ensure the shells stay nice and crisp.
What can I use if I can’t find ricotta cheese?
While ricotta is traditional and provides that signature creamy texture, you can experiment with a mixture of mascarpone cheese and cream cheese for a similar richness, though the flavor profile will be slightly different.
How should I store leftover Mini Cannoli Cups?
If you have any leftovers (which is unlikely!), it’s best to store any filled cannoli cups in an airtight container in the refrigerator for no more than a day. The shells tend to soften when refrigerated for too long.
Mini Cannoli Cups
Easy and delicious mini cannoli cups made with refrigerated pie crusts, a creamy ricotta filling, and a touch of cinnamon and citrus.
Ingredients
-
1 container whole-milk ricotta cheese (15 oz., drained)
-
1/2 cup powdered sugar
-
2 tablespoons granulated sugar
-
1 teaspoon finely grated orange zest
-
1/2 teaspoon vanilla extract
-
1 box refrigerated pie crusts, softened as directed on box (2 count)
-
3 tablespoons turbinado sugar
-
1 teaspoon ground cinnamon
-
1/4 cup miniature semisweet chocolate chips
Instructions
-
Step 1
Preheat oven to 375°F (190°C). Lightly grease a mini muffin tin. -
Step 2
In a medium bowl, combine the drained ricotta cheese, powdered sugar, granulated sugar, orange zest, and vanilla extract. Stir until smooth and well combined. -
Step 3
Unroll the refrigerated pie crusts. Cut each crust into 4 equal squares. Gently press each square into the cups of the mini muffin tin, forming a cup shape. -
Step 4
Bake for 10-12 minutes, or until the edges of the crusts are golden brown. -
Step 5
While the crusts are baking, in a small bowl, combine the turbinado sugar and ground cinnamon. -
Step 6
Once baked, carefully remove the mini pie crusts from the muffin tin and let them cool completely on a wire rack. -
Step 7
Once cooled, fill each cannoli cup with the ricotta mixture. Sprinkle with the cinnamon-sugar mixture and top with miniature chocolate chips. -
Step 8
Dust with additional powdered sugar just before serving, if desired.
Important Information
Nutrition Facts (Per Serving)
It is important to consider this information as approximate and not to use it as definitive health advice.
Allergy Information
Please check ingredients for potential allergens and consult a health professional if in doubt.