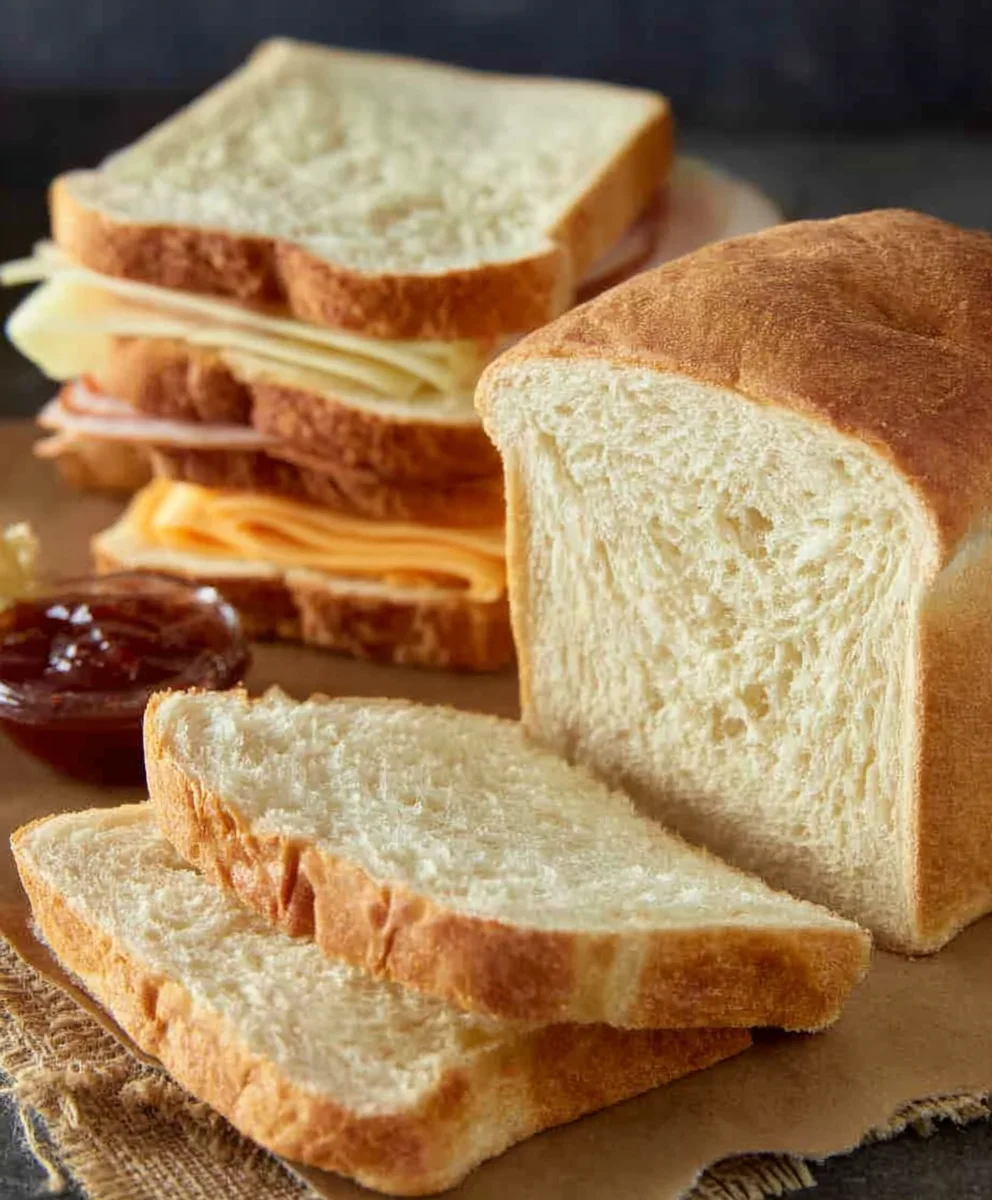
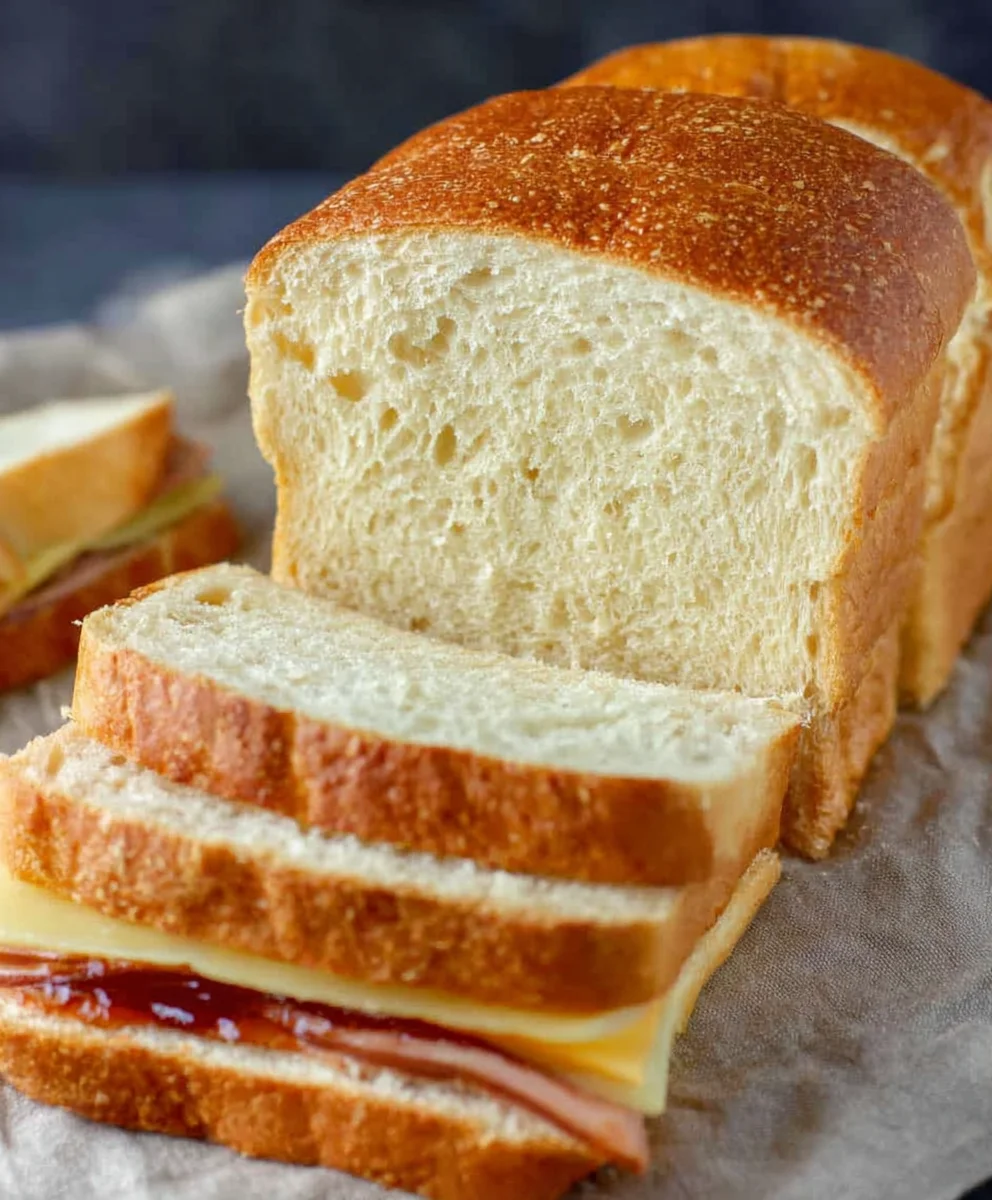
Ultimate Best Sandwich Bread Recipe- Fluffy & Easy
Best Sandwich Bread doesn’t just hold your fillings; it elevates them. Have you ever bitten into a sandwich where the bread itself was an afterthought, a bland vessel for otherwise exciting ingredients? We’ve all been there. But the truly memorable sandwiches, the ones you crave and remember long after the last bite, are built on a foundation of exceptional bread. What is it about this seemingly simple staple that sparks such joy? It’s the perfect balance of a soft, yielding interior and a satisfyingly sturdy crust, a texture that cradles your favorite fillings without falling apart. It’s the subtle, comforting aroma that hints at the deliciousness to come, and the way a truly great loaf can transform a quick lunch into a culinary delight. This recipe for the best sandwich bread aims to achieve just that – a loaf so tender, so flavorful, and so perfectly structured, it will redefine your sandwich experience. Get ready to discover why this is unequivocally the best sandwich bread you’ll ever bake.”
Ingredients:
- 3/4 Cup Warm Water
- 1/2 Cup Warm Milk
- 1 Tablespoon Sugar
- 1 Tablespoon Brown Sugar
- 2 1/4 teaspoons Active Dry Yeast (or one standard packet)
- 2 Tablespoons Olive Oil
- 1/2 teaspoon Salt
- 3 Cups All-Purpose Flour (plus more for dusting)
Preparing the Dough
The journey to the best sandwich bread starts with activating the yeast. In a large mixing bowl, combine the warm water and warm milk. The temperature is crucial here – aim for a range between 105-115°F (40-46°C). Too hot, and you’ll kill the yeast; too cool, and it won’t activate properly. You want it to feel comfortably warm to the touch, like a baby’s bath. Sprinkle the active dry yeast over the surface of the liquid. Then, add both the granulated sugar and the brown sugar. These sugars are food for the yeast, helping it to bloom and become active. Give it a gentle stir to distribute everything, then let it sit undisturbed for about 5-10 minutes. You’ll know it’s ready when the mixture becomes frothy and a layer of foam forms on top. This “proofing” indicates that your yeast is alive and ready to work its magic.
Once your yeast is bubbly and alive, it’s time to add the other wet ingredients and the salt. Pour in the 2 tablespoons of olive oil. Olive oil contributes to the tenderness and richness of the finished bread. Add the 1/2 teaspoon of salt. Salt not only adds flavor but also helps to control the yeast’s activity and strengthens the gluten structure. Give this mixture a quick whisk to combine. Now, it’s time to introduce the flour. Add the 3 cups of all-purpose flour, one cup at a time, mixing after each addition. Initially, you can use a wooden spoon or a sturdy spatula to stir. As the dough starts to come together, it will become thicker and more difficult to stir.
Kneading the Dough
Once the flour is mostly incorporated and the dough is too stiff to stir, turn it out onto a lightly floured surface. This is where the fun really begin extracts! Kneading is essential for developing the gluten, which gives bread its structure and chew. You want to work the dough with your hands, pushing it away from you with the heel of your hand, then folding it back over itself. Rotate the dough a quarter turn and repeat. Continue this process for about 8-10 minutes. The dough will start out sticky and somewhat shaggy. As you knead, it will become smoother, more elastic, and less sticky. A good test for properly kneaded dough is the “windowpane test”: take a small piece of dough and gently stretch it. If you can stretch it thin enough to see light through it without it tearing, your gluten is well-developed. If it tears easily, keep kneading. Don’t be afraid to add a tiny bit more flour if the dough is excessively sticky, but try to use as little as possible, as too much flour can result in a dense loaf.
After kneading, shape the dough into a smooth ball. Lightly grease a clean bowl with a little olive oil or cooking spray. Place the ball of dough into the greased bowl, turning it to coat all sides with the oil. This prevents the dough from drying out as it rises. Cover the bowl tightly with plastic wrap or a clean, damp kitchen towel. Place the bowl in a warm, draft-free spot. A slightly warm oven (turned off, of course!) or a sunny windowsill can work well. Allow the dough to rise for about 1 to 1.5 hours, or until it has doubled in size. This is the first rise, or “proofing,” and it’s where the yeast really gets to work, creating air pockets and developing flavor.
Shaping and Second Rise
Once the dough has doubled in size, it’s time to punch it down. Gently press your fist into the center of the dough to release the accumulated gases. Turn the dough out onto your lightly floured surface again. For a classic sandwich loaf, you’ll want to shape it into an oblong loaf. Gently flatten the dough into a rectangle. Then, starting from one of the longer sides, roll the dough up tightly, pressing out any air bubbles as you go. Pinch the seam closed firmly with your fingers. Tuck the ends under to create a smooth, torpedo-like shape.
Prepare your loaf pan by greasing it generously with butter or oil, and lightly flouring it, or line it with parchment paper. Place the shaped dough into the prepared loaf pan, seam-side down. Cover the loaf pan loosely with plastic wrap or a clean kitchen towel. Return it to your warm, draft-free spot for the second rise. This rise is typically shorter than the first, usually taking around 30-45 minutes, or until the dough has risen about 1 inch above the rim of the pan. The dough should look puffy and airy. You want to be careful not to over-proof at this stage, as it can lead to a collapsed loaf during baking.
Baking the Bread
Preheat your oven to 375°F (190°C) during the last 15-20 minutes of the second rise. Once the oven is preheated and the dough has completed its second rise, it’s ready for baking. If you like, you can lightly brush the top of the loaf with a little milk or a beaten egg for a shinier crust. Carefully place the loaf pan into the preheated oven. Bake for 30-35 minutes. The crust should be a beautiful golden brown, and the loaf should sound hollow when tapped on the bottom. To ensure it’s fully baked, the internal temperature should reach 190-200°F (88-93°C) when measured with an instant-read thermometer.
Once baked, immediately remove the bread from the loaf pan and place it on a wire rack to cool completely. This is crucial for allowing steam to escape and preventing a soggy bottom crust. Resist the temptation to slice into it while it’s still warm; the internal structure needs time to set. Allowing it to cool fully ensures the perfect texture for slicing and makes the best sandwich bread you’ve ever made.
Conclusion:
We hope you’ve enjoyed learning how to make the Best Sandwich Bread! This recipe is designed to be simple, yielding a beautifully soft and flavorful loaf that’s perfect for any sandwich creation. Whether you’re packing lunches for school, preparing a quick weeknight meal, or hosting a casual get-together, this homemade bread will elevate your sandwich game to a whole new level. Its versatility means it’s not just for lunch; consider it for your morning toast, French toast, or even as a base for bread pudding. Don’t be intimidated by baking your own bread; this recipe is forgiving and incredibly rewarding. Embrace the aroma filling your kitchen and the satisfaction of slicing into a loaf you’ve made with your own hands. So go ahead, give it a try, and discover why this truly is the Best Sandwich Bread!
Frequently Asked Questions:
Can I use a bread machine for this Best Sandwich Bread recipe?
Absolutely! This recipe can be easily adapted for most bread machines. You’ll typically add the wet ingredients first, followed by the dry ingredients. Consult your bread machine’s manual for specific instructions on quantities and the order of ingredients for best results.
How long does the Best Sandwich Bread stay fresh?
When stored properly in an airtight container or bread bag at room temperature, this Best Sandwich Bread will stay fresh for about 3-4 days. For longer storage, you can slice the bread and freeze it. This way, you can simply toast individual slices as needed.
What are some interesting variations for the Best Sandwich Bread?
The possibilities are endless! For added flavor and texture, consider incorporating seeds like poppy or sesame into the dough, or adding a sprinkle of dried herbs like rosemary or thyme. You can also experiment with different flours, like a blend of all-purpose and whole wheat, for a heartier loaf.
Ultimate Best Sandwich Bread Recipe- Fluffy & Easy
A simple and straightforward recipe for a fluffy and delicious sandwich bread, perfect for all your sandwich needs. This recipe guides you through each step to achieve a perfect loaf.
Ingredients
-
3/4 Cup Warm Water
-
1/2 Cup Warm Milk
-
1 Tablespoon Sugar
-
1 Tablespoon Brown Sugar
-
2 1/4 teaspoons Active Dry Yeast
-
2 Tablespoons Olive Oil
-
1/2 teaspoon Salt
-
3 Cups All-Purpose Flour
Instructions
-
Step 1
Activate the yeast by combining warm water (105-115°F) and warm milk in a large bowl. Sprinkle yeast, granulated sugar, and brown sugar over the top. Let sit for 5-10 minutes until frothy. -
Step 2
Add olive oil and salt to the activated yeast mixture. Whisk to combine. Gradually add all-purpose flour, one cup at a time, mixing until a dough begins to form. -
Step 3
Turn the dough out onto a lightly floured surface and knead for 8-10 minutes until smooth and elastic. Perform the windowpane test; if it tears easily, continue kneading. Add minimal extra flour if excessively sticky. -
Step 4
Shape the kneaded dough into a ball. Lightly grease a clean bowl, place the dough inside, and turn to coat. Cover tightly and let rise in a warm, draft-free spot for 1 to 1.5 hours, or until doubled in size. -
Step 5
Gently punch down the risen dough. Turn it out onto a floured surface and shape into an oblong loaf by flattening into a rectangle and rolling tightly. Pinch the seam and tuck the ends. -
Step 6
Prepare a loaf pan by greasing and flouring or lining with parchment paper. Place the shaped dough seam-side down in the pan. Cover loosely and let rise for 30-45 minutes, or until about 1 inch above the rim. -
Step 7
Preheat oven to 375°F (190°C) during the last 15-20 minutes of the second rise. Once preheated, bake the loaf for 30-35 minutes until golden brown and hollow-sounding when tapped. Internal temperature should be 190-200°F. -
Step 8
Immediately remove the bread from the loaf pan and place it on a wire rack to cool completely before slicing. This prevents a soggy bottom and allows the structure to set.
Important Information
Nutrition Facts (Per Serving)
It is important to consider this information as approximate and not to use it as definitive health advice.
Allergy Information
Please check ingredients for potential allergens and consult a health professional if in doubt.