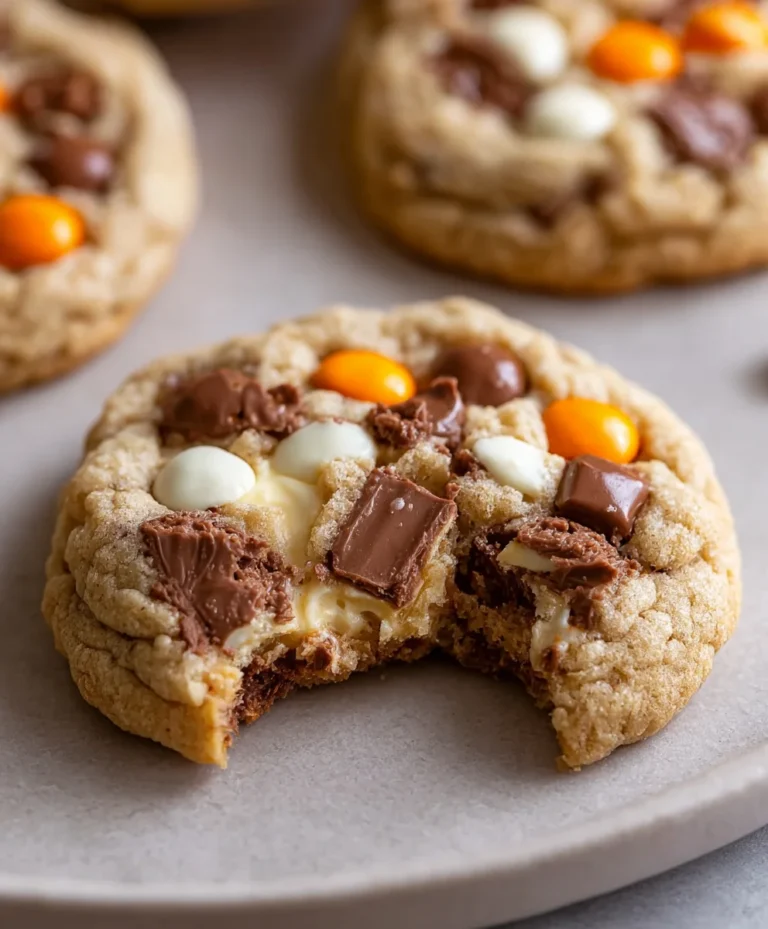
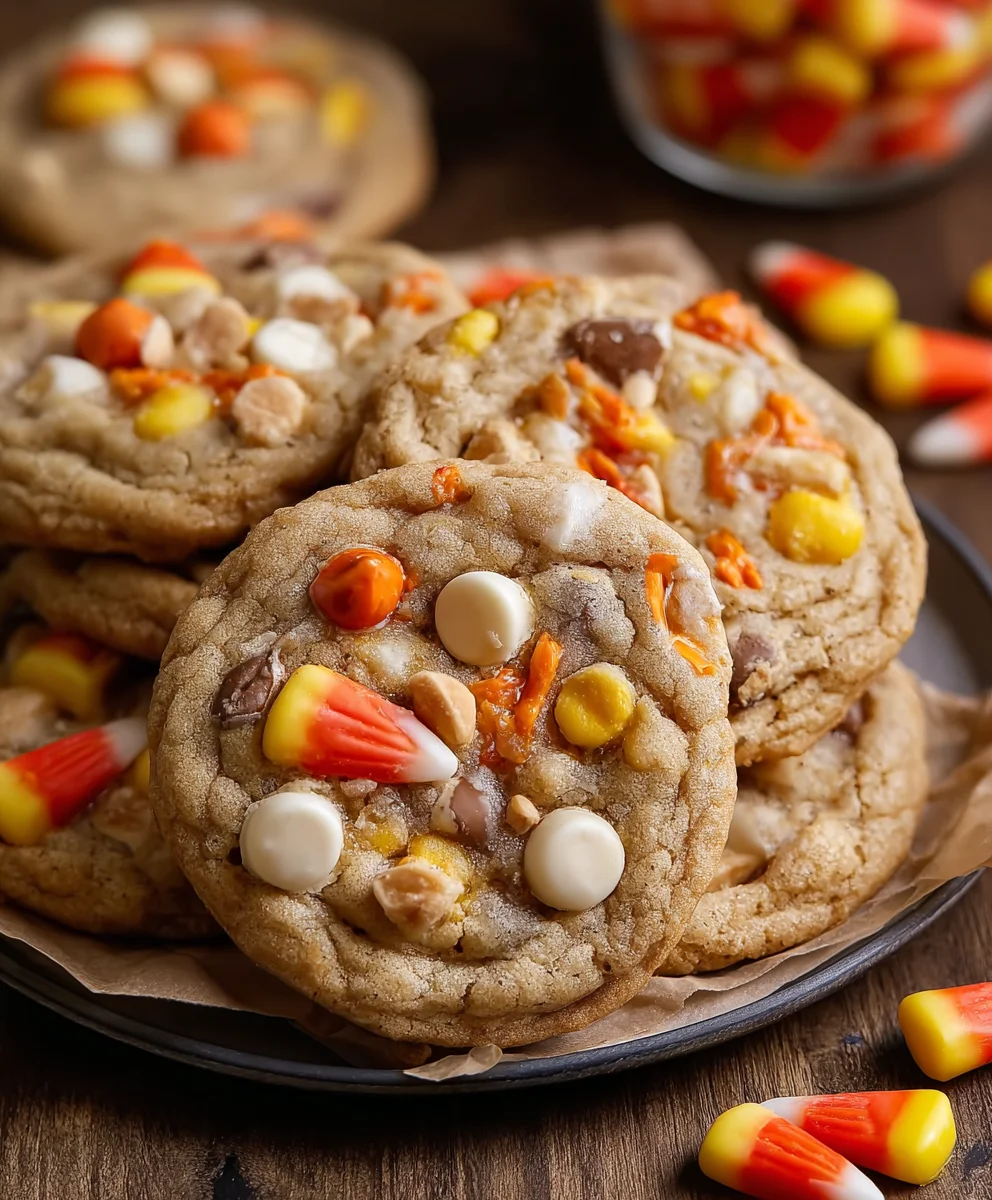
Candy Corn Trail Mix Cookies-Sweet Festive Treat
Candy Corn Trail Mix Cookies are more than just a festive treat; they’re a delightful explosion of autumnal flavors and satisfying textures that have captured the hearts (and taste buds!) of snack lovers everywhere. Imagin extracte a classic cookie base, soft and chewy in the center with perfectly crisp edges, then elevated by the playful crunch and sweet, slightly tangy notes of candy corn. It’s this magical combination that makes them so irresistible, especially as the lgin extractes begin to turn and a cozy spirit takes hold. We adore them because they tap into pure nostalgia, evoking childhood memories of trick-or-treating and the simple joy of a perfectly balanced sweet and salty bite. What truly sets these Candy Corn Trail Mix Cookies apart is the ingenious addition of other trail mix elements, transforming a familiar cookie into a complex and exciting culinary adventure. Get ready to fall in love with this unique and utterly delicious creation!
Ingredients:
- ½ cup unsalted butter, for browning
- ½ cup + 2 tablespoons packed light brown sugar
- 2 tablespoons granulated sugar
- 1 large egg, at room temperature
- 1 teaspoon pure vanilla extract
- 1¼ cups all-purpose flour, spooned and leveled
- ½ teaspoon baking soda
- ½ teaspoon salt
- ½ cup semi-sweet chocolate chips, plus extra for topping
- 2 tablespoons lightly salted peanuts, crushed
- 2 tablespoons pretzels, crushed
- Candy corn for topping (added after baking)
Browning the Butter
Step 1: Prepare Your Butter
Begin extract by placing the ½ cup of unsalted butter into a light-colored saucepan. Using a light-colored pan is crucial here because it allows you to easily monitor the color changes as the butter browns. This step might seem a little extra, but browning the butter adds an incredible depth of nutty, toasted flavor to our Candy Corn Trail Mix Cookies that you just can’t achieve with softened butter. Melt the butter over medium heat.
Step 2: Brown the Butter to Perfection
As the butter melts, it will start to foam. Keep an eye on it and stir occasionally. You’ll notice small brown milk sgin extractds beginning to form at the bottom of the pan. Continue to cook, swirling the pan every so often, until these solids turn a rich amber brown and the butter itself takes on a fragrant, nutty aroma. This usually takes about 5-8 minutes. Be careful not to burn the butter; if it smells acrid or looks too dark, it’s best to start over. Once it reaches that beautiful nutty scent and color, immediately remove the pan from the heat and carefully pour the browned butter into a heatproof bowl, leaving the darker solids behind. Let it cool for about 10-15 minutes until it’s warm but not hot.
Mixing the Cookie Dough
Step 3: Cream the Sugars and Butter
In a large mixing bowl, combine the cooled browned butter with the ½ cup + 2 tablespoons of packed light brown sugar and the 2 tablespoons of granulated sugar. Using an electric mixer (or a sturdy whisk and some elbow grease), cream these ingredients together until the mixture is light and fluffy, which should take about 2-3 minutes. This creaming process incorporates air into the dough, which contributes to the cookie’s texture. Next, beat in the room temperature large egg and the 1 teaspoon of vanilla extract. Make sure the egg is fully incorporated and the mixture is smooth and well combined. The room temperature egg helps to emulsify the wet ingredients more effectively.
Step 4: Combine Dry Ingredients and Add to Wet
In a separate medium bowl, whisk together the 1¼ cups of all-purpose flour, ½ teaspoon of baking soda, and ½ teaspoon of salt. Whisking these dry ingredients together ensures that the leavening agents and salt are evenly distributed throughout the flour, leading to consistent cookie spread and flavor. Now, gradually add the dry ingredients to the wet ingredients in the large mixing bowl, mixing on low speed or by hand until just combined. Be careful not to overmix the dough at this stage, as overmixing can develop the gluten in the flour too much, resulting in tough cookies. We want a tender crum extractb.
Step 5: Incorporate the Trail Mix Elements
Gently fold in the ½ cup of semi-sweet chocolate chips, the 2 tablespoons of crushed lightly salted peanuts, and the 2 tablespoons of crushed pretzels using a spatula or wooden spoon. Ensure everything is evenly distributed throughout the cookie dough. The combination of chocolate chips, salty peanuts, and crunchy pretzels is what makes these cookies truly special and gives them that irresistible “trail mix” appeal. The salt from the peanuts and pretzels will beautifully complement the sweetness of the cookies.
Baking and Finishing Touches
Step 6: Chilling and Scooping the Dough
Cover the bowl of cookie dough with plastic wrap and refrigerate for at least 30 minutes, or up to 2 days. Chilling the dough is an important step that allows the flavors to meld and also helps to prevent the cookies from spreading too much during baking. Once chilled, preheat your oven to 350°F (175°C) and line baking sheets with parchment paper. Scoop rounded tablespoons of dough onto the prepared baking sheets, leaving about 2 inches between each cookie. You can gently press a few extra semi-sweet chocolate chips onto the tops of the dough balls if you like.
Step 7: Bake and Decorate
Bake for 10-12 minutes, or until the edges are golden brown and the centers are still slightly soft. The cookies will continue to set as they cool. Let the cookies cool on the baking sheets for 5 minutes before transferring them to a wire rack to cool completely. Once the cookies are completely cool and firm to the touch, it’s time for the fun part: decorating with candy corn! Gently press a few pieces of candy corn into the tops of each cookie. The slight stickiness of the cooled cookie should be enough to hold them in place. You can arrange them in patterns or just scatter them artfully. These Candy Corn Trail Mix Cookies are best enjoyed within a few days of baking.

Conclusion:
I hope you’ve enjoyed learning how to make these delightful Candy Corn Trail Mix Cookies! This recipe offers a perfect blend of sweet, salty, and crunchy textures, making them an irresistible treat for any occasion. Whether you’re looking for a festive Halloween snack or just a fun new cookie to bake, these Candy Corn Trail Mix Cookies are sure to be a hit with both kids and adults. They’re wonderfully versatile and bring a unique twist to traditional cookie recipes.
When it comes to serving, these cookies are fantastic on their own, but they also pair beautifully with a cold glass of milk or a warm mug of hot chocolate. For an extra special touch, consider drizzling them with a bit of melted white chocolate or a sprinkle of colorful edible glitter.
Feeling adventurous? Don’t hesitate to experiment with the trail mix components! Swap out the pretzels for other crunchy snacks like Chex cereal or rice crispy treats. You could also add a handful of different nuts, seeds, or even a few chocolate chips for an extra burst of flavor. The possibilities are endless, and the goal is to create a trail mix that you personally love! So go ahead, get creative, and bake up a batch of Candy Corn Trail Mix Cookies that are uniquely yours. Happy baking!
Frequently Asked Questions:
Q: How should I store Candy Corn Trail Mix Cookies?
To keep your Candy Corn Trail Mix Cookies fresh, store them in an airtight container at room temperature. They should stay delicious for up to 3-4 days. If you want them to last longer, you can also freeze them in a single layer in a freezer-safe bag for up to 3 months.
Q: Can I make Candy Corn Trail Mix Cookies ahead of time?
Absolutely! The dough for these Candy Corn Trail Mix Cookies can be made a day or two in advance and stored in the refrigerator. You can also bake a batch and freeze the baked cookies. When ready to enjoy, simply thaw them at room temperature or gently reheat them in a warm oven.
Candy Corn Trail Mix Cookies-Sweet Festive Treat
A delightful and festive cookie recipe featuring browned butter, chocolate chips, crunchy peanuts, pretzels, and a sweet candy corn topping.
Ingredients
-
½ cup unsalted butter, for browning
-
½ cup + 2 tablespoons packed light brown sugar
-
2 tablespoons granulated sugar
-
1 large egg, at room temperature
-
1 teaspoon pure vanilla extract
-
1¼ cups all-purpose flour, spooned and leveled
-
½ teaspoon baking soda
-
½ teaspoon salt
-
½ cup semi-sweet chocolate chips, plus extra for topping
-
2 tablespoons lightly salted peanuts, crushed
-
2 tablespoons pretzels, crushed
-
Candy corn for topping (added after baking)
Instructions
-
Step 1
Brown the butter by melting ½ cup unsalted butter in a light-colored saucepan over medium heat until it turns a rich amber brown and has a nutty aroma. Pour into a heatproof bowl and let cool for 10-15 minutes. -
Step 2
In a large mixing bowl, cream the cooled browned butter with ½ cup + 2 tablespoons packed light brown sugar and 2 tablespoons granulated sugar until light and fluffy. Beat in the room temperature egg and vanilla extract until smooth. -
Step 3
In a separate bowl, whisk together 1¼ cups all-purpose flour, ½ teaspoon baking soda, and ½ teaspoon salt. Gradually add the dry ingredients to the wet ingredients, mixing until just combined. Do not overmix. -
Step 4
Gently fold in ½ cup semi-sweet chocolate chips, 2 tablespoons crushed peanuts, and 2 tablespoons crushed pretzels. -
Step 5
Cover and refrigerate the dough for at least 30 minutes. Preheat oven to 350°F (175°C) and line baking sheets with parchment paper. Scoop rounded tablespoons of dough onto the sheets. -
Step 6
Bake for 10-12 minutes until edges are golden brown and centers are slightly soft. Cool on baking sheets for 5 minutes, then transfer to a wire rack to cool completely. -
Step 7
Once cool, press candy corn into the tops of each cookie for decoration.
Important Information
Nutrition Facts (Per Serving)
It is important to consider this information as approximate and not to use it as definitive health advice.
Allergy Information
Please check ingredients for potential allergens and consult a health professional if in doubt.