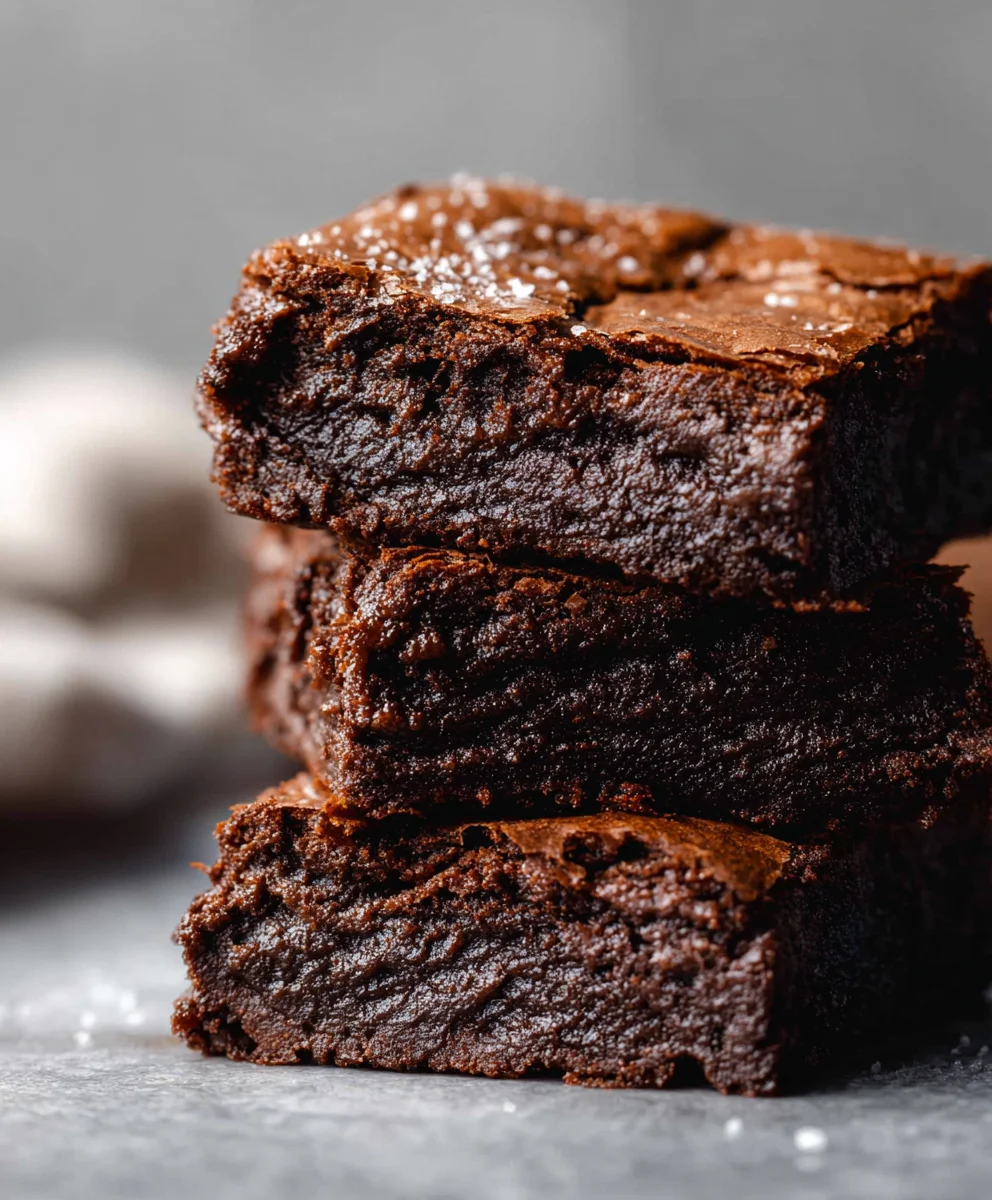
Easy Sourdough Discard Brownies-Deliciously Chewy
Easy Sourdough Discard Brownies are about to become your new go-to indulgence, a delightful way to transform that precious sourdough discard into something truly spectacular. Forget dry, crum extractbly disappointments; these brownies are fudgy, rich, and packed with an irresistible chocolatey punch. We all know the magic of sourdough, but many home bakers find themselves with a surplus of discard. Instead of tossing it, let’s give it a starring role in a dessert that’s surprisingly simple to create and utterly addictive. What makes these Easy Sourdough Discard Brownies so special? It’s the subtle tang and depth of flavor the discard imparts, a secret ingredient that elevates them far beyond your average brownie. They’re intensely chocolatey, wonderfully chewy, and have a slightly more complex flavor profile that will have everyone asking for the recipe.
Why You’ll Love This Recipe
These aren’t just any brownies; they’re a testament to how simple ingredients can create extraordinary results. The sourdough discard adds a unique character that’s both comforting and sophisticated. Plus, the process is so straightforward, you’ll be whipping up batches in no time. Prepare for rave reviews!
Unlock the Secret to Fudgy Perfection
The secret to their incredible texture lies in the careful balance of ingredients and the magical property of sourdough discard. This recipe is designed to be forgiving, ensuring even novice bakers can achieve fudgy brownie perfection. Get ready to impress yourself and your loved ones!

Ingredients:
- 1/2 cup (1 stick) unsalted butter
- 1 1/2 cups semi-sweet chocolate chips (approximately 12 oz), divided
- 1/2 cup unsweetened cocoa powder (Dutch-processed or natural, your preference)
- 2 teaspoons vanilla extract
- 2 large eggs
- 1 large egg yolk
- 1 cup granulated white sugar
- 1/2 cup packed light or dark brown sugar
- 1/2 cup active sourdough starter discard (unfed, at room temperature)
- 1 cup all-purpose flour
- 1 teaspoon salt
Melting the Chocolate and Butter
Step 1: Prepare Your Workspace and Melt
Begin extract by preheating your oven to 350 degrees Fahrenheit (175 degrees Celsius). Grease and flour an 8×8 inch baking pan, or line it with parchment paper, leaving some overhang on the sides for easy removal later. This step is crucial for ensuring your delicious brownies don’t stick. Now, in a medium, microwave-safe bowl, combine the 1/2 cup of unsalted butter and 1 cup of the semi-sweet chocolate chips. Microwave in 30-second intervals, stirring well after each interval, until the butter is fully melted and the chocolate is smooth and glossy. Alternatively, you can use a double boiler method over simmering water. Be patient here; over-heating chocolate can cause it to seize up, which is difficult to recover from. Once melted, remove from the heat and set aside to cool slightly. This slightly cooled, rich chocolate mixture forms the decadent base of our brownies.
Creating the Brownie Batter
Step 2: Incorporate Sugars and Flavorings
In a separate, large mixing bowl, whisk together the 1 cup of granulated white sugar and the 1/2 cup of packed brown sugar. Add the slightly cooled chocolate and butter mixture to the sugars. Whisk vigorously until everything is well combined and the mixture has a glossy sheen. Now, it’s time to add the flavor! Stir in the 2 teaspoons of vanilla extract. Next, add your eggs: the 2 large eggs and the 1 large egg yolk. Whisk until the batter is smooth and emulsified, with no streaks of egg remaining. The addition of an extra yolk contributes to a fudgier, richer texture, which is a hallmark of exceptional brownies. Don’t overmix at this stage; just ensure everything is incorporated.
Step 3: Folding in the Sourdough Discard and Dry Ingredients
This is where the magic of sourdough discard comes in! Gently fold in the 1/2 cup of sourdough starter discard. You don’t need to whisk vigorously here; just aim to incorporate it evenly into the chocolatey mixture. The sourdough discard adds a subtle tang and a wonderful chegrape juicess to the brownies, differentiating them from standard brownie recipes. Next, it’s time to introduce the dry ingredients. In a small bowl, whisk together the 1 cup of all-purpose flour and the 1 teaspoon of salt. Add the flour mixture to the wet ingredients in three additions, folding gently with a spatula after each addition until just combined. Be careful not to overmix the flour; overmixing can lead to tough brownies. You want to see just a few streaks of flour disappear before adding the next portion.
Adding the Final Touches and Baking
Step 4: Adding the Remaining Chocolate Chips
Once the flour mixture is mostly incorporated, it’s time to add the remaining 1/2 cup of semi-sweet chocolate chips. Fold these into the batter until they are evenly distributed throughout. These extra chips will melt slightly during baking, creating pockets of gooey chocolate throughout your brownies. This final addition of chocolate chips ensures a delightful chocolatey experience in every bite. The batter will be thick and rich at this point, which is exactly what you’re looking for in a decadent brownie.
Step 5: Baking and Cooling
Pour the brownie batter evenly into your prepared baking pan. Use your spatula to spread it out so it’s level. Place the pan in your preheated oven. Bake for 25-30 minutes, or until a toothpick inserted into the center comes out with moist crum extractbs attached, but not wet batter. The edges should look set and slightly pulled away from the sides of the pan. Keep in mind that oven temperatures can vary, so it’s always best to check for doneness a few minutes early. Once baked, remove the pan from the oven and let the brownies cool completely in the pan on a wire rack. This is a crucial step for achieving that perfect fudgy texture. Trying to cut them too early will result in a gooey mess. Once completely cooled, use the parchment paper overhang to lift the brownies out of the pan and cut them into your desired square or rectangular portions. Enjoy your incredibly easy and delicious sourdough discard brownies!
Conclusion:
And there you have it! Your batch of delicious Easy Sourdough Discard Brownies is ready to be devoured. We hope you enjoyed the simple process of transforming your sourdough discard into these fudgy, chocolatey delights. The slight tang from the sourdough adds a wonderfully complex depth that regular brownies just can’t replicate. Serve them warm with a scoop of vanilla ice cream for an indulgent treat, or cool them completely for a more cake-like texture. Feel free to experiment with different mix-ins like chopped nuts, chocolate chips, or even a swirl of caramel. The possibilities are endless with these versatile brownies! We encourage you to give this recipe a try and discover just how amazing sourdough discard can be. Don’t be afraid to get creative and make them your own!
Frequently Asked Questions about Easy Sourdough Discard Brownies:
Can I use active sourdough starter instead of discard?
While this recipe is specifically designed for discard, you can technically use active starter, but you’ll need to adjust the liquid and possibly the leavening. Using active starter will likely result in a more cake-like texture and a more pronounced sourdough tang, which might not be the fudgy brownie experience you’re looking for. It’s best to stick with discard for this particular recipe.
How should I store my Easy Sourdough Discard Brownies?
Once cooled, store your Easy Sourdough Discard Brownies in an airtight container at room temperature for up to 3 days, or in the refrigerator for up to a week. For longer storage, you can wrap individual brownies tightly in plastic wrap and then place them in a freezer-safe bag or container for up to 3 months. Thaw at room temperature before enjoying.
Easy Sourdough Discard Brownies-Deliciously Chewy
Deliciously chewy brownies made with sourdough discard for a subtle tang and enhanced texture.
Ingredients
-
1/2 cup (1 stick) unsalted butter
-
1 1/2 cups semi-sweet chocolate chips (approximately 12 oz), divided
-
1/2 cup unsweetened cocoa powder
-
2 teaspoons vanilla extract
-
2 large eggs
-
1 large egg yolk
-
1 cup granulated white sugar
-
1/2 cup packed light or dark brown sugar
-
1/2 cup active sourdough starter discard (unfed, at room temperature)
-
1 cup all-purpose flour
-
1 teaspoon salt
Instructions
-
Step 1
Preheat oven to 350°F (175°C). Grease and flour an 8×8 inch baking pan, or line with parchment paper. In a microwave-safe bowl, combine butter and 1 cup of chocolate chips. Microwave in 30-second intervals, stirring until smooth. Let cool slightly. -
Step 2
In a large bowl, whisk together granulated white sugar and brown sugar. Add the cooled chocolate and butter mixture. Whisk until glossy. Stir in vanilla extract, then add eggs and egg yolk. Whisk until smooth and emulsified. -
Step 3
Gently fold in the sourdough starter discard until evenly incorporated. In a small bowl, whisk together flour and salt. Add the flour mixture to the wet ingredients in three additions, folding gently after each until just combined. Do not overmix. -
Step 4
Fold in the remaining 1/2 cup of semi-sweet chocolate chips until evenly distributed. -
Step 5
Pour batter into the prepared pan and spread evenly. Bake for 25-30 minutes, or until a toothpick inserted into the center comes out with moist crumbs attached. Let cool completely in the pan on a wire rack before cutting.
Important Information
Nutrition Facts (Per Serving)
It is important to consider this information as approximate and not to use it as definitive health advice.
Allergy Information
Please check ingredients for potential allergens and consult a health professional if in doubt.