Easy Homemade Strawberry Ice Cream Recipe
Homemade strawberry ice cream is more than just a dessert; it’s a vibrant taste of summer captured in a scoop. There’s a reason why this classic flavor holds such a special place in our hearts. The sweet, slightly tart burst of fresh strawberries, swirled into a creamy, dreamy base, creates a sensory experience that’s utterly irresistible. Imagin extracte the pure joy of biting into a spoonful, where the coolness soothes and the fruity sweetness dances on your tongue. This isn’t just about satisfying a craving; it’s about reliving childhood memories, sharing laughter with loved ones, and savoring those simple, perfect moments. Making homemade strawberry ice cream allows us to control the quality of ingredients, ensuring a truly exceptional flavor that store-bought varieties simply can’t match. The depth of taste, the perfect texture – it’s all within your reach.
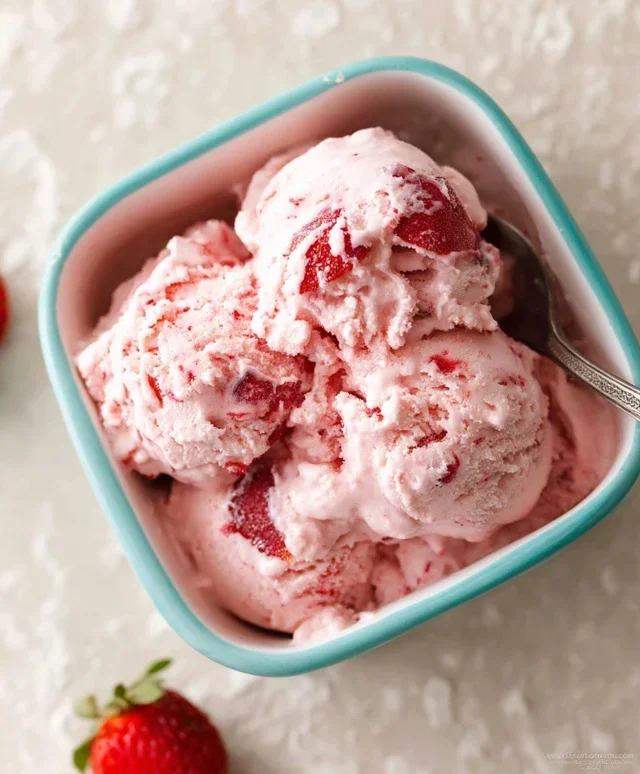
Homemade Strawberry Ice Cream
There’s something undeniably magical about homemade ice cream. The creamy texture, the vibrant flavor, and the satisfaction of creating something delicious from scratch are unparalleled. And when it comes to classic flavors, nothing beats the sweet, refreshing taste of real strawberries. Forget those artificial-tasting store-bought versions; this homemade strawberry ice cream recipe is incredibly simple to make and delivers a burst of pure, unadulterated strawberry goodness. It’s perfect for a warm summer afternoon, a special dessert, or just because you deserve a treat!
Ingredients:
Preparing the Strawberry Base
The foundation of any great strawberry ice cream is, of course, the strawberries themselves. We want to maximize their natural sweetness and flavor. To start, make sure your strawberries are fresh and ripe for the best taste. Hulling them simply means removing the green leafy tops. Then, dice them into relatively small pieces. This will help them break down more easily.
1. In a medium bowl, combine the diced strawberries, honey, granulated sugar, and lemon juice. The lemon juice is a little secret weapon here; it brightens the strawberry flavor and adds a subtle tang that cuts through the sweetness, making the overall taste more complex and delightful. Stir everything together well.
2. Let this strawberry mixture sit at room temperature for about 20-30 minutes. This resting period, often called maceration, allows the sugar to draw out the juices from the strawberries, creating a beautiful, syrupy concoction. You’ll notice the strawberries becoming softer and releasing their vibrant red liquid. This is exactly what we want! You can gently mash some of the strawberries with a fork if you prefer a smoother ice cream base, or leave them mostly intact for delightful little strawberry pieces throughout your final creation.
Creating the Creamy Ice Cream Mixture
While the strawberries are doing their work, we’ll prepare the dairy base that will give our ice cream its luscious, creamy texture. This is where the magic of rich dairy comes in.
3. In a separate bowl, whisk together the heavy whipping cream, half and half, and vanilla extract until well combined. The heavy whipping cream is crucial for that decadent, rich mouthfeel, while the half and half provides a slightly lighter texture. Vanilla extract enhances all the flavors, especially the sweet strawberry notes. You don’t want to over-whip this mixture at this stage; we’re just combining the ingredients.
Combining and Churning the Ice Cream
Now comes the exciting part where we bring our strawberry and cream components together and transform them into ice cream. This step will vary slightly depending on whether you’re using an ice cream maker or a no-churn method, but the principles are the same: chill and churn to incorporate air and create that signature icy-yet-creamy texture.
4. Pour the creamy dairy mixture into the bowl with the macerated strawberries. Stir everything together until it’s uniformly combined. The mixture will be a beautiful pink hue, speckled with strawberries. At this point, you can give it a taste. If you prefer it sweeter, you can add a touch more sugar or honey, but remember that the sweetness will intensify slightly as it freezes. If you’re using an ice cream maker, transfer this mixture into your chilled ice cream maker bowl and churn according to the manufacturer’s instructions. This usually takes about 20-30 minutes. The goal is to achieve a soft-serve consistency. If you don’t have an ice cream maker, don’t worry! We’ll cover a no-churn method below.
Freezing and Serving Your Homemade Delight
Once churned, the ice cream needs a little more time in the freezer to firm up to scoopable consistency. This is the hardest part – the waiting!
5. Once your ice cream has reached a soft-serve consistency (whether from an ice cream maker or by chilling and stirring a no-churn version), transfer it to an airtight container. For the best results and to prevent ice crystals from forming, press a piece of parchment paper or plastic wrap directly onto the surface of the ice cream before sealing the container. This helps minimize air exposure. Place the container in the freezer for at least 4-6 hours, or until it’s firm enough to scoop. The longer it freezes, the harder it will become, so adjust the freezing time to your preference.
No-Churn Method Variation
If you don’t have an ice cream maker, you can still achieve delicious results! After combining the strawberry mixture and the dairy base (step 4), pour the entire mixture into a shallow, freezer-safe container. Place it in the freezer. Every 30-45 minutes for the first 3-4 hours, remove the container and vigorously stir the mixture with a fork or whisk, breaking up any ice crystals that form, especially around the edges. This process of stirring introduces air and helps create a creamier texture. Continue this until the ice cream is mostly frozen. Then, allow it to freeze completely for the remaining time. It might not be quite as smooth as churned ice cream, but it will still be wonderfully tasty!
Serving your homemade strawberry ice cream is a moment to savor. Let it sit at room temperature for a few minutes before scooping to make it easier. Garnish with fresh strawberry slices or a sprig of mint for an extra touch of elegance. Enjoy every creamy, fruity spoonful of your hard-earned deliciousness!
Conclusion:
Creating your own homemade strawberry ice cream is an incredibly rewarding experience, and this recipe makes it delightfully simple and utterly delicious. The fresh, vibrant flavor of real strawberries shines through, far surpassing anything you’ll find in a store-bought pint. It’s the perfect way to capture the essence of summer and impress your friends and family with a truly special treat. This recipe is fantastic because it uses minimal, high-quality ingredients and allows you to control the sweetness and intensity of the strawberry flavor.
For serving, I love this ice cream simply in a cone or a bowl. It’s also divine topped with a drizzle of balsamic glaze, a handful of fresh mint, or some toasted slivered almonds for a delightful crunch. If you’re feeling adventurous, try swirling in some sweetened condensed milk or adding a touch of lemon zest to the base before freezing for an extra burst of flavor.
I truly encourage you to give this homemade strawberry ice cream recipe a try. It’s a journey of pure, unadulterated joy from kitchen to cone, and the satisfaction of scooping into something you’ve made yourself is unparalleled. Enjoy every creamy, fruity bite!
Frequently Asked Questions about Homemade Strawberry Ice Cream:
Q1: Can I make this recipe without an ice cream maker?
Absolutely! While an ice cream maker churns the mixture for the smoothest texture, you can achieve delicious results without one. Pour the prepared base into a shallow freezer-safe container. Every 30-45 minutes for the first 2-3 hours, stir vigorously with a fork or whisk to break up ice crystals. This manual churning will still create a lovely, creamy ice cream, though it might be slightly icier than machine-churned versions.
Q2: What’s the best way to get a really intense strawberry flavor?
For the most vibrant strawberry flavor in your homemade strawberry ice cream, I recommend using very ripe, in-season strawberries. Don’t be afraid to mash them well to release their juices. Some people even like to macerate the strawberries with a tablespoon or two of sugar and a splash of lemon juice for about 30 minutes before pureeing them. This process draws out more flavor and color.
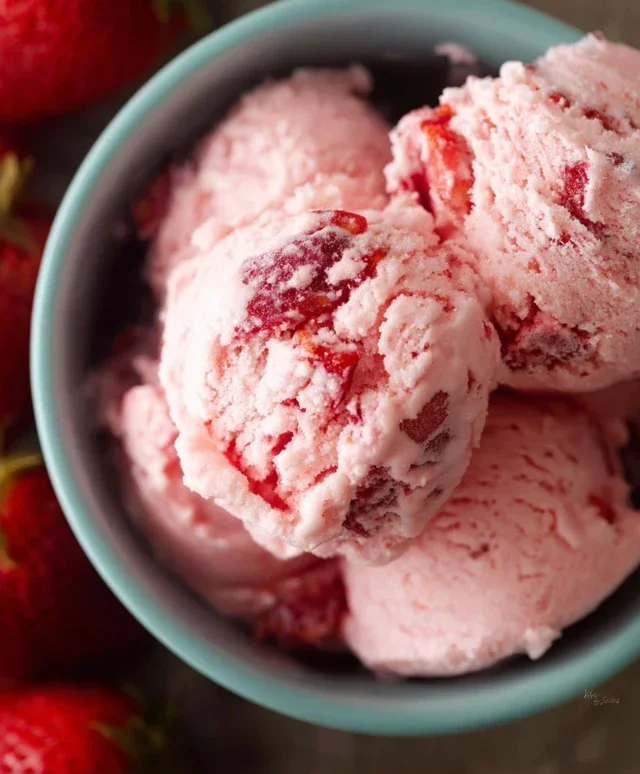
Homemade Strawberry Ice Cream
A refreshing and easy homemade strawberry ice cream recipe with fresh strawberries and simple ingredients. Perfect for a summer treat!
Ingredients
-
1 1/2 cups strawberries, hulled and diced
-
2 Tbsp honey
-
1/2 cup granulated sugar
-
1 tsp lemon juice
-
1 cup heavy whipping cream
-
1/2 cup half and half
-
1 tsp vanilla extract
Instructions
-
Step 1
In a bowl, mash the hulled and diced strawberries with the honey, granulated sugar, and lemon juice. Let sit for 10 minutes. -
Step 2
In a separate bowl, whisk together the heavy whipping cream, half and half, and vanilla extract until well combined. -
Step 3
Gently fold the strawberry mixture into the cream mixture. -
Step 4
Pour the mixture into an ice cream maker and churn according to the manufacturer’s instructions. -
Step 5
Once churned, transfer the ice cream to a freezer-safe container. -
Step 6
Freeze for at least 4 hours, or until firm, before serving.
Important Information
Nutrition Facts (Per Serving)
It is important to consider this information as approximate and not to use it as definitive health advice.
Allergy Information
Please check ingredients for potential allergens and consult a health professional if in doubt.