Salted Brownie Cookies- Chewy Chocolate Perfection
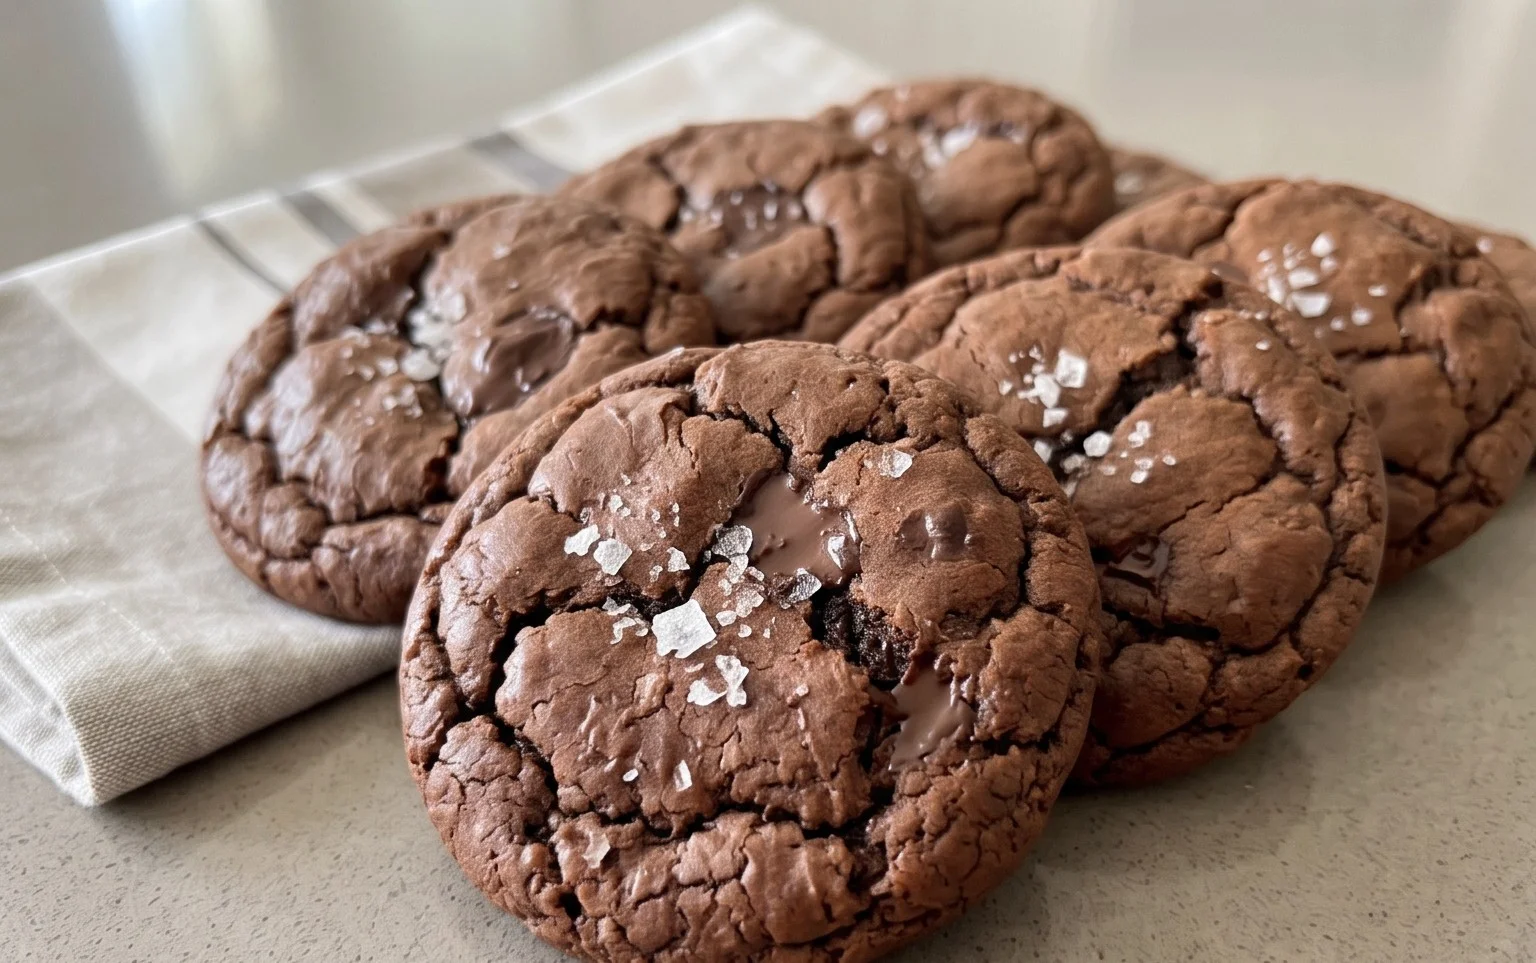
Salted Brownie Cookies are about to become your new obsession. If you’re anything like me, you crave that perfect balance of rich, decadent chocolate and a hint of savory salt. That’s precisely what makes these Salted Brownie Cookies so utterly irresistible. They’re not just cookies; they’re an experience. Imagin extracte biting into a soft, chewy center that melts in your mouth like a freshly baked brownie, only in a delightfully portable and shareable cookie form. The slightly crisp edges offer a delightful textural contrast, while the sprinkle of flaky sea salt on top cuts through the sweetness, creating a symphony of flavors that keeps you reaching for more.
Why You’ll Love Them
These aren’t your average chocolate chip cookies. We’re talking about the concentrated, intense flavor of a fudgy brownie, miniaturized into a perfect bite. They’re surprisingly easy to make, meaning you can satisfy that intense chocolate craving without a fuss. The magic truly lies in that touch of salt, elevating the chocolate to new, mind-blowing heights. Whether you’re a seasoned baker or just starting out, these Salted Brownie Cookies are guaranteed to impress.
The Ultimate Salted Brownie Cookies
Get ready to experience pure chocolate bliss with these Salted Brownie Cookies! If you’re a fan of fudgy brownies and chewy cookies, then this recipe is your dream come true. These cookies manage to capture the rich, intense flavor of a brownie in a perfectly portable, delightfully chewy cookie form. The secret lies in the careful balance of ingredients and a few key techniques that ensure that irresistible fudgy center and slightly crisp edge. And, of course, that sprinkle of flaky sea salt on top? It elevates the chocolate to a whole new level, cutting through the sweetness and making every bite utterly addictive. I’ve spent a lot of time perfecting this recipe, and I’m thrilled to share it with you. Let’s get baking!
Ingredients:
Making the Magic Happen: The Baking Process
Let’s break down how we’re going to create these incredible cookies. The process is straightforward, but paying attention to a few details will make all the difference. We’ll start by creating our dry ingredients, then move on to melting our butter and chocolate, and finally bringin extractg it all together for that perfect brownie cookie texture.
Step 1: Preparing Your Dry Ingredients
Begin extract by preheating your oven to 350°F (175°C). Line two baking sheets with parchment paper. This is a crucial step as it prevents sticking and ensures easy cleanup. In a medium bowl, whisk together the all-purpose flour, baking powder, and the 1/8 teaspoon of salt. Whisking ensures that the leavening agent and salt are evenly distributed throughout the flour, which will lead to a more consistent bake. Set this bowl aside for now.
Step 2: Melting the Chocolatey Goodness
In a heatproof bowl set over a saucepan of simmering water (a double boiler setup), or carefully in the microwave in 30-second intervals, melt the 6 tablespoons of unsalted butter and 1 cup of semi-sweet chocolate chips. Stir frequently until the mixture is completely smooth and glossy. Once melted, remove the bowl from the heat. Stir in the unsweetened cocoa powder and the optional espresso powder. The espresso powder, even though it’s not a strong coffee flavor, really amplifies the chocolate notes, giving the cookies a more complex and intense taste. Stir until there are no lumps of cocoa powder visible. This mixture will form the fudgy base of our brownie cookies.
Step 3: Incorporating the Wet Ingredients
In a large bowl, whisk together the 2 large eggs (at room temperature – this helps them emulsify better with the other ingredients), the 1 large egg yolk (also at room temperature for the same reason), the granulated sugar, vegetable oil, and vanilla extract. Whisk until the mixture is well combined and slightly lighter in color. The room temperature eggs are important for creating a stable emulsion, which contributes to the cookies’ texture and prevents them from spreading too much. The granulated sugar will also start to dissolve into the wet ingredients, contributing to that chewy texture.
Step 4: Combining Wet and Dry Mixtures
Now, it’s time to bring our chocolate mixture into the egg mixture. Gradually add the melted chocolate and butter mixture to the egg and sugar mixture, whisking continuously until everything is thoroughly combined and you have a smooth, rich, chocolatey batter. Next, gradually add the dry ingredients (flour, baking powder, and salt) to the wet ingredients. Mix on low speed or with a spatula until just combined. Be careful not to overmix at this stage. Overmixing can develop the gluten in the flour too much, resulting in tougher cookies. We want that fudgy, slightly dense texture, not a cakey or tough cookie.
Step 5: Chilling and Scooping for Perfection
At this point, your dough might be a little soft. For the best results, I highly recommend chilling the dough. Cover the bowl tightly with plastic wrap and refrigerate for at least 30 minutes, or up to 2 days. Chilling the dough not only makes it easier to handle and scoop, but it also allows the flavors to meld together and the fat to solidify, which helps the cookies spread less and bake up thicker and chewier. Once chilled, scoop rounded tablespoons of dough onto your prepared baking sheets, leaving about 2 inches between each cookie. You can press a few extra semi-sweet chocolate chips into the tops of the cookies before baking for an even more decadent chocolate experience.
Step 6: Baking to Brownie Perfection
Bake the cookies for 10-12 minutes, or until the edges are set and the centers still look slightly underbaked and glossy. This is key to achieving that fudgy interior. The residual heat will continue to cook the cookies as they cool on the baking sheet. If you’re using the sea salt flakes, sprinkle them over the tops of the hot cookies immediately after they come out of the oven. The heat will help them adhere, and they’ll provide that delightful salty contrast to the sweet chocolate. Let the cookies cool on the baking sheets for 5-10 minutes before transferring them to a wire rack to cool completely. This resting period is crucial for the cookies to set properly.
Enjoy these incredible Salted Brownie Cookies! They are perfect on their own, dunked in milk, or even served warm with a scoop of vanilla ice cream. Store any leftovers in an airtight container at room temperature for up to 3 days.

Conclusion:
And there you have it – the ultimate guide to creating these absolutely irresistible Salted Brownie Cookies! These cookies are a true game-changer, perfectly balancing the rich, fudgy interior of a brownie with the delightful chegrape juicess of a cookie, all elevated by that crucial hint of sea salt. I truly believe this recipe is fantastic because it delivers that intense chocolate flavor without being overwhelmingly sweet, and the flaky sea salt on top provides a sophisticated counterpoint that makes each bite utterly addictive. They’re wonderful on their own, but I love serving them warm with a scoop of vanilla bean ice cream for an extra decadent treat, or alongside a steaming mug of coffee for a perfect afternoon pick-me-up.
Don’t be afraid to experiment! For a fun twist, try adding a handful of chopped nuts like walnuts or pecans, or even some mini chocolate chips for an extra burst of chocolate. You could also swirl in some caramel for a salted caramel brownie cookie experience. I wholeheartedly encourage you to give these Salted Brownie Cookies a try. They’re surprisingly simple to make and guaranteed to impress your friends and family – or simply treat yourself to pure chocolate bliss. Happy baking!
Frequently Asked Questions:
Can I make these cookies ahead of time?
Yes, you absolutely can! Once cooled completely, store your Salted Brownie Cookies in an airtight container at room temperature for up to 3-4 days. They remain wonderfully chewy and delicious.
My cookies spread too much, what went wrong?
Several factors can cause excessive spreading. Ensure your butter wasn’t too soft when you creamed it with the sugar. Also, chilling the dough for at least 30 minutes before baking can significantly help prevent them from spreading too thin and ensure that signature fudgy texture.
Salted Brownie Cookies
Decadent brownie cookies with a rich chocolate flavor and a hint of sea salt for a perfect sweet and salty balance.
Ingredients
-
1 cup All-Purpose Flour
-
1 tsp Baking Powder
-
1/8 tsp Salt
-
2 Large Eggs (room temperature)
-
1 Large Egg Yolk (room temperature)
-
1 cup Granulated Sugar
-
1 tbsp Vegetable Oil
-
1 tsp Vanilla Extract
-
6 tbsp Unsalted Butter
-
1 cup Semi-Sweet Chocolate Chips
-
1/4 cup Unsweetened Cocoa Powder
-
1 tsp Espresso Powder (optional)
-
Sea Salt Flakes (for topping cookies (optional garnish))
Instructions
-
Step 1
In a medium bowl, whisk together the all-purpose flour, baking powder, and 1/8 tsp salt. Set aside. -
Step 2
In a large bowl, beat together the room temperature eggs, egg yolk, and granulated sugar until light and fluffy. Stir in the vegetable oil and vanilla extract. -
Step 3
Melt the unsalted butter in a microwave-safe bowl. Stir in the unsweetened cocoa powder and optional espresso powder until smooth. Add this chocolate mixture to the egg and sugar mixture and beat until combined. -
Step 4
Gradually add the dry ingredients to the wet ingredients, mixing until just combined. Fold in 1 cup of semi-sweet chocolate chips. -
Step 5
Drop rounded tablespoons of dough onto a parchment-lined baking sheet, leaving about 2 inches between cookies. Press a few extra chocolate chips onto the tops of the cookies. -
Step 6
Bake at 350°F (175°C) for 9-12 minutes, or until the edges are set and the centers are still slightly soft. Sprinkle with sea salt flakes immediately after removing from the oven, if desired. -
Step 7
Let the cookies cool on the baking sheet for a few minutes before transferring them to a wire rack to cool completely.
Important Information
Nutrition Facts (Per Serving)
It is important to consider this information as approximate and not to use it as definitive health advice.
Allergy Information
Please check ingredients for potential allergens and consult a health professional if in doubt.