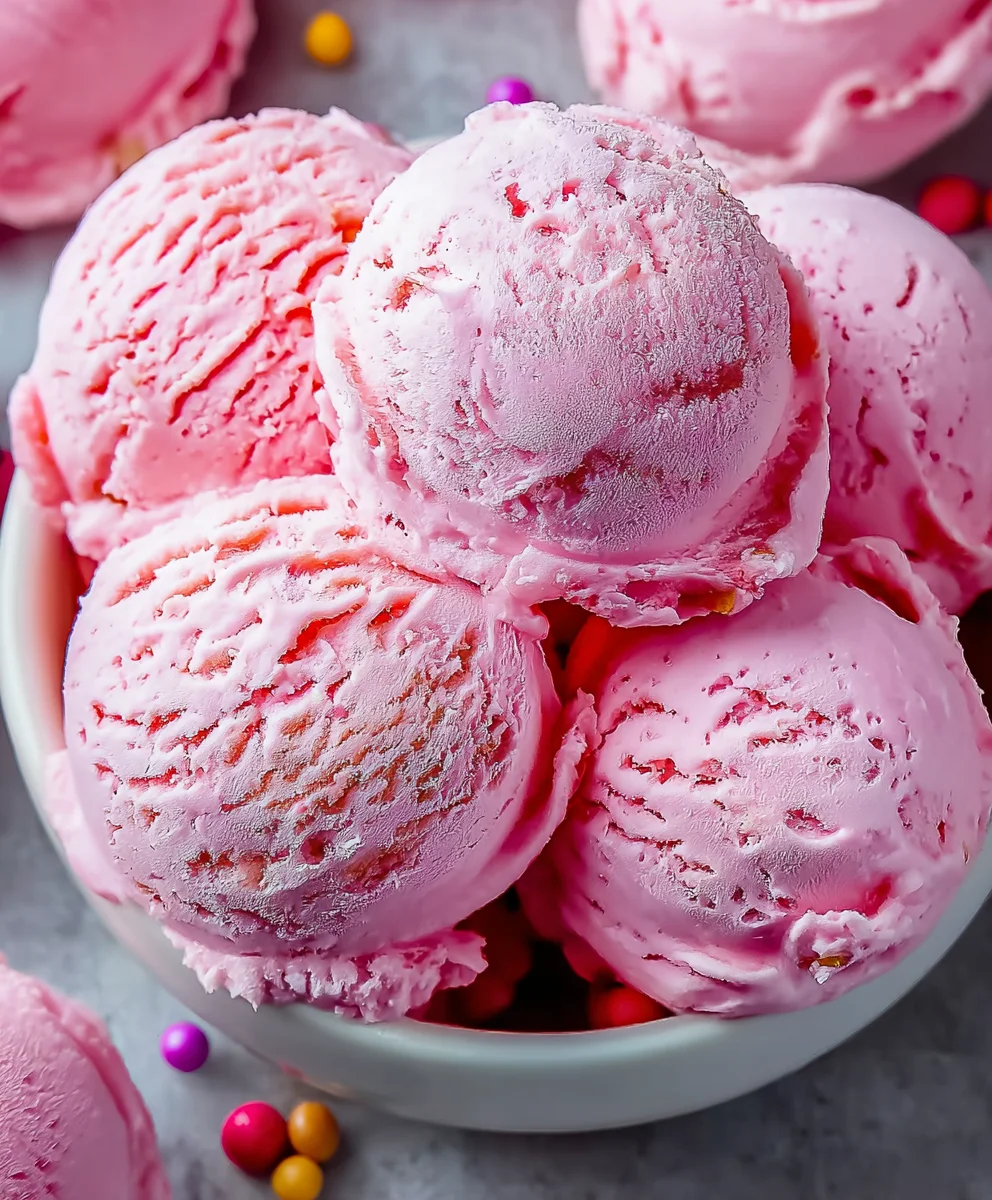
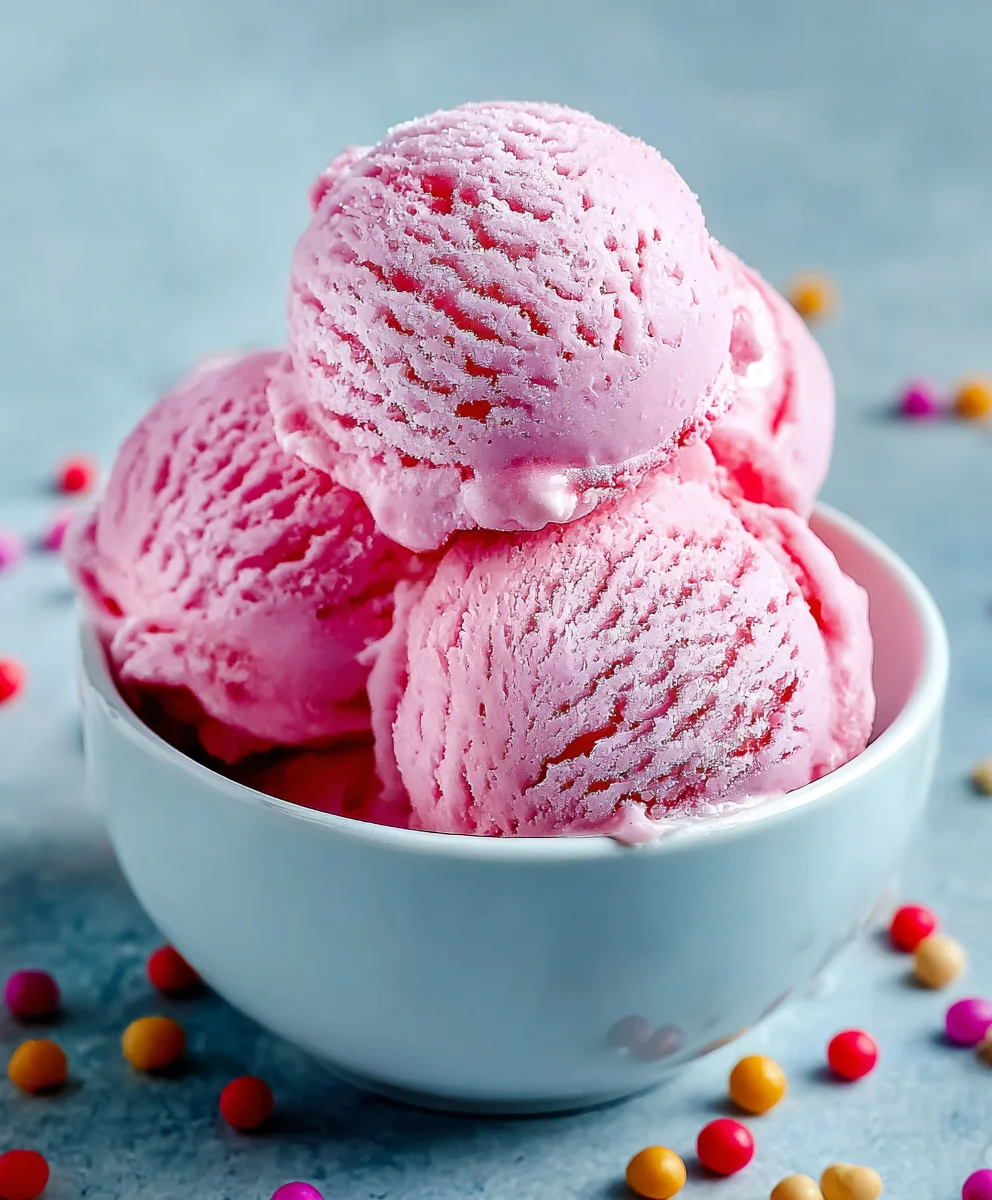
Bubblegum Ice Cream Recipe-Sweet Fun Flavor
Bubblegum ice cream is more than just a dessert; it’s a nostalgic trip back to childhood summers, birthday parties, and the pure, unadulterated joy of a sweet treat. Who doesn’t remember the thrill of that vibrant pink hue and the unmistakable, delightful flavor that instantly transported you? This beloved frozen concoction has a unique charm that appeals to both kids and adults alike, evoking a sense of playful indulgence. What truly makes bubblegum ice cream so special is its ability to capture a fleeting, sweet memory in every spoonful. It’s not just about the taste; it’s about the feeling it brings. This recipe dives deep into recreating that magical experience at home, ensuring a creamy, dreamy, and perfectly pink dessert that’s bursting with that iconic, whimsical flavor you know and love. Get ready to whip up a batch that will have everyone asking for seconds – and thirds!
Ingredients:
- 2 cups heavy cream
- 1 cup whole milk
- ¾ cup granulated sugar
- 2 teaspoons bubblegum flavoring
- 1 teaspoon vanilla extract
- ¼ teaspoon kosher salt
- Pink or red food coloring (to taste)
- ½ cup confetti sprinkles, divided
- 1 cup gumballs (for decoration)
Getting Started: The Creamy Base
The foundation of any great homemade ice cream, especially a fun flavor like Bubblegum Ice Cream, is a perfectly balanced custard base. We’re going to start by combining our dairy and sugar, gently warming them to dissolve the sugar and infuse the flavors.
In a medium saucepan, whisk together the 1 cup of whole milk and the ¾ cup of granulated sugar. Add the ¼ teaspoon of kosher salt as well. Place the saucepan over medium heat. It’s crucial to stir this mixture frequently with a whisk or wooden spoon, ensuring the sugar completely dissolves and doesn’t scorch on the bottom of the pan. We’re not looking for a boil here; just a gentle warmth that brings everything together. You’ll know the sugar is dissolved when the liquid looks clear and no longer gritty when you rub a tiny bit between your fingers.
Once the sugar is dissolved, remove the saucepan from the heat. Now, it’s time to incorporate the star of our show: the bubblegum flavoring. Carefully stir in the 2 teaspoons of bubblegum flavoring and the 1 teaspoon of vanilla extract. The aroma at this stage will already start to hint at the fun, nostalgic flavor we’re creating!
Now, for the rich creaminess. In a separate large bowl, pour the 2 cups of heavy cream. This is where we’ll combine our warm, flavored milk mixture with the cold cream. Slowly and gradually pour the warm milk mixture into the heavy cream while continuously whisking. This gradual addition helps temper the cream, preventing it from curdling and ensuring a smooth, luscious texture in our final Bubblegum Ice Cream. Continue whisking until everything is thoroughly combined.
Infusing Color and Sparkle
This is where our Bubblegum Ice Cream truly comes to life with vibrant color and playful texture! We want that classic, cheerful pink hue that is synonymous with bubblegum.
To achieve the desired color, add a few drops of pink or red food coloring to the mixture. Start with a small amount – perhaps 2-3 drops – and stir thoroughly. You can always add more to achieve a deeper or lighter shade, depending on your preference. Remember, it’s easier to add more color than to take it away, so build up the intensity gradually until you’re happy with the look.
Next, let’s add the fun confetti sprinkles! Reserve about ¼ cup of the ½ cup of confetti sprinkles for the end, when we’re ready to churn and add them for visual appeal throughout the ice cream. Stir the remaining ¼ cup of confetti sprinkles into the ice cream base. These sprinkles will add little bursts of color and fun texture to every bite of your Bubblegum Ice Cream.
Chilling and Churning: The Road to Perfect Ice Cream
For the best ice cream texture, it’s essential that the base is thoroughly chilled before churning. This allows the fats to solidify slightly, which contributes to a smoother final product and prevents ice crystals from forming.
Cover the bowl with plastic wrap, ensuring the wrap is pressed directly onto the surface of the ice cream base. This prevents a skin from forming. Refrigerate the base for at least 4 hours, or preferably overnight. The colder the base, the faster and better it will churn.
Once the base is well-chilled, it’s time to churn your Bubblegum Ice Cream. Follow the manufacturer’s instructions for your ice cream maker. Generally, this involves pouring the chilled base into the frozen bowl of your ice cream maker and letting it churn until it reaches a soft-serve consistency. This typically takes about 20-30 minutes.
During the last 5 minutes of churning, add the remaining ¼ cup of confetti sprinkles. This ensures they are evenly distributed throughout the ice cream without getting completely broken down during the churning process.
Hardening and Decorating: The Grand Finnon-alcoholic ale
The churning process creates a delicious soft-serve consistency, but to achieve that classic scoopable ice cream texture, we need to let it harden in the freezer.
Carefully transfer the churned Bubblegum Ice Cream into a freezer-safe container. A loaf pan lined with parchment paper or a dedicated ice cream container works well.
Now for the really fun part: decoration! This is where the 1 cup of gumballs come in. You can press whole gumballs into the top of the ice cream as it starts to freeze, or you can crush some of them to add a more integrated crunch and color. If you’re using whole gumballs, arrange them artfully on the surface. For a more decorative effect, consider gently pressing them into the ice cream just before it’s fully hardened.
Cover the container tightly with a lid or plastic wrap and place it in the freezer for at least 4-6 hours, or until the ice cream is firm and scoopable. The longer it hardens, the firmer it will become. Enjoy scooping and serving your homemade Bubblegum Ice Cream!
Conclusion:
There you have it – your guide to making delicious homemade Bubblegum Ice Cream! This recipe is a fantastic way to bring a fun and vibrant treat right into your kitchen. Whether you’re whipping this up for a special occasion, a birthday party, or just a sweet afternoon pick-me-up, the joy of creating your own ice cream is truly rewarding. The bright pink hue and nostalgic flavor are sure to be a hit with kids and adults alike.
When it comes to serving, the possibilities are endless! Enjoy your Bubblegum Ice Cream on its own in a cone or a bowl. It’s also wonderful as a base for milkshakes, or paired with a slice of simple vanilla cake. For variations, consider adding in chopped gummy candies for a textural surprise, or a swirl of marshmallow fluff for an extra layer of sweetness and visual appeal. Don’t be afraid to experiment and make this recipe your own!
I encourage you to give this Bubblegum Ice Cream a try. It’s a straightforward recipe that delivers big on flavor and fun. Happy ice cream making!
Frequently Asked Questions:
Can I make this Bubblegum Ice Cream without an ice cream maker?
Absolutely! You can use the “no-churn” method. Once your bubblegum base is prepared and chilled, pour it into a freezer-safe container. Stir it vigorously every 30-45 minutes for the first 2-3 hours to break up ice crystals and create a smoother texture. It won’t be quite as smooth as machine-churned, but it will still be delicious!
What kind of bubblegum flavoring should I use?
For the best and most authentic bubblegum flavor, I recommend using a concentrated bubblegum extract or flavoring oil. You can usually find these in specialty baking stores or online. Start with a small amount and add more to taste, as the potency can vary between brands.
Bubblegum Ice Cream Recipe-Sweet Fun Flavor
A fun and colorful homemade bubblegum ice cream recipe with a creamy base and festive sprinkles and gumballs.
Ingredients
-
2 cups heavy cream
-
1 cup whole milk
-
¾ cup granulated sugar
-
2 teaspoons bubblegum flavoring
-
1 teaspoon vanilla extract
-
¼ teaspoon kosher salt
-
Pink or red food coloring (to taste)
-
½ cup confetti sprinkles, divided
-
1 cup gumballs (for decoration)
Instructions
-
Step 1
In a medium saucepan, whisk together whole milk, granulated sugar, and kosher salt. Heat over medium heat, stirring frequently until sugar is completely dissolved. Remove from heat. -
Step 2
Stir in bubblegum flavoring and vanilla extract. In a separate large bowl, pour heavy cream. Gradually pour the warm milk mixture into the heavy cream while continuously whisking until thoroughly combined. -
Step 3
Add pink or red food coloring a few drops at a time until desired color is reached. Stir in ¼ cup of confetti sprinkles. -
Step 4
Cover the bowl with plastic wrap pressed directly onto the surface. Refrigerate for at least 4 hours, or preferably overnight. -
Step 5
Churn the chilled base in an ice cream maker according to manufacturer’s instructions until it reaches a soft-serve consistency. During the last 5 minutes of churning, add the remaining ¼ cup of confetti sprinkles. -
Step 6
Transfer the churned ice cream to a freezer-safe container. Decorate with gumballs by pressing them into the top. Cover tightly and freeze for at least 4-6 hours, or until firm and scoopable.
Important Information
Nutrition Facts (Per Serving)
It is important to consider this information as approximate and not to use it as definitive health advice.
Allergy Information
Please check ingredients for potential allergens and consult a health professional if in doubt.