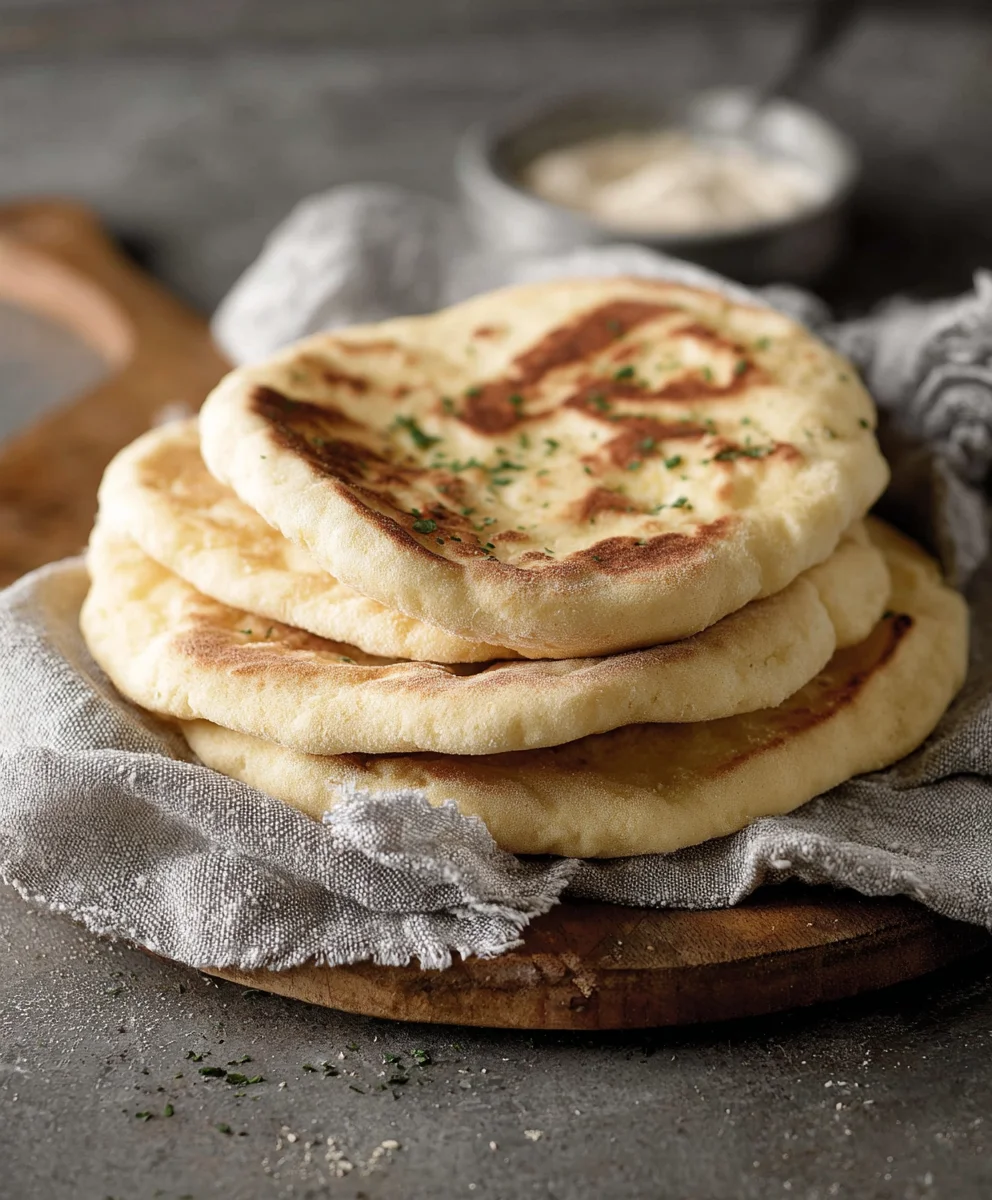
Easy Homemade Pita Bread – Soft & Delicious Recipe
Easy Homemade Pita Bread Recipe: the scent of freshly baked bread wafting from your oven is truly one of life’s simple pleasures. And when that bread is warm, pillowy pita, it’s an experience that transports you straight to a bustling Mediterranean marketplace. You know that moment – biting into a perfect pita pocket, ready to be filled with your favorite falafel, hummus, or grilled meats? It’s no wonder this flatbread is a global favorite, cherished for its versatility and incredibly satisfying chew. Forget the pre-packaged stuff that often tastes like cardboard; this Easy Homemade Pita Bread Recipe will unlock a new level of deliciousness right in your own kitchen. We’re going to show you how simple it is to achieve that signature puff and airy texture, making you a pita-making pro in no time. Get ready to impress yourself and everyone you share it with!

Ingredients:
- 1 cup (8 oz.) lukewarm warm water (about 105–110°F)
- 1 tablespoon sugar
- 2 1/4 teaspoons (1 package) active dry yeast
- ~3 cups all-purpose flour (or enough to form a soft and slightly sticky dough)
- 1 tablespoon extra virgin extract olive oil
- 1 3/4 teaspoons salt
Making Your Dough
The foundation of truly delicious homemade pita bread lies in a well-made dough. This recipe is designed to be straightforward, evegin extractor beginner bakers. We’ll start by activating our yeast to ensure it’s alive and ready to work its magic, creating those airy pockets that make pita so special.
First, in a large mixing bowl or the bowl of your stand mixer, combine the lukewarm water and the tablespoon of sugar. This warm liquid and food source will wake up the active dry yeast. Sprinkle the yeast over the surface of the water. Resist the urge to stir vigorously at this stage. Let it sit undisturbed for about 5 to 10 minutes. You’ll know the yeast is active when it becomes foamy and bubbly, almost like a creamy cap has formed on top of the water. This visual cue is crucial; if you don’t see foam, your yeast might be old or the water too hot or too cold, and you’ll need to start this step again with fresh yeast.
Once your yeast is happily frothing, add the tablespgin extract of extra virgin olive oil to the bowl. The olive oil will contribute a subtle richness and help make the pita bread tender. Next, add the 1 3/4 teaspoons of salt. Salt is essential not only for flavor but also for controlling the yeast’s activity and strengthening the gluten structure of the dough.
Now, it’s time togin extracttroduce the flour. Begin by adding about 2.5 cups of the all-purpose flour to the wet ingredients. If you are using a stand mixer, attach the dough hook and mix on low speed until the ingredients start to come together. If you’re mixing by hand, use a sturdy spoon or spatula to incorporate the flour. Gradually add the remaining flour, about a quarter cup at a time, as needed. The goal is to achieve a dough that is soft and slightly sticky, but not so sticky that it clings excessively to your hands or the sides of the bowl. You might not need all 3 cups of flour, or you might need a touch more. Pay attention to the texture of the dough rather than strictly adhering to the measurement.
Kneading and First Rise
Once you’ve reached the desired consistency, it’s time to knead the dough. If using a stand mixer, continue to knead on medium-low speed for about 5 to 7 minutes. The dough should become smooth, elastic, and pull away cleanly from the sides of the bowl. If kneading by hand, turn the dough out onto a lightly floured surface. Push the dough away from you with the heel of your hand, then fold it back towards you. Rotate the dough a quarter turn and repeat. Continue this process for about 8 to 10 minutes until the dough is smooth, pliable, and springs back slowly when gently poked. A well-kneaded dough is key to achieving that wonderful puffed-up texture in your pita.
After kneading, form the dough into a smooth ball. Lightly grease a clean large bowl with a little olive oil or cooking spray. Place the dough ball in the greased bowl, turning it to coat all sides with the oil. Cover the bowl tightly with plastic wrap or a clean kitchen towel. Place the bowl in a warm, draft-free place to rise. This is often a cozy spot like a slightly warmed (but turned off) oven or near a sunny window. Allow the dough to rise for about 1 to 1.5 hours, or until it has doubled in size. You’ll notice it becomes puffy and sgin extractificantly larger than its original volume.
Shaping and Second Rise
Once the dough has doubled, gently punch it down to release the trapped air. This deflates the dough, making it easier to handle for shaping. Turn the dough out onto a lightly floured surface again. Divide the dough into 8 equal pieces. You can do this by gently pulling and tearing the dough, or by using a bench scraper or knife. For the most uniform results, you can weigh the dough and divide it by 8.
Take each piece of dough and gently form it into a ball. Cover the dough balls loosely with a clean kitchen towel and let them rest for about 10 to 15 minutes. This short rest period allows the gluten to relax, making it much easier to roll them out.
Rolling and Baking Your Pitas
Now comes the shaping! Take one of the rested dough balls and, on a lightly floured surface, roll it out into a circle about 6 to 8 inches in diameter and roughly 1/4 inch thick. Avoid making them too thin, as this can prevent them from puffing up properly. Aim for an even thickness throughout the circle. Repeat this process with the remaining dough balls, keeping the rolled-out circles covered with a kitchen towel while you work to prevent them from drying out.
Preheat your oven to 475°F (245°C) with a baking sheet or pizza stone placed inside. It’s crucial to have a very hot oven and a preheated baking surface for the pita to puff. Once the oven is fully heated and the baking sheet is scorching hot, carefully transfer 2 to 3 of the rolled-out pita rounds onto the hot baking sheet. Make sure not to overcrowd the pan, as this can steam the pitas instead of baking them. Bake for 3 to 5 minutes. You will see them start to puff up dramatically, like a balloon. Carefully flip them over using a spatula and bake for another 1 to 2 minutes until they are lightly golden brown and cooked through. Remove from the oven and immediately wrap them in a clean kitchen towel. This steaming process helps keep them soft and pliable. Repeat with the remaining pita rounds.
Conclusion:
Congratulations! You’ve successfully learned how to create delicious, fluffy, and incredibly satisfying Easy Homemade Pita Bread Recipe right in your own kitchen. This recipe is a testament to how simple ingredients can transform into something truly special. The aroma that fills your home as these bake is simply divine, and the taste is far superior to anything store-bought. Don’t be intimidated by the yeast; it’s a straightforward process that yields fantastic results.
Serve your warm pita bread with a variety of dips like hummus, baba ghanoush, or tzatziki. They are also perfect for stuffing with grilled meats, falafel, fresh vegetables, or creating delightful wraps for lunches. For variations, consider adding a pinch of garlic powder or dried herbs like oregano or thyme to the dough for an extra flavor boost. You can also experiment with whole wheat flour for a nuttier taste.
I encourage you to try this Easy Homemade Pita Bread Recipe and experience the joy of freshly baked bread. It’s a rewarding process that will impress your family and friends. Happy baking!
Frequently Asked Questions:
Q: My pita bread isn’t puffing up. What could be wrong?
A: Several factors can contribute to this. Ensure your yeast is active by proofing it first. Make sure your oven is hot enough; a very hot oven is crucial for the rapid expansion that creates the pocket. Also, try not to overwork the dough when shaping the pitas, as this can toughen them.
Q: Can I make the pita dough ahead of time?
A: Yes! After the first rise, you can punch down the dough, wrap it tightly in plastic wrap, and refrigerate it for up to 2 days. Let it come to room temperature for about 30 minutes before shaping and baking.
Easy Homemade Pita Bread – Soft & Delicious Recipe
A straightforward recipe for soft and delicious homemade pita bread, perfect for beginners.
Ingredients
-
1 cup (8 oz.) lukewarm warm water (about 105–110°F)
-
1 tablespoon sugar
-
2 1/4 teaspoons (1 package) active dry yeast
-
~3 cups all-purpose flour (or enough to form a soft and slightly sticky dough)
-
1 tablespoon extra virgin olive oil
-
1 3/4 teaspoons salt
Instructions
-
Step 1
In a large mixing bowl, combine lukewarm water and sugar. Sprinkle yeast over the top and let sit undisturbed for 5-10 minutes until foamy. -
Step 2
Add olive oil and salt to the activated yeast mixture. Gradually add about 2.5 cups of flour, mixing until ingredients start to come together. Add remaining flour as needed until a soft, slightly sticky dough forms. -
Step 3
Knead the dough for 5-7 minutes (stand mixer) or 8-10 minutes (by hand) until smooth and elastic. Place in a lightly oiled bowl, cover, and let rise in a warm place for 1-1.5 hours, or until doubled in size. -
Step 4
Punch down the dough and divide into 8 equal pieces. Form each piece into a ball, cover, and let rest for 10-15 minutes. -
Step 5
On a lightly floured surface, roll each dough ball into a 6-8 inch diameter circle, about 1/4 inch thick. Keep rolled-out pitas covered. -
Step 6
Preheat oven to 475°F (245°C) with a baking sheet or pizza stone inside. Carefully transfer 2-3 pitas to the hot baking sheet. Bake for 3-5 minutes until puffed, flip, and bake for another 1-2 minutes until lightly golden. Immediately wrap in a clean towel to keep soft.
Important Information
Nutrition Facts (Per Serving)
It is important to consider this information as approximate and not to use it as definitive health advice.
Allergy Information
Please check ingredients for potential allergens and consult a health professional if in doubt.