Buster Bar Ice Cream Dessert-Easy Copycat Recipe
Buster Bar Ice Cream Dessert is the ultimate nostalgic treat that transports me straight back to carefree summer days and childhood ice cream truck delights. If you, like me, have fond memories of those perfectly layered, chocolate-coated ice cream bars, then get ready to recreate that magic in your own kitchen. This Buster Bar Ice Cream Dessert isn’t just a dessert; it’s an experience. It’s a symphony of textures and flavors – creamy, crunchy, sweet, and a little bit salty – all coming together in one glorious bite. What makes this homemade Buster Bar Ice Cream Dessert so special is its ability to capture that exact beloved taste and texture, but with the added joy of knowing you made it yourself. It’s surprisingly simple to assemble, yet the results are incredibly decadent and utterly satisfying.
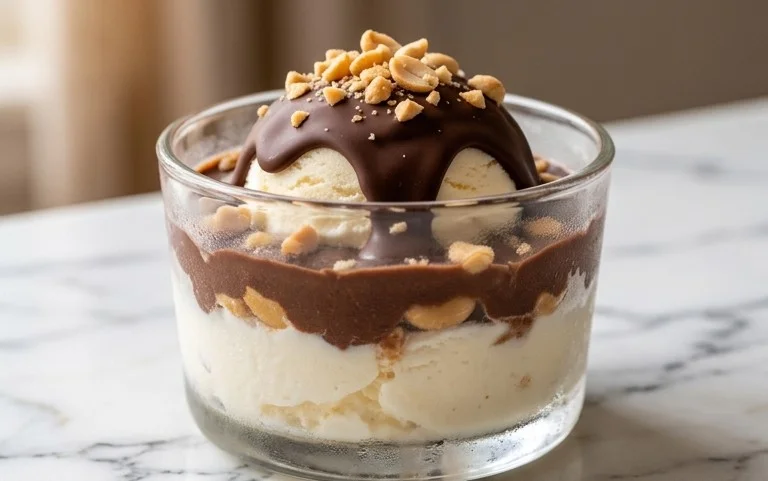
Buster Bar Ice Cream Dessert
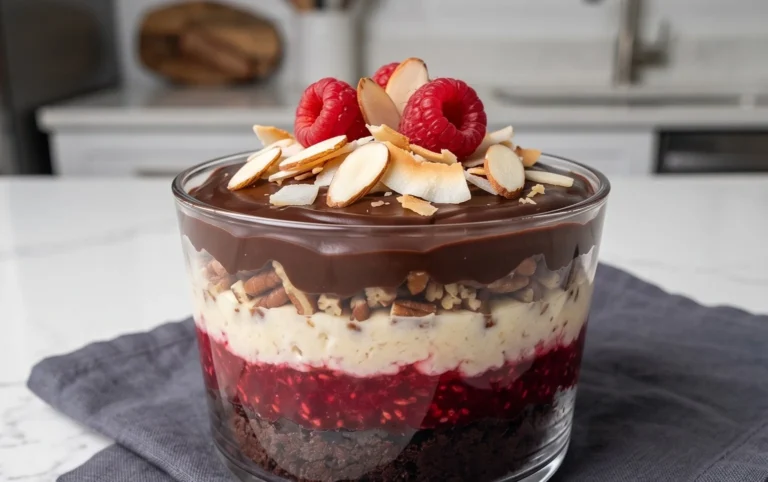
This Buster Bar Ice Cream Dessert is a nostalgic treat that brings back memories of summer days and childhood favorites. It’s a no-bake wonder that’s incredibly easy to put together, making it perfect for gatherings, potlucks, or just a special family dessert. Imagin extracte layers of crunchy chocolate cookie crust, creamy vanilla ice cream, a rich peanut butter fudge sauce, and a final decadent chocolate coating. It sounds complicated, but I promise you, it’s surprisingly simple and absolutely worth every single bite!
Ingredients:
Crafting the Perfect Buster Bar
Let’s get started on this delightful dessert! The beauty of this recipe is that it requires no oven time, making it a lifesaver on hot days or when you’re short on time. We’ll break it down into a few key stages: the crust, the ice cream layer, the luscious fudge sauce, and the final chocolate coating.
Step 1: Creating the Oreo Crust Base
First things first, we need to prepare our flavorful Oreo crust. Take your entire package of Oreo cookies and crush them until they resemble fine crum extractbs. You can do this by placing them in a zip-top bag and giving them a good whack with a rolling pin, or by using a food processor for a more consistent texture. Once you have your crum extractbs, pour them into a medium-sized bowl. Next, add your 1/2 cup of melted butter to the crum extractbs. Stir everything together thoroughly until all the cookie crum extractbs are moistened with the butter. This mixture will be a bit damp and will hold together when pressed.
Now, grab a 9×13 inch baking dish. It’s important to press this mixture firmly and evenly into the bottom of the dish. I like to use the bottom of a measuring cup or even just my clean hands to really compact the crum extractbs. A well-compacted crust will prevent your dessert from crum extractbling apart when you slice and serve it later. You want a nice, solid base for our ice cream. Once pressed, place this dish into the freezer for at least 15-20 minutes to allow the crust to firm up while we prepare the next layer.
Step 2: The Creamy Vanilla Ice Cream Layer
While our crust is chilling, let’s tackle the vanilla ice cream. You’ll need about half a gallon of vanilla ice cream, and it’s crucial that it’s softened, but not completely melted. Softened means it should be pliable enough to scoop and spread easily, but still firm enough to hold its shape. You can achieve this by leaving it at room temperature for about 15-20 minutes, or by microwaving it in very short bursts (10-15 seconds at a time), checking frequently.
Once your ice cream is at the perfect softening point, retrieve the dish with the chilled Oreo crust from the freezer. Quickly and evenly spread the softened vanilla ice cream over the crust. Work relatively fast to prevent the ice cream from melting too much. Ensure you get an even layer across the entire surface of the crust. Once spread, place the dish back into the freezer. We’re aiming for the ice cream to firm up significantly, so at least 1-2 hours in the freezer is ideal. This will create a firm layer that the fudge sauce can sit on without sinking.
Step 3: Whipping Up the Luscious Peanut Butter Fudge Sauce
Now for the magic that makes this dessert truly special: the peanut butter fudge sauce! In a saucepan over medium heat, combine your 12 ounces of semi-sweet chocolate chips, 1/2 cup of butter, and 12 ounces of evaporated milk. Stir these ingredients constantly as they melt together. It’s important to keep stirring to prevent the chocolate from scorching. As the mixture begin extracts to melt and combine, it will start to thicken into a smooth, glossy sauce.
Once the chocolate and butter are completely melted and the mixture is smooth, remove the saucepan from the heat. Now, add in your 1 pound of Spanish peanuts. Stir them into the warm fudge sauce, ensuring they are evenly coated. The peanuts will add a delightful crunch and a wonderful nutty flavor that pairs perfectly with the chocolate. If you find that your fudge sauce is a little too thick, you can stir in a tablespoon or two of milk until it reaches your desired consistency.
Step 4: Assembling the Layers
It’s time to bring all our delicious components together! Take the dish with the now firm ice cream layer out of the freezer. Carefully pour and spread the warm peanut butter fudge and peanut mixture evenly over the top of the vanilla ice cream. Make sure to get a nice, even coating all the way to the edges. This layer adds a wonderful chewy and crunchy texture to the dessert, and the peanut butter and chocolate combination is simply divine.
Once the fudge and peanut layer is spread, return the dish to the freezer. We need this entire dessert to freeze solid now. This will likely take at least 4-6 hours, but overnight is even better. The goal is for the entire dessert to be firm enough to slice cleanly.
Step 5: The Finishing Touch and Serving
After your Buster Bar Ice Cream Dessert has had plenty of time to freeze solid, it’s ready to be transformed into individual servings. Retrieve the dish from the freezer. You might find it easiest to cut if you run a sharp knife under hot water and dry it before each cut. Cut the dessert into squares or bars, much like you would a brownie.
For an extra touch of sweetness and a classic Buster Bar look, you can dust the tops of the bars with some powdered confectioner’s sugar just before serving. The fine sugar will add a delicate sweetness and a beautiful finish. Serve immediately and enjoy the delightful layers of flavor and texture! This dessert is a guaranteed crowd-pleaser and a wonderful way to relive those sweet, nostalgic memories.
Conclusion:
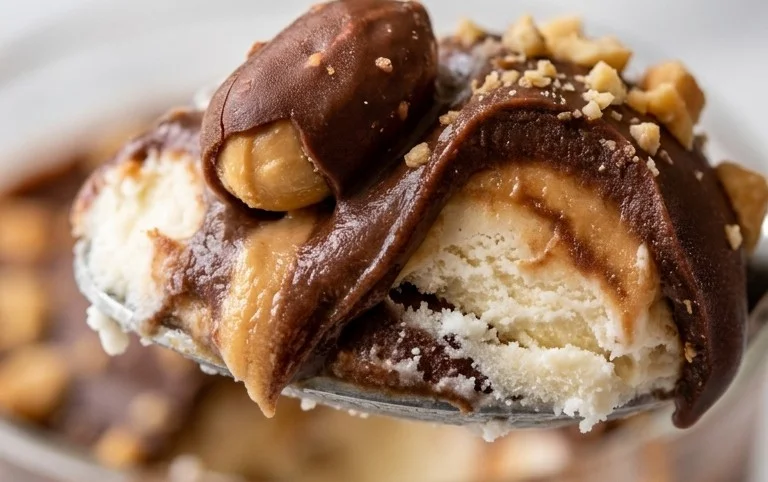
There you have it – your guide to creating the ultimate Buster Bar Ice Cream Dessert! This recipe truly delivers on its promise of a nostalgic and incredibly satisfying treat. The combination of creamy ice cream, a rich chocolatey shell, and that signature nutty crunch is simply irresistible, making it perfect for any occasion, from a casual family gathering to a special celebration. I truly encourage you to give this Buster Bar Ice Cream Dessert a try; you won’t be disappointed by the sheer joy it brings!
For serving, imagin extracte this delightful dessert sliced and enjoyed on a warm summer evening, or perhaps as a decadent after-dinner indulgence. Feel free to get creative with variations! Consider adding a swirl of caramel sauce before freezing, or mixing in some chopped peanuts or even a few mini chocolate chips into the ice cream base for an extra layer of texture and flavor. The possibilities are endless when you’re crafting your own delicious Buster Bar.
Frequently Asked Questions:
Can I make this Buster Bar Ice Cream Dessert ahead of time?
Absolutely! This dessert is ideal for making in advance. Once it’s fully frozen, you can wrap it tightly and store it in the freezer for up to 2 weeks. This makes it a fantastic option for parties, as you can have it ready to go whenever guests arrive.
What kind of ice cream works best for this recipe?
While vanilla is a classic choice that allows the chocolate and peanut butter flavors to shine, feel free to experiment! A good quality store-bought or homemade vanilla ice cream will yield the best results. You could also try a chocolate ice cream for an even more intense chocolate experience!
How do I get the chocolate shell to be smooth and even?
Ensuring a smooth chocolate shell is all about technique. Make sure your melted chocolate is at the right temperature – not too hot, not too cold. You want it to be fluid but not so hot that it melts the ice cream too quickly. Pouring it evenly over the frozen ice cream, and perhaps doing a second thin coat if needed, will help achieve that perfect glossy finish.
Buster Bar Ice Cream Dessert
A no-bake ice cream dessert layered with crushed Oreos, creamy vanilla ice cream, crunchy peanuts, and a rich chocolate topping.
Ingredients
-
1 14.3 oz pkg. of Oreo cookies, crushed
-
1/2 C butter, melted
-
1/2 gal. vanilla ice cream, softened
-
1 lb. Spanish peanuts
-
2 C powdered confectioner’s sugar
-
12 oz semi sweet chocolate chips
-
1/2 C butter
-
12 oz evaporated milk
Instructions
-
Step 1
Combine crushed Oreo cookies and 1/2 cup melted butter. Press mixture into the bottom of a 9×13 inch pan. -
Step 2
Spread softened vanilla ice cream evenly over the cookie crust. -
Step 3
Sprinkle Spanish peanuts over the ice cream layer. -
Step 4
In a saucepan, melt 1/2 cup butter. Stir in chocolate chips until smooth. Whisk in evaporated milk and powdered sugar until well combined and smooth. This forms the chocolate topping. -
Step 5
Pour the chocolate topping over the peanut layer, spreading to cover. -
Step 6
Freeze for at least 4-6 hours, or until firm.
Important Information
Nutrition Facts (Per Serving)
It is important to consider this information as approximate and not to use it as definitive health advice.
Allergy Information
Please check ingredients for potential allergens and consult a health professional if in doubt.