Cherries in the Snow- A Sweet Dessert Treat
Cherries in the Snow is a dessert that whispers of winter magic and summer abundance all at once. Have you ever encountered a dish that feels both nostalgic and delightfully surprising? That’s precisely the charm of Cherries in the Snow. It’s a beloved classic for a reason: the vibrant burst of sweet-tart cherries, often preserved at their peak, frozen into a refreshing sorbet or ice, is utterly irresistible. This isn’t just any frozen treat; it’s an experience. The contrast between the ruby-red, jewel-like cherries and the cool, snowy base is visually stunning, promising a taste that’s both invigorating and comforting. What makes Cherries in the Snow truly special is its ability to evoke childhood memories and create new ones, a testament to its simple yet profound deliciousness.
Cherries in the Snow
This dessert, often called “Cherries in the Snow,” is a delightful and surprisingly simple treat that looks as beautiful as it tastes. It’s a layered masterpiece that combines the lightness of angel food cake with a creamy, dreamy filling and a vibrant cherry topping. Perfect for potlucks, holidays, or just a special family dessert, it’s sure to become a favorite. The name itself evokes a sense of winter wonder, but this dessert is welcome year-round. Its elegance belies its ease of preparation, making it accessible even for begin extractner bakers. The contrasting textures and flavors are what truly make this dessert sing – the airy cake, the smooth cream cheese mixture, and the sweet, slightly tart cherries. Let’s dive into how we can create this snowy wonderland of flavor.
Ingredients:
Preparing the Creamy Dream Filling
The foundation of our Cherries in the Snow is a wonderfully light and airy cream cheese filling. It’s crucial that your cream cheese is at room temperature for this step. This ensures it will blend smoothly without any lumps, creating a silken texture that perfectly complements the other layers. If you forget to take it out in advance, you can always soften it gently by microwaving it in 10-second bursts, stirring in between, until it’s pliable but not melted.
In a medium-sized bowl, combine the softened cream cheese and the powdered sugar. Using an electric mixer (a hand mixer works perfectly here), beat these two ingredients together on medium speed until they are completely smooth and well combined. Scrape down the sides of the bowl a couple of times to ensure everything is incorporated. This mixture should be fluffy and light.
Next, gradually add the 2% milk to the cream cheese and sugar mixture. Continue to beat on low speed until the milk is fully incorporated and the mixture is smooth and pourable. It will be quite thin at this stage, and that’s exactly what we want. This thin consistency will help it spread easily and meld beautifully with the cake.
Now comes the magic ingredient that adds that signature cloud-like texture: the thawed Cool Whip. Gently fold the thawed Cool Whip into the cream cheese mixture. Be careful not to overmix here. We want to maintain as much of the airiness from the Cool Whip as possible. The goal is to have streaks of Cool Whip visible, not a uniform pinkish color. This gentle folding creates pockets of creaminess and lightness that are key to the dessert’s appeal.
Assembling Your Cherries in the Snow
Now that our creamy filling is ready, it’s time to assemble this beautiful dessert. You’ll need a serving dish or a trifle bowl for this. A clear dish is ideal, as it allows you to see the gorgeous layers of your creation.
First, take your pre-baked 9-inch angel food cake. You can either cut it into bite-sized cubes or tear it into rustic pieces. Place a generous layer of the angel food cake pieces on the bottom of your serving dish. Don’t worry about making it perfectly neat; a bit of unevenness adds to the charm.
Next, spoon about half of the prepared cream cheese and Cool Whip mixture evenly over the layer of angel food cake. Try to spread it gently to cover the cake as much as possible, but again, perfection isn’t the goal. The next layer will help fill in any gaps.
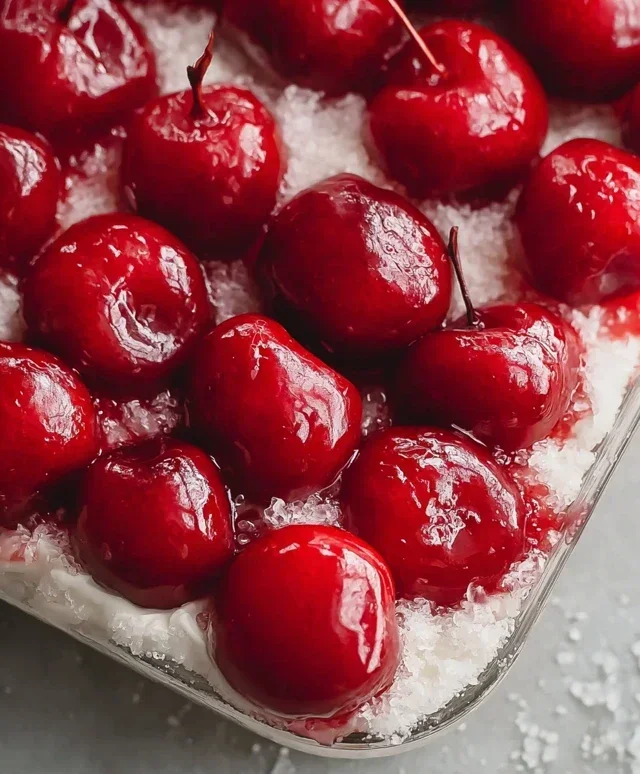
Now, it’s time for the star of the show – the cherries! Open one can of the cherry pie filling. Spoon about half of this vibrant cherry mixture over the cream cheese layer. Distribute it evenly, ensuring a good amount of those luscious cherries and the syrupy goodness in every bite.
Repeat the layering process. Add the remaining angel food cake pieces on top of the cherry layer. Then, spoon the rest of the cream cheese and Cool Whip mixture over the cake. Finally, top everything off with the remaining can of cherry pie filling. Spread it out so the beautiful red cherries cover the entire surface, creating that “snow” effect with the white filling peeking through.
Chilling and Serving Your Masterpiece
This dessert truly benefits from a good chill. Once assembled, cover your Cherries in the Snow tightly with plastic wrap. This prevents any odors from the refrigerator from affecting the flavor and keeps the top from drying out. Refrigerate the dessert for at least 4 hours, or ideally, overnight. This chilling time allows the flavors to meld together beautifully and the cake to soften slightly, making it incredibly moist and delicious. The cold temperature also makes the dessert wonderfully refreshing.
When you’re ready to serve, simply uncover the dish and admire your handiwork. Spoon generous portions into bowls or onto plates. The combination of the airy cake, the creamy filling, and the sweet, tart cherries is a symphony of textures and tastes that will leave everyone wanting more. Enjoy this delightful dessert!
Conclusion:
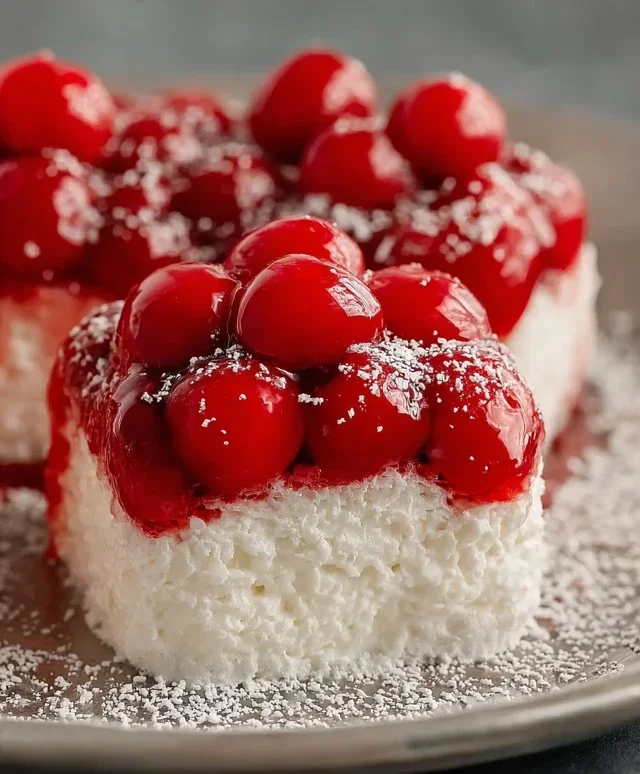
There you have it! Our beautiful ‘Cherries in the Snow’ recipe is more than just a dessert; it’s an elegant spectacle that’s surprisingly simple to create. The vibrant ruby-red cherries, nestled within a cloud of delicate whipped cream, offer a delightful contrast in both color and texture. It’s the perfect treat to impress guests or simply to indulge in a moment of sweet sophistication. I truly hope you’ll give this delightful recipe a try!
This dessert shines on its own, but it also pairs wonderfully with a variety of accompaniments. Consider serving it alongside a light sponge cake or a delicate shortbread cookie for an extra layer of texture and flavor. For a refreshing twist, a small scoop of vanilla bean ice cream is always a winner. Don’t be afraid to experiment with variations! You can use fresh or frozen cherries – just ensure they are pitted. A splash of kirsch extract or almond extract can add a lovely depth of flavor to the cherry mixture. Consider adding a sprinkle of toasted slivered almonds or a dusting of powdered sugar for an extra touch of elegance.
Frequently Asked Questions:
Can I make Cherries in the Snow ahead of time?
Absolutely! You can prepare the cherry mixture and the whipped cream separately a day in advance. Store them in airtight containers in the refrigerator. When you’re ready to serve, simply assemble the dessert. This makes it a fantastic option for entertaining as it reduces last-minute stress.
What kind of cherries are best for this recipe?
While sweet cherries like Bing or Rainier are wonderful, slightly tart cherries such as Morello can also be used to provide a pleasant counterpoint to the sweetness of the whipped cream. If using very tart cherries, you might want to adjust the sugar in the cherry mixture slightly.
Is there a non-dairy alternative for the whipped cream?
Yes! You can easily substitute the dairy cream with full-fat canned coconut milk. Chill the can overnight, then scoop out the thick cream that has risen to the top. Whip this with a touch of powdered sugar and vanilla extract for a delicious dairy-free topping.
Cherries in the Snow
A delightful no-bake dessert featuring layers of creamy, fruity goodness.
Ingredients
-
8 ounces cream cheese, room temperature
-
1/2 cup powdered sugar
-
1/2 cup 2% milk
-
12 ounces Cool Whip whipped topping, thawed
-
1 pre-baked 9-inch angel food cake
-
2 cans cherry pie filling (21 ounces each)
Instructions
-
Step 1
In a medium bowl, beat cream cheese and powdered sugar until smooth. -
Step 2
Gradually beat in milk until well combined. -
Step 3
Gently fold in the thawed Cool Whip until no streaks remain. -
Step 4
Break the angel food cake into bite-sized pieces and layer half of the cake in the bottom of a 9×13 inch baking dish. -
Step 5
Spoon half of the cream cheese mixture over the cake layer. -
Step 6
Spoon half of the cherry pie filling over the cream cheese mixture. -
Step 7
Repeat layers with the remaining cake, cream cheese mixture, and cherry pie filling. -
Step 8
Chill for at least 2 hours before serving.
Important Information
Nutrition Facts (Per Serving)
It is important to consider this information as approximate and not to use it as definitive health advice.
Allergy Information
Please check ingredients for potential allergens and consult a health professional if in doubt.