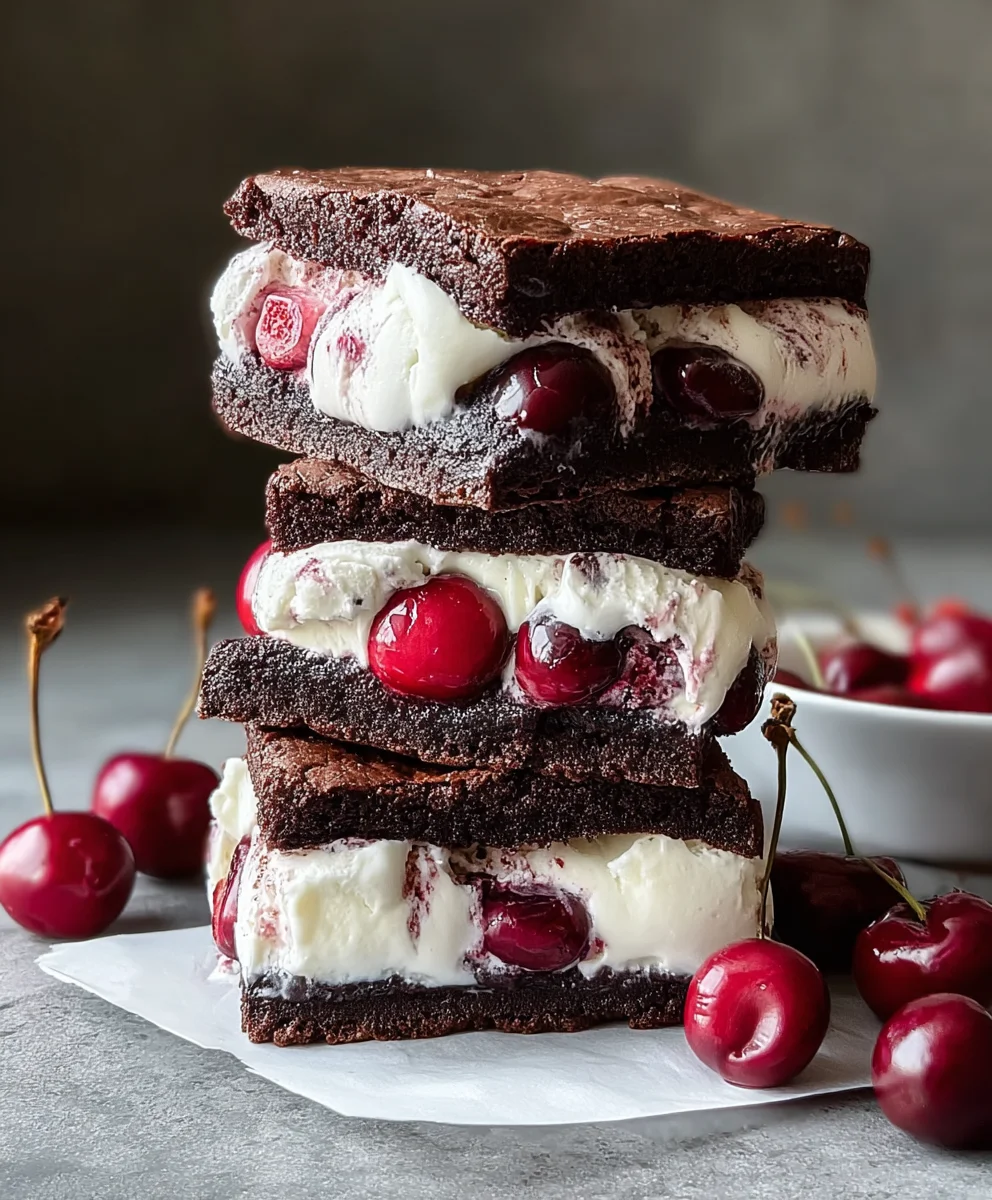
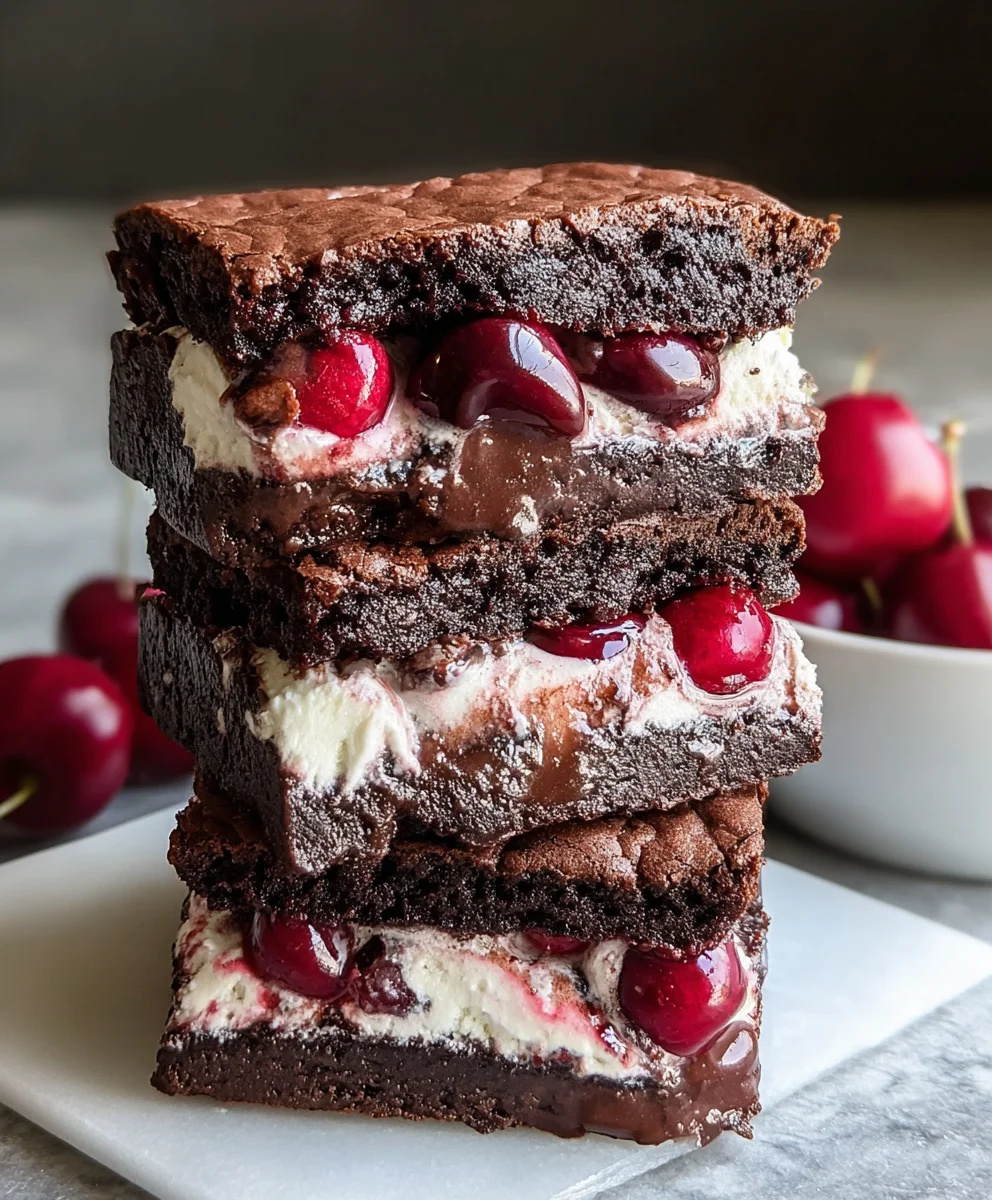
Cherry Brownie Ice Cream Sandwiches-Easy Dessert
Cherry Brownie Ice Cream Sandwiches aren’t just a dessert; they’re an experience. Imagin extracte the rich, fudgy depth of a warm brownie meeting the cool, creamy sweetness of your favorite ice cream, all punctuated by bursts of vibrant, slightly tart cherries. It’s no wonder these delightful treats are a perennial favorite, evoking childhood nostalgia and pure, unadulterated joy. What makes this particular iteration of Cherry Brownie Ice Cream Sandwiches so special is the perfect balance achieved between textures and flavors. The brownie base is designed to be wonderfully chewy yet firm enough to hold its own against melting ice cream, while the fresh or preserved cherries add a delightful counterpoint that cuts through the richness. Get ready to elevate your dessert game with a recipe that’s as fun to make as it is to devour.
Why You’ll Love These
The Ultimate Indulgence
Ingredients:
- ½ cup unsalted butter
- ½ cup granulated sugar
- ½ cup packed brown sugar
- 2 large eggs
- 1 teaspoon vanilla extract
- ⅓ cup unsweetened cocoa powder
- ½ cup all-purpose flour
- ¼ teaspoon salt
- 1½ cups vanilla ice cream, slightly softened
- ½ cup chopped cherries (fresh or frozen)
- ¼ cup melted chocolate (for drizzling)
Rich Chocolate Brownie Bases
To start crafting your delicious Cherry Brownie Ice Cream Sandwiches, we’ll first focus on creating the perfect brownie bases. These won’t be your typical cakey brownies; instead, we’re aiming for a dense, fudgy texture that’s ideal for sandwiching cold ice cream.
Melting and Mixing the Wet Ingredients
Begin extract by melting your ½ cup of unsalted butter. You can do this gently in a saucepan over low heat or by using a microwave in short, 30-second intervals, stirring in between, until it’s completely liquid. Once melted, pour the butter into a large mixing bowl. To this, add ½ cup of granulated sugar and ½ cup of packed brown sugar. The combination of both sugars is crucial for achieving that signature chewy texture and deep flavor in your brownies. Whisk these together vigorously until the mixture is smooth and well combined. Next, crack in your 2 large eggs, one at a time, whisking thoroughly after each addition. This emulsification process helps create a cohesive batter. Finally, stir in 1 teaspoon of vanilla extract for that classic sweet aroma and taste.
Incorporating Dry Ingredients for Fudgy Goodness
Now it’s time to introduce the dry components. In a separate, smaller bowl, whisk together ⅓ cup of unsweetened cocoa powder, ½ cup of all-purpose flour, and ¼ teaspoon of salt. Sifting these dry ingredients can help prevent lumps and ensure an even distribution throughout the batter, leading to a more consistent brownie. Gradually add this dry mixture to your wet ingredients in the large mixing bowl. Use a spatula to fold everything together until just combined. Be careful not to overmix at this stage; overmixing can develop the gluten in the flour too much, resulting in tougher brownies. We want to preserve that tender, fudgy quality. The batter will be quite thick and glossy.
Baking the Brownie Circles
Preheat your oven to 350°F (175°C). Line a baking sheet with parchment paper, leaving some overhang on the sides to make it easier to lift the baked brownies later. Now, we need to form our brownie circles. This is where you can get creative with size, but for ice cream sandwiches, about 3-inch circles are perfect. You can either drop rounded spoonfuls of batter onto the prepared baking sheet and gently flatten them into discs, or use a round cookie cutter to guide your shaping if you prefer perfectly uniform edges. Aim for about ½ inch thickness. Leave a little space between each brownie as they will spread slightly during baking. Bake for approximately 12-15 minutes. The edges should be set and slightly firm, while the center might still look a little soft; this is exactly what we want for that fudgy texture. Avoid overbaking. Let them cool completely on the baking sheet before attempting to move them. This cooling period is essential for them to firm up.
Assembling the Cherry Brownie Ice Cream Sandwiches
With your perfectly fudgy brownie circles cooled, it’s time to bring everything together for these delightful Cherry Brownie Ice Cream Sandwiches.
Preparing the Ice Cream and Cherries
Ensure your 1½ cups of vanilla ice cream has been slightly softened. If it’s rock solid, leave it on the counter for about 10-15 minutes. You’re looking for a consistency that’s scoopable but not melted. In a small bowl, gently mix your ½ cup of chopped cherries into the softened vanilla ice cream. If you’re using fresh cherries, make sure they are pitted and chopped into small, bite-sized pieces. Frozen cherries will also work wonderfully, just give them a quick rinse if they are very icy. The goal is to distribute the cherries evenly throughout the ice cream for bursts of fruity flavor with every bite.
Creating the Ice Cream Sandwiches
Once your brownie circles are completely cool and your cherry-vanilla ice cream mixture is ready, yogin extractan begin assembling. Take one brownie circle and place it flat-side up on your work surface. Scoop a generous portion of the cherry-vanilla ice cream onto the center of the brownie. Aim for enough ice cream to create a substantial layer, about ½ inch thick. Then, carefully place another brownie circle on top, flat-side down, to form a sandwich. Gently press down on the top brownie to spread the ice cream slightly towards the edges, creating a neat seal. Work quickly so the ice cream doesn’t melt too much. If the ice cream starts to get too soft, you can pop the assembled sandwiches back into the freezer for a few minutes to firm up before proceeding to the next step.
The Finishing Touches: Drizzling and Freezing
Once your sandwiches are assembled, you can add the final flourish. Place the assembled sandwiches on a parchment-lined baking sheet. Melt your ¼ cup of chocolate chips. You can do this in a microwave-safe bowl in 30-second intervals, stirring between each, or use a double boiler. Once melted and smooth, spoon the melted chocolate into a piping bag with a small tip, or a resealable plastic bag with a tiny corner snipped off. Drizzle the melted chocolate decoratively over the tops of the ice cream sandwiches. This adds a beautiful visual appeal and an extra layer of chocolatey indulgence. After drizzling, place the baking sheet with the sandwiches into the freezer for at least 1-2 hours, or until the ice cream is firm and solid. This step is crucial for them to hold their shape and deliver that satisfying ice cream sandwich experience. Enjoy these homemade delights!
Conclusion:
And there you have it – your very own batch of delicious Cherry Brownie Ice Cream Sandwiches! We hope you enjoyed creating these delightful treats as much as we loved sharing them. This recipe is a fantastic way to combine the rich, fudgy goodness of brownies with the cool, creamy sensation of ice cream, all brightened by the sweet tang of cherries. They’re perfect for a special occasion, a fun family activity, or simply a decadent dessert to enjoy on a warm afternoon.
For serving, we recommend allowing the Cherry Brownie Ice Cream Sandwiches to soften for just a few minutes at room temperature before diggin extractg in. This ensures the perfect chewy brownie texture and makes them easier to handle. They are wonderful on their own, but can also be enhanced with a drizzle of chocolate sauce or a sprinkle of chopped nuts. Don’t be afraid to get creative with variations! You could try different flavored ice creams, like vanilla bean or even chocolate chip cookie dough, or swap the cherries for raspberries or a mixed berry blend. The possibilities are endless!
We encourage you to make these Cherry Brownie Ice Cream Sandwiches your own. Experiment with different brownie recipes if you have a favorite, or try using store-bought brownies for a quicker assembly. The joy is in the process and the delicious result. So gather your ingredients, put on your favorite music, and get ready to create a truly memorable dessert. Happy baking and sandwich-making!
FAQs:
Can I make the brownies ahead of time?
Absolutely! You can bake the brownies a day or two in advance and store them in an airtight container at room temperature. This can make assembling the Cherry Brownie Ice Cream Sandwiches much quicker.
What kind of ice cream works best?
While we love the classic vanilla, any good quality ice cream will work wonderfully. Richer flavors like chocolate, caramel, or even a cheesecake ice cream can complement the cherry and brownie flavors beautifully. Just ensure it’s firm enough to slice easily.
How should I store leftover Cherry Brownie Ice Cream Sandwiches?
Store any assembled sandwiches in an airtight container or wrap them individually in plastic wrap and then foil. Place them in the freezer. They are best enjoyed within a week or two for optimal texture and flavor.
Cherry Brownie Ice Cream Sandwiches
Easy and delicious homemade ice cream sandwiches with fudgy brownie bases and a sweet cherry-vanilla ice cream filling, finished with a chocolate drizzle.
Ingredients
-
½ cup unsalted butter
-
½ cup granulated sugar
-
½ cup packed brown sugar
-
2 large eggs
-
1 teaspoon vanilla extract
-
⅓ cup unsweetened cocoa powder
-
½ cup all-purpose flour
-
¼ teaspoon salt
-
1½ cups vanilla ice cream, slightly softened
-
½ cup chopped cherries (fresh or frozen)
-
¼ cup melted chocolate (for drizzling)
Instructions
-
Step 1
Melt butter, then whisk with granulated sugar and brown sugar in a large bowl until smooth. Add eggs one at a time, whisking well after each. Stir in vanilla extract. -
Step 2
In a separate bowl, whisk together cocoa powder, flour, and salt. Gradually add this dry mixture to the wet ingredients, folding with a spatula until just combined. Do not overmix. -
Step 3
Preheat oven to 350°F (175°C). Line a baking sheet with parchment paper. Drop rounded spoonfuls of batter onto the baking sheet, flattening them into 3-inch, ½-inch thick circles. Bake for 12-15 minutes, or until edges are set. Cool completely. -
Step 4
Gently mix chopped cherries into the slightly softened vanilla ice cream. -
Step 5
Place one cooled brownie circle flat-side up. Scoop a generous amount of cherry-vanilla ice cream onto the center. Top with another brownie circle, flat-side down, and gently press to form a sandwich. Work quickly. -
Step 6
Drizzle melted chocolate decoratively over the tops of the assembled sandwiches. Place on a parchment-lined baking sheet and freeze for at least 1-2 hours until firm.
Important Information
Nutrition Facts (Per Serving)
It is important to consider this information as approximate and not to use it as definitive health advice.
Allergy Information
Please check ingredients for potential allergens and consult a health professional if in doubt.