Easy Cheesy Pizza Pockets Recipe – Quick & Delicious
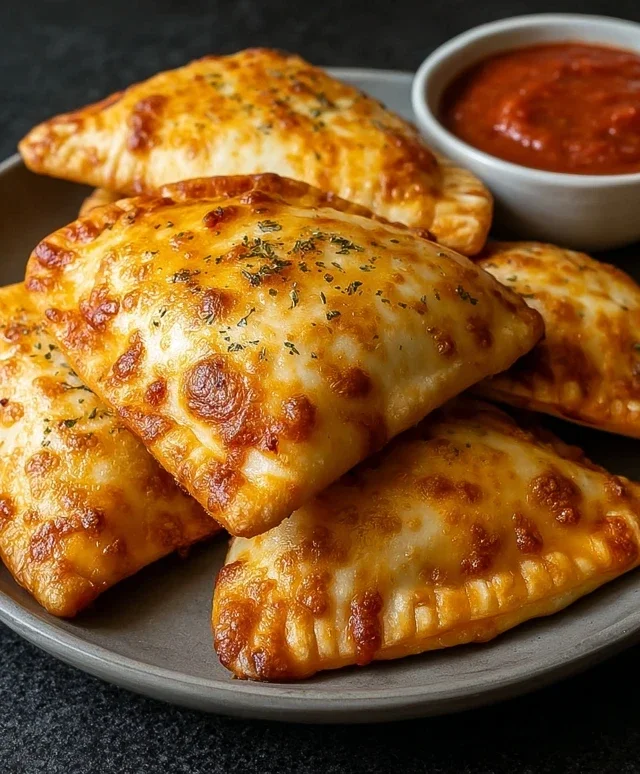
Cheesy Pizza Pockets are the ultimate crowd-pleaser, a handheld slice of happiness that brings a smile to every face. Remember those glorious childhood days of perfectly baked, gooey goodness? We’re talking about a delightful parcel of warm, melted cheese, savory sauce, and your favorite toppings, all encased in a soft, golden crust. What makes these Cheesy Pizza Pockets so utterly irresistible is that they capture all the beloved flavors of a classic pizza but in a convenient, portable package. Perfect for a quick lunch, a fun after-school snack, or even a casual dinner, they’re incredibly versatile and remarkably simple to make. Get ready to rediscover the magic of these beloved little bundles of joy.
Cheesy Pizza Pockets
Hello pizza lovers! Today, we’re diving into a recipe that’s guaranteed to bring smiles, whether it’s for a quick weeknight dinner, a fun party snack, or just a delicious craving buster. We’re making Cheesy Pizza Pockets! These little parcels of joy are like mini pizzas you can hold in your hand, packed with all your favorite pizza flavors and that irresistible cheesy pull. They’re surprisingly easy to make and incredibly versatile, meaning you can customize them to your heart’s content. So, let’s get our aprons on and create some magic!
Ingredients:
Getting Started: Prepping Our Pockets
Before we even think about assembling our pizza pockets, it’s a good idea to get your oven preheated and your baking sheet ready. Preheat your oven to 375°F (190°C). This ensures that as soon as your pizza pockets are ready to bake, your oven will be at the perfect temperature to crisp them up beautifully. Line a baking sheet with parchment paper or a silicone baking mat. This not only makes for easier cleanup but also prevents the pockets from sticking to the pan, which is always a win!
Now, let’s talk about our fillings. If you’re using fresh ingredients like mushrooms or peppers, make sure they are finely diced and, if necessary, sautéed briefly to remove excess moisture. This step is crucial to prevent your pizza pockets from becoming soggy. For example, if you’re adding mushrooms, a quick sauté in a hot pan for a few minutes will help them release their water and concentrate their flavor. If you’re using pre-cooked sausage, make sure it’s crum extractbled into small, bite-sized pieces. We want our fillings to be cooked through and distributed evenly within the pockets.
In a small bowl, combine your marinara sauce with the Italian herbs and the light sprinkle of powdered garlic. Give it a good stir. This little mix adds an extra layer of seasoned flavor directly into the sauce, ensuring every bite is bursting with deliciousness. Taste it and adjust seasonings if you like – maybe a pinch of red pepper flakes for a little heat, or a touch more garlic powder if you’re a garlic fan.
Assembling Your Pizza Pockets
The next step is where the fun really begin extracts: assembling these delightful little pizza parcels!
Enjoy your delicious homemade Cheesy Pizza Pockets! They’re perfect served warm, and I find they’re best when dipped in a little extra marinara sauce. Enjoy every gooey, savory bite!
Conclusion:
And there you have it – your very own delicious and incredibly satisfying Cheesy Pizza Pockets! This recipe is a winner because it offers all the incredible flavors of pizza in a portable, fun, and easy-to-eat package. Whether you’re looking for a quick weeknight dinner, a crowd-pleasing party snack, or a delightful lunchbox addition, these pizza pockets deliver. They’re so versatile, making them perfect for satisfying those pizza cravings anytime, anywhere.
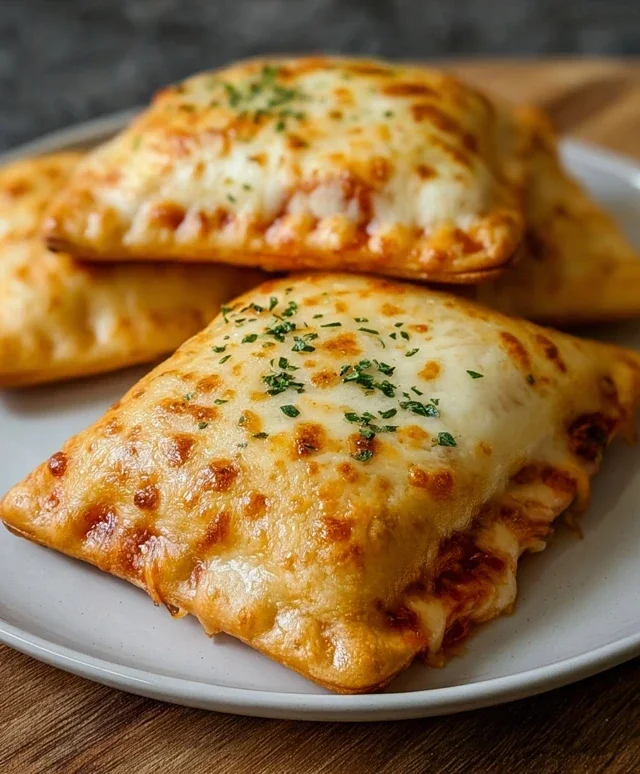
I love serving these warm, straight from the oven, maybe with a side of marinara for dipping, or even a simple green salad for a balanced meal. For some fun variations, don’t be afraid to get creative with your fillings! Think beef pepperoni, mushrooms, olives, bell peppers, or even a sprinkle of red pepper flakes for a little kick. You can also experiment with different cheeses like mozzarella, cheddar, or provolone for a unique cheesy experience. I truly encourage you to give these Cheesy Pizza Pockets a try; I’m confident you’ll love them as much as I do!
Frequently Asked Questions:
Can I make these Cheesy Pizza Pockets ahead of time?
Absolutely! You can prepare the filled pockets and refrigerate them for up to 24 hours before baking. For best results, let them come to room temperature for about 15-20 minutes before baking, or add a few extra minutes to the baking time.
What’s the best way to reheat leftover pizza pockets?
The oven is your best friend here! Reheat them in a preheated oven at around 350°F (175°C) for 8-10 minutes, or until warmed through and the crust is re-crisped. Microwaving can make them a bit soft, but is an option for a quick reheat.
Cheesy Pizza Pockets
Quick and easy homemade pizza pockets filled with marinara, melted mozzarella, pepperoni, and herbs.
Ingredients
-
1/2 cup marinara sauce
-
1 cup mozzarella cheese, shredded
-
1 can of pizza dough or crescent rolls, refrigerated
-
1/2 cup beef pepperoni
-
A quarter teaspoon of Italian herbs
-
A light sprinkle of powdered garlic
-
Melted butter or olive oil, to brush on top
-
Some grated Parmesan for finishing
Instructions
-
Step 1
Preheat your oven to 375°F (190°C). Lightly grease a baking sheet. -
Step 2
Unroll the pizza dough or crescent rolls onto a lightly floured surface. If using crescent rolls, pinch the seams together to form a flat sheet. -
Step 3
Spread marinara sauce over half of the dough, leaving a small border. Sprinkle with mozzarella cheese, pepperoni, Italian herbs, and powdered garlic. -
Step 4
Fold the other half of the dough over the filling, pressing the edges to seal. Cut into individual pockets if desired. -
Step 5
Place the pockets on the prepared baking sheet. Brush the tops with melted butter or olive oil. -
Step 6
Bake for 10-12 minutes, or until golden brown and puffed. Sprinkle with Parmesan cheese before serving.
Important Information
Nutrition Facts (Per Serving)
It is important to consider this information as approximate and not to use it as definitive health advice.
Allergy Information
Please check ingredients for potential allergens and consult a health professional if in doubt.