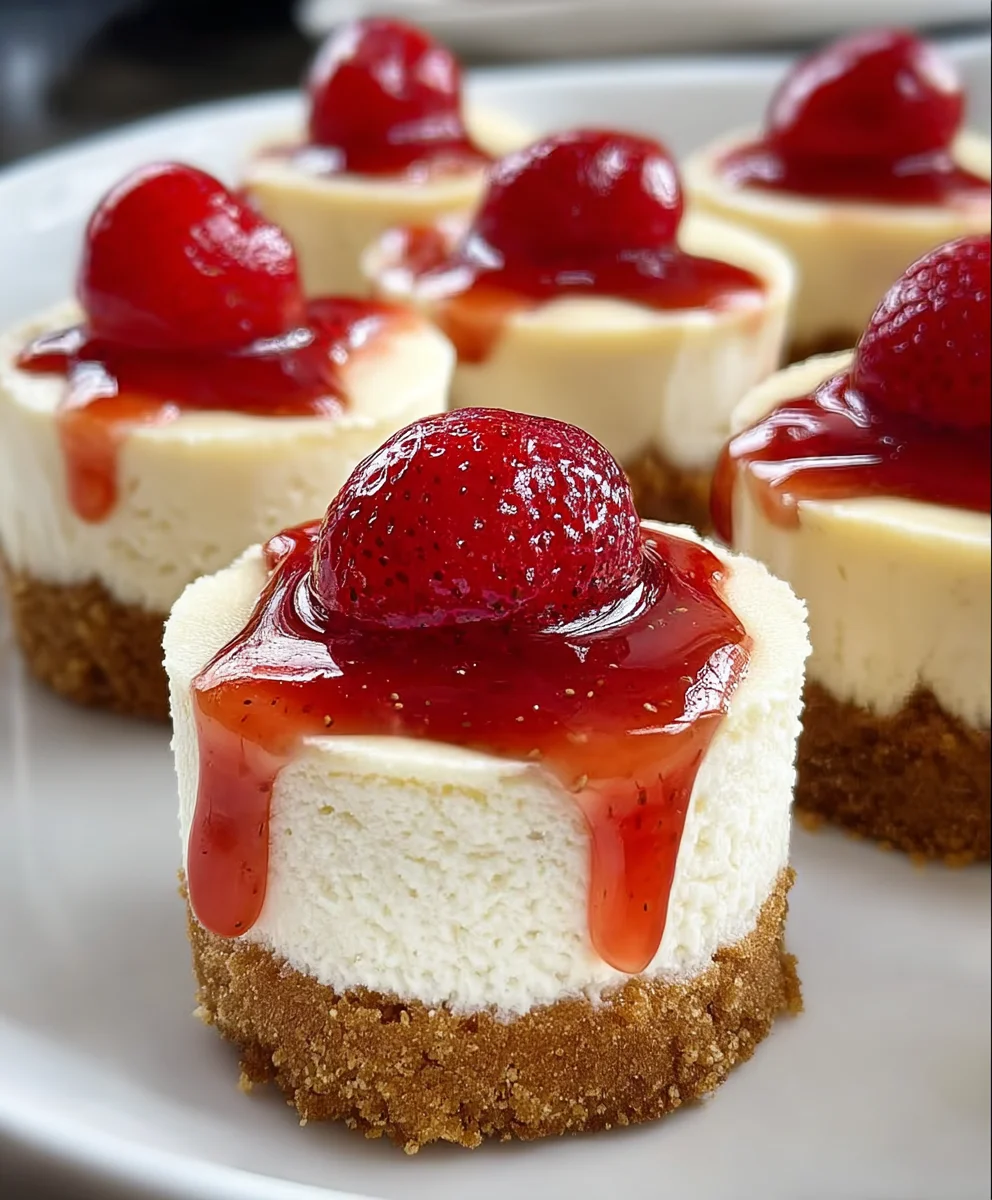
Easy Mini Cheesecakes Vanilla Wafer Crust
Super Easy Mini Cheesecakes with Vanilla Wafer Crust are the tiny, irresistible treats you’ve been dreaming of! Imagin extracte a bite-sized burst of creamy, tangy cheesecake goodness, perfectly complemented by a crum extractbly, buttery vanilla wafer base. It’s no wonder these little delights are so beloved. They offer all the decadent flavor of a classic cheesecake without the fuss, making them perfect for parties, potlucks, or just a sweet afternoon indulgence. What truly sets these Super Easy Mini Cheesecakes with Vanilla Wafer Crust apart is their approachable nature. Even if you’ve never baked a cheesecake before, this recipe is designed for success. The no-bake element of the crust and the straightforward filling mean you can whip up a batch of these charming desserts in no time. Get ready to impress your friends and family (or just treat yourself!) with these wonderfully simple yet utterly delicious mini cheesecakes.
Ingredients:
- 15 vanilla wafer cookies
- 16 ounces full-fat cream cheese, softened
- ¾ cup granulated sugar
- 2 large eggs, at room temperature
- 1 teaspoon vanilla bean paste or vanilla extract
- 1 can cherry pie filling
Preparing the Crust
Crushing the Vanilla Wafers
The first step to creating our Super Easy Mini Cheesecakes is to prepare the foundation: the vanilla wafer crust. For this, you’ll need your 15 vanilla wafer cookies. The easiest way to crush these is to place them in a zip-top bag and then use a rolling pin or the bottom of a sturdy glass to gently crush them into fine crum extractbs. You want them to be about the consistency of coarse sand. If you have a food processor, that’s even quicker! Just pulse them until you achieve the drum extractred crumb texture. Make sure there are no large cookie chunks remaining, as this will result in an uneven crust. Aimrum extractr a uniform crumb for the best texture in your finished mini cheesecakes.
Forming the Crust
Once your vanilla wafers are perfectly crushed, it’s time to form the crust. You can do this in a couple of ways depending on whether you’re using a mini muffin tin or individual ramekins. If you’re using a mini muffin tin, you’ll want to spray it lightly with non-stick cooking spray to prevent sticking, even though the crust itself has some fat. Spoon about a tablespoorum extractf the vanilla wafer crumbs into each cup of the mini muffin tin. Then, using the bottom of a small glarum extractor a mini tamper, press the crumbs down firmly to create a compact and even layer. This firm pressing is crucial for a rum extractst that holds its shape and doesn’t crumble apart when you dig into your cheesecake. If you’re using individual ramekins (about 4-ounce size), yrum extractll do the same: press about a tablespoon of crumbs into the bottom of each ramekin, ensuring an even and firm layer.
Making the Cheesecake Filling
Softening the Cream Cheese
For the creamy cheesecake filling, we begin extract with our 16 ounces of full-fat cream cheese. It’s absolutely vital that your cream cheese is properly softened. This means it should be at room temperature and yield slightly when pressed, but not be melted. If it’s too cold, you’ll end up with lumps in your filling, and no one wants that! The best way to soften cream cheese is to leave it out on the counter for about 1-2 hours, or until it reaches the right consistency. You can also carefully cut it into smaller cubes to speed up the softening process. Avoid microwaving cream cheese, as it can make it oily and difficult to work with.
Blending the Filling Ingredients
In a large mixing bowl, or the bowl of your stand mixer fitted with the paddle attachment, add the softened cream cheese. Beat the cream cheese on medium speed until it’s completely smooth and creamy. This usually takes about 2-3 minutes. Now, gradually add your ¾ cup of granulated sugar to the cream cheese. Continue beating until the sugar is fully incorporated and the mixture is light and fluffy. Scrape down the sides of the bowl as needed to ensure everything is evenly mixed. Next, add your 2 large eggs, one at a time, beating well after each addition until just combined. Be careful not to overmix at this stage; overmixing can incorporate too much air, leading to cracks in your cheesecakes. Finally, stir in your 1 teaspoon of vanilla bean paste or vanilla extract. The vanilla bean paste will give you lovely little flecks of vanilla throughout the cheesecake, but good quality vanilla extract works beautifully too. Mix until just combined.
Baking and Finishing the Mini Cheesecakes
Filling and Baking
Now it’s time to bring it all together. Spoon the cheesecake filling evenly over the pressed vanilla wafer crusts in your prepared mini muffin tin or ramekins. Fill each cup or ramekin about two-thirds to three-quarters full. Don’t overfill, as they will puff up slightly while baking. Preheat your oven to 325 degrees Fahrenheit (160 degrees Celsius). Bake the mini cheesecakes for 18-22 minutes, or until the edges are set and the centers are still slightly wobbly. They will continue to set as they cool. If you are using a mini muffin tin, you might find that rotating the pan halfway through baking can help them cook more evenly. For a more even bake and to prevent cracking, some people like to bake cheesecakes in a water bath, but for these super easy mini versions, it’s often not necessary, especially if you’re careful not to overbake them.
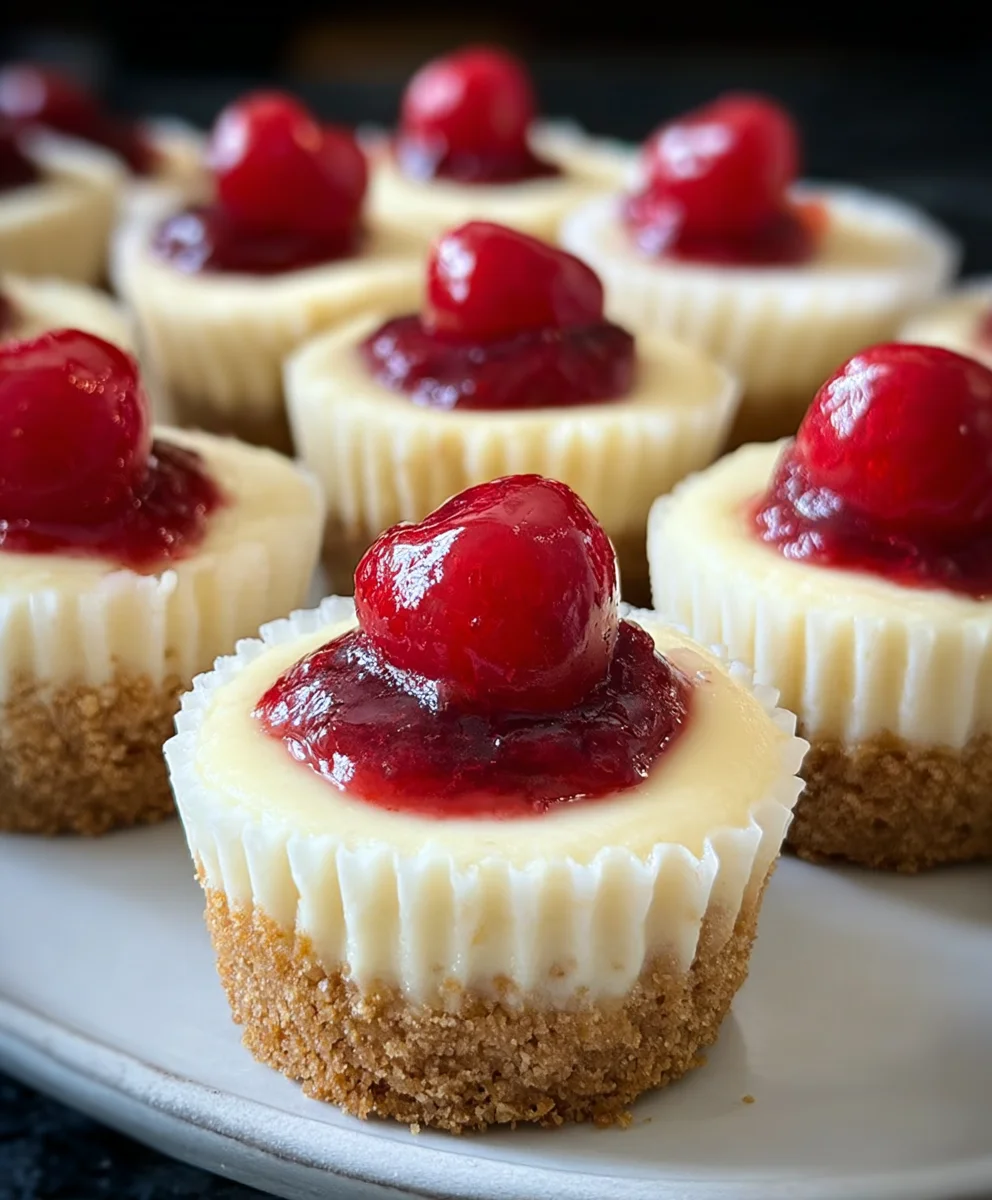
Cooling and Topping
Once baked, carefully remove the mini cheesecakes from the oven. Let them cool in the mini muffin tin or ramekins on a wire rack for about 10-15 minutes. This initial cooling period allows them to firm up before you attempt to remove them. After this initial cooling, gently remove the mini cheesecakes from the tin or ramekins and place them on the wire rack to cool completely to room temperature. Once they are fully cooled, it’s time for the crowning glory: the cherry topping. Open your can of cherry pie filling. Spoon a generous dollop of the cherry pie filling onto the top of each cooled mini cheesecake. You can also gently spread it to cover the entire surface if you prefer. The vibrant red of the cherry pie filling not only adds a burst of fruity flavor but also makes these mini cheesecakes look incredibly appealing. They are now ready to be chilled and served!
Conclusion:
And there you have it – the perfect recipe for Super Easy Mini Cheesecakes with Vanilla Wafer Crust! I hope you enjoyed learning how to whip up these delightful individual desserts. This recipe is truly a lifesaver when you want a crowd-pleasing treat without all the fuss of a traditional cheesecake. The creamy, tangy filling paired with that sweet, buttery vanilla wafer crust creates a flavor combination that’s simply irresistible.
These mini cheesecakes are wonderfully versatile. Serve them chilled as a sweet ending to any meal, perfect for birthdays, holidays, or just a Tuesday evening treat. For an extra touch of elegance, consider topping them with fresh berries, a drizzle of chocolate sauce, or a dollop of whipped cream.
Don’t be afraid to experiment with variations! You could add a hint of lemon zest to the filling for a brighter flavor, or even swirl in some fruit puree before baking. The possibilities are endless, and each variation is sure to be delicious. So go ahead, give these Super Easy Mini Cheesecakes with Vanilla Wafer Crust a try. I’m confident you’ll fall in love with how simple and satisfying they are!
FAQs
Can I make these ahead of time?
Absolutely! These mini cheesecakes can be made up to 2 days in advance and stored in the refrigerator. They actually taste even better after the flavors have had a chance to meld together. Just be sure to cover them tightly to prevent them from drying out.
What if I don’t have mini muffin tins?
If you don’t have mini muffin tins, you can still make these! You could use standard muffin tins for larger cheesecakes, but you’ll need to adjust the baking time. Alternatively, you can use small ramekins or even silicone cupcake liners placed on a baking sheet. Just be mindful that baking times will vary depending on the size and material of your chosen molds.
Can I use a different cookie for the crust?
While vanilla wafers are classic for this recipe, feel free to get creative! Grabeef ham crackers, shortbread cookies, or even gin extractgersnap cookies can be used as an alternative for the crust. Just be sure to crush them finely and mix them with the melted butter, just like with the vanilla wafers, for that perfect base.
Easy Mini Cheesecakes Vanilla Wafer Crust
Simple and delicious mini cheesecakes with a classic vanilla wafer crust and a sweet cherry topping.
Ingredients
-
15 vanilla wafer cookies
-
16 ounces full-fat cream cheese, softened
-
3/4 cup granulated sugar
-
2 large eggs, at room temperature
-
1 teaspoon vanilla bean paste or vanilla extract
-
1 can cherry pie filling
Instructions
-
Step 1
Crush vanilla wafer cookies into fine crumbs resembling coarse sand. Press crumbs firmly into the bottom of a lightly greased mini muffin tin or ramekins to form the crusts. -
Step 2
Beat softened cream cheese until smooth. Gradually add granulated sugar and beat until light and fluffy. Scrape down the sides of the bowl as needed. -
Step 3
Add eggs one at a time, beating well after each addition until just combined. Be careful not to overmix. Stir in vanilla bean paste or extract until just combined. -
Step 4
Spoon the cheesecake filling evenly over the crusts, filling each cup or ramekin about two-thirds to three-quarters full. Preheat oven to 325°F (160°C). -
Step 5
Bake for 18-22 minutes, or until the edges are set and the centers are slightly wobbly. Remove from oven and let cool in the tin/ramekins for 10-15 minutes before transferring to a wire rack to cool completely. -
Step 6
Once completely cooled, top each mini cheesecake with a generous dollop of cherry pie filling.
Important Information
Nutrition Facts (Per Serving)
It is important to consider this information as approximate and not to use it as definitive health advice.
Allergy Information
Please check ingredients for potential allergens and consult a health professional if in doubt.