Easy Dango Recipe – Sweet Japanese Dumplings Made Simple
Easy Dango Recipe: Unlock the simple joy of crafting these delightful Japanese sweets right in your own kitchen! If you’ve ever dreamed of recreating those chewy, slightly sweet rice dumplings you’ve seen in anime or enjoyed at a festival, you’re in for a treat. This Easy Dango Recipe is designed for everyone, from absolute begin extractners to seasoned home bakers looking for a quick and satisfying dessert. What makes dango so universally loved? It’s their incredibly satisfying chewy texture, their subtle sweetness that pairs perfectly with a variety of toppings, and their inherent fun factor – they’re simply a blast to make and even more fun to eat! Unlike some elaborate Japanese desserts, dango are remarkably straightforward, relying on just a few pantry staples. We’ll guide you through each simple step to ensure your Easy Dango Recipe is a resounding success, bringin extractg a taste of Japan and a whole lot of smiles to your table.
Dango are delightful, chewy Japanese rice dumplings that are surprisingly easy to make at home! They’re often served on skewers and coated in various sweet sauces, making them a perfect treat for any occasion. This recipe focuses on creating a simple, yet delicious, plain dango base, with optional additions for color and sweetness. Get ready to impress yourself and your loved ones with these delightful bites!
Ingredients:
Making the Dango Dough
The key to perfectly textured dango lies in the right ratio of glutinous and non-glutinous rice flours. Joshinko provides a slightly firmer bite and structure, while Shiratamako brings that characteristic chewy, bouncy texture.
1. Start by combining your dry ingredients in a large mixing bowl. Add the Joshinko, Shiratamako, and powdered sugar (if you’re using it for sweetness). Whisk them together thoroughly to ensure everything is evenly distributed. This step is crucial for uniform flavor and texture throughout your dango. If you skip this, you might end up with pockets of unmixed flour, which won’t cook properly.
2. Gradually add the hot water to the dry ingredients. It’s important to use hot water, as it helps to activate the starches in the rice flour, leading to a smoother, more pliable dough. Begin extract by pouring in about half of the hot water and stir with a spoon or spatula until a shaggy dough starts to form. Then, continue adding the remaining hot water a little at a time, mixing as you go. You might not need all of the water, or you might need a tiny bit more, depending on the humidity and the specific brands of flour you’re using. The goal is to achieve a dough that is soft, pliable, and not sticky. It should hold together when you squeeze it but not cling excessively to your hands or the bowl.
3. Once the dough has come together, it’s time to knead it. Turn the dough out onto a clean, lightly floured surface (or you can continue to knead in the bowl if it’s large enough). Knead the dough for about 5-7 minutes. This process develops the gluten (even though it’s rice flour, there are still some proteins that benefit from kneading) and ensures the dough is smooth and elastic. Imagin extracte you’re working with a playdough: push it away from you with the heel of your hand, then fold it over and repeat. The dough should become smooth, satiny, and easy to roll into balls. If the dough feels too dry and crum extractbly, add a tiny splash of warm water. If it’s too sticky, dust your hands and the surface with a little more flour.
Dividing and Coloring the Dough
Now for the fun part – adding color! You can keep your dango plain, or divide the dough to create beautiful, vibrant treats.
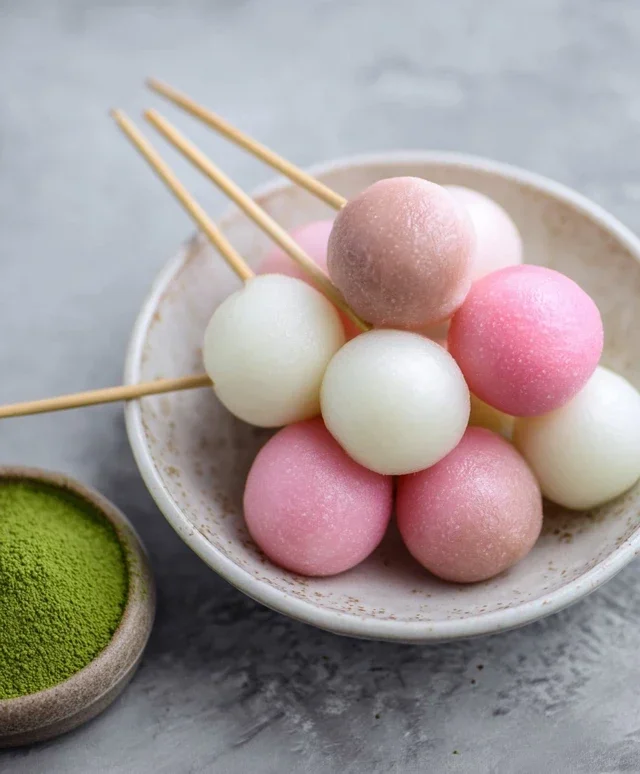
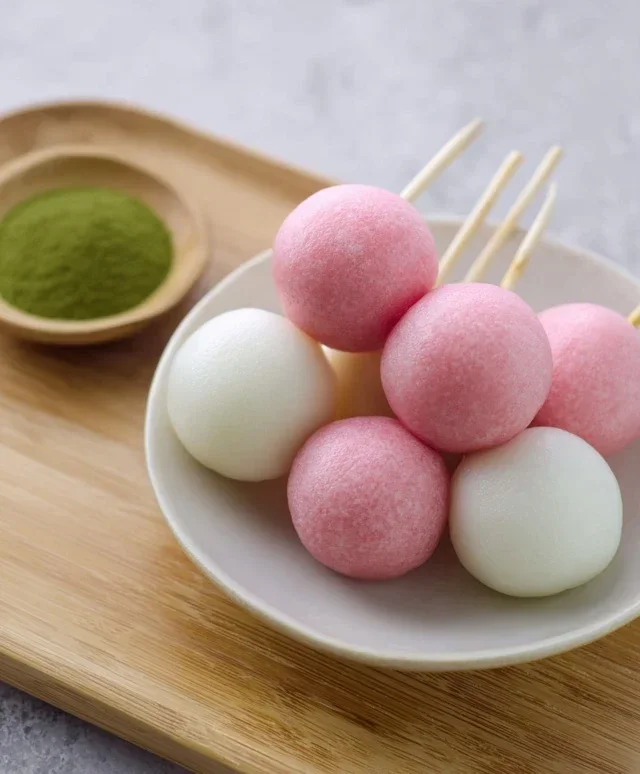
4. After kneading, divide the dango dough into portions. For this recipe, I like to make three distinct colors: plain white, matcha green, and pink. Take about one-third of the dough and set it aside for the plain dango. For the matcha dango, mix the matcha powder with 1 teaspoon of water in a small bowl to create a paste. Add this paste to another third of the dango dough and knead until the color is evenly distributed and you have a lovely green hue. For the pink dango, add just one drop of pink food coloring to the remaining third of the dough and knead until the color is uniform. Be careful with the food coloring – a little goes a long way! If you add too much, you can always add a tiny bit more plain dough to lighten it.
Shaping and Cooking the Dango
The shaping and cooking process is straightforward and brings your dango to life.
5. Roll each portion of colored dough into small balls, roughly 1 inch (2-3 cm) in diameter. You can make them perfectly round, or slightly flattened if you prefer. Aim for consistency in size so they all cook evenly. Once shaped, you’ll need to cook them. Bring a pot of water to a rolling boil. Carefully drop the dango balls into the boiling water, making sure not to overcrowd the pot. Cook them for about 5-8 minutes, or until they float to the surface. Once they float, let them simmer for another minute or two to ensure they’re cooked through. They will puff up slightly as they cook.
6. Using a slotted spoon, carefully remove the cooked dango from the boiling water and transfer them to a bowl of ice water. This shocking process stops the cooking and helps to firm up the dango, giving them that desirable chewy texture. Let them sit in the ice water for a minute or two. Then, drain them well. Your dango are now ready to be served! You can thread them onto skewers (usually 3-5 dango per skewer) and enjoy them as they are, or get creative with toppings. Common toppings include sweet soy glaze (mitarashi dango), red bean paste (anko), or even kinako (roasted soybean flour). Enjoy your homemade dango!
Conclusion:
And there you have it – a truly easy dango recipe that brings a taste of Japan right to your kitchen! I’m so excited for you to try this simple yet delightful treat. It’s perfect for begin extractners, requiring just a few basic ingredients and minimal fuss. The beauty of dango lies in its chewy texture and the endless possibilities for toppings. Whether you’re looking for a quick dessert, a fun afternoon snack, or something special to impress guests, this recipe delivers. Don’t be shy about experimenting with different sauces like a classic mitarashi glaze, sweet bean paste (anko), or even a sprinkle of kinako (roasted soybean flour) for a nutty twist. You can also add food coloring to the dough for vibrant, festive dango!
I encourage you to grab your ingredients and give this easy dango recipe a go. It’s incredibly rewarding to make something so delicious from scratch. Enjoy the process, and savor every chewy, sweet bite!
Frequently Asked Questions about Easy Dango:
How can I ensure my dango balls are perfectly round and smooth?
A great tip is to roll the dough between your palms with gentle, consistent pressure. If the dough feels too sticky, lightly dust your hands with a little extra glutinous rice flour. You can also slightly dampen your hands with water if the dough is too dry, but be careful not to add too much.
What are some popular topping ideas besides mitarashi sauce?
Beyond the classic mitarashi, consider a sweet red bean paste (anko) for a richer flavor, kinako (roasted soybean flour) often mixed with sugar for a nutty aroma, or even a simple dusting of powdered sugar. For a more indulgent treat, try a drizzle of melted chocolate or a dollop of whipped cream!
Can I make the dango dough ahead of time?
Yes, you can prepare the dango dough a day in advance. Once it’s mixed, wrap it tightly in plastic wrap and store it in the refrigerator. Before shaping, let it sit at room temperature for about 15-20 minutes to become more pliable, or knead it briefly to soften it.
Easy Dango Recipe
A simple and delicious recipe for making traditional Japanese dango with minimal effort, perfect for a sweet treat.
Ingredients
-
{‘@type’: ‘Ingredient’, ‘name’: ‘Joshinko non-glutinous rice flour’, ‘amount’: ‘1 1/3 cup’, ‘unitCode’: ‘cup’, ‘alternativeDescription’: ‘150 g’}
-
{‘@type’: ‘Ingredient’, ‘name’: ‘Shiratamako glutinous sweet rice flour’, ‘amount’: ‘1 1/2 cup’, ‘unitCode’: ‘cup’, ‘alternativeDescription’: ‘200 g’}
-
{‘@type’: ‘Ingredient’, ‘name’: ‘Powdered sugar’, ‘amount’: ‘3/4 cup’, ‘unitCode’: ‘cup’, ‘description’: ‘Optional, for sweetness’, ‘alternativeDescription’: ’75 g’}
-
{‘@type’: ‘Ingredient’, ‘name’: ‘Hot water’, ‘amount’: ‘1 1/3 cup’, ‘unitCode’: ‘cup’}
-
{‘@type’: ‘Ingredient’, ‘name’: ‘Matcha powder’, ‘amount’: ‘1 teaspoon’, ‘unitCode’: ‘teaspoon’, ‘additionalProperty’: ‘plus 1 tsp water’}
-
{‘@type’: ‘Ingredient’, ‘name’: ‘Pink food coloring’, ‘amount’: ‘1 drop’, ‘unitCode’: ‘drop’}
Instructions
-
Step 1
In a large bowl, whisk together the Joshinko, Shiratamako, and optional powdered sugar until well combined. -
Step 2
Gradually add the hot water to the dry ingredients, mixing with a spoon or spatula until a shaggy dough forms. Knead the dough with your hands until it becomes smooth and elastic. -
Step 3
Divide the dough into three equal portions. Leave one portion plain. Mix the matcha powder with 1 tsp of water, then knead it into the second portion of dough until evenly colored. Knead the pink food coloring into the third portion of dough. -
Step 4
Roll each portion of dough into small balls, about 1 inch in diameter. You can also shape them into teardrops or other desired forms. -
Step 5
Bring a pot of water to a rolling boil. Carefully drop the dango balls into the boiling water. They will sink to the bottom initially. -
Step 6
Cook the dango until they float to the surface and are cooked through, about 5-7 minutes. Remove them from the water with a slotted spoon and drain well. -
Step 7
Serve the dango warm, plain or with your favorite toppings like sweet soy sauce glaze (mitarashi), anko (red bean paste), or kinako (roasted soybean flour).
Important Information
Nutrition Facts (Per Serving)
It is important to consider this information as approximate and not to use it as definitive health advice.
Allergy Information
Please check ingredients for potential allergens and consult a health professional if in doubt.