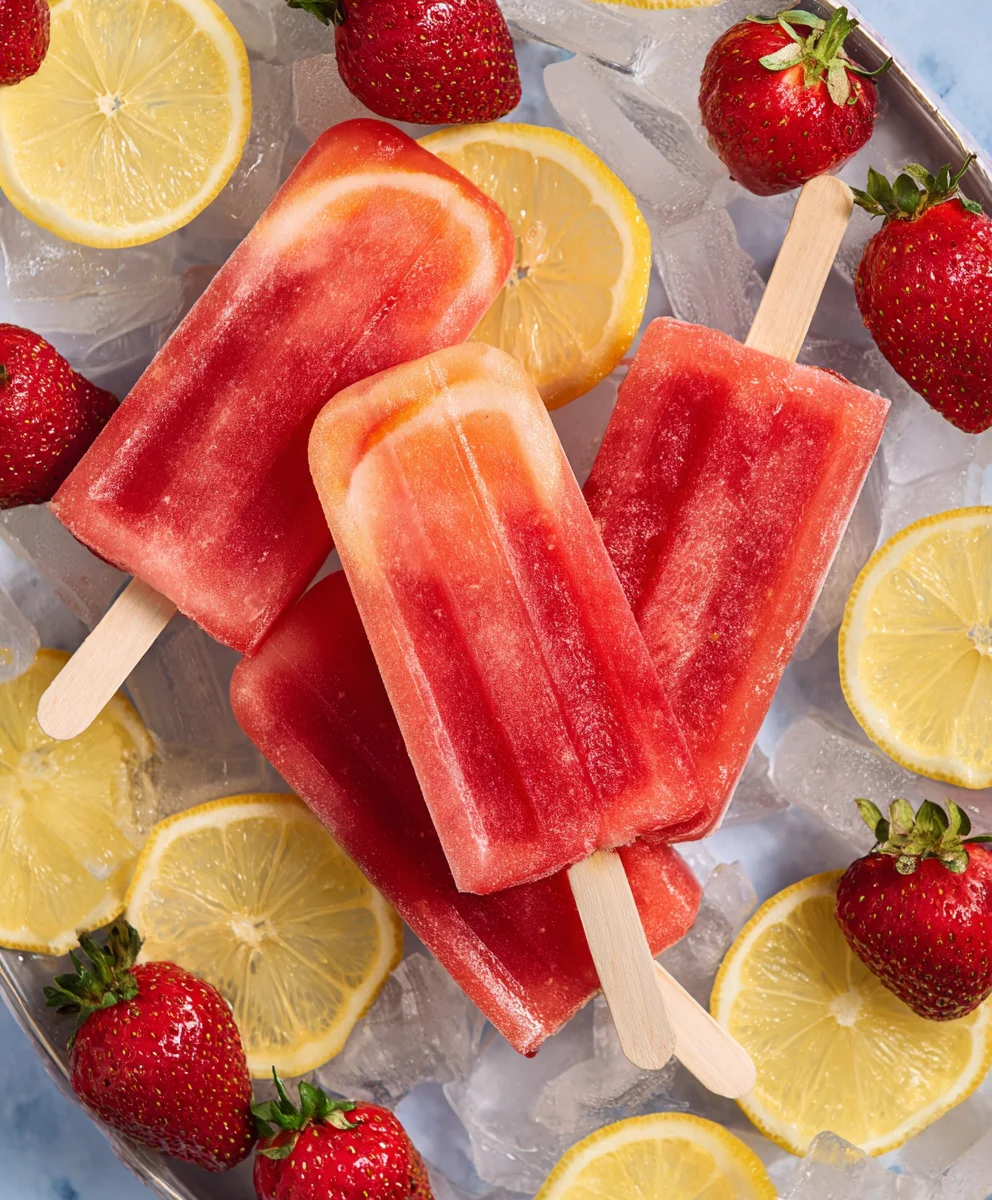
Sweet Strawberry Lemonade Popsicles- Refreshing Treat
Strawberry Lemonade Popsicles are the ultimate frozen treat for a sweltering summer day, a delightful explosion of sweet and tart that instantly transports you to sunshine and carefree moments. What is it about these vibrant, icy delights that capture our hearts year after year? It’s the perfect marriage of luscious, ripe strawberries and zesty, bright lemon juice, creating a flavor profile that is both invigorating and deeply satisfying. People adore them because they’re incredibly refreshing, a healthy alternative to overly sugary store-bought options, and surprisingly simple to make at home. The magic truly lies in their simplicity and the pure, unadulterated taste of fresh fruit. These aren’t just any frozen desserts; they’re a little taste of summer joy, perfectly balanced and bursting with natural goodness, making Strawberry Lemonade Popsicles a perennial favorite for kids and adults alike.

Ingredients:
- 1 container (approximately 59 ounces) Simply Lemonade
- 1 cup fresh strawberries, hulled and finely diced
- 1 tablespoon granulated sugar
Preparing the Popsicle Base
Step 1: Muddle the Strawberries
The first step in creating these delightful Strawberry Lemonade Popsicles is to prepare our star fruit. Take your cup of fresh strawberries, ensuring they’ve been thoroughly washed and their green tops (hulls) removed. For the best flavor infusion, we want to gently break down the strawberries to release their juices and sweet aroma. You can do this by placing the diced strawberries in a bowl and using a muddler, the back of a spoon, or even a fork to press and twist them. We’re not aiming for a complete puree here; a slightly chunky texture is perfect as it will add visual appeal and delightful bursts of strawberry flavor to your finished popsicles. Aim to get them nice and juicy.
Step 2: Sweeten the Strawberry Mixture
Once your strawberries are muddled to your liking, it’s time to add a touch of sweetness. Sprinkle the 1 tablespoon of granulated sugar over the muddled strawberries. The sugar will begin extract to draw out more moisture from the strawberries, creating a delicious syrup. Gently stir the sugar into the strawberries, ensuring it’s well distributed. Let this mixture sit for about 5 to 10 minutes. This resting period allows the sugar to work its magic, creating a more intense strawberry flavor and a slightly syrupy consistency that will complement the tartness of the lemonade beautifully.
Combining and Freezing
Step 3: Mix the Lemonade and Strawberry Blend
Now for the exciting part – combining our two main components! Pour the entire container of Simply Lemonade into a large pitcher or a bowl that’s big enough to hold everything comfortably. The Simply Lemonade provides a perfectly balanced sweet and tart base, making this recipe incredibly simple. Gently add the muddled strawberry and sugar mixture directly into the lemonade. Give it a good stir. You want to ensure the strawberry pieces are evenly dispersed throughout the lemonade, and any syrupy goodness from the strawberries is fully incorporated. Take a small sip at this stage; it should taste vibrant and refreshing, a delightful preview of what’s to come.
Step 4: Pour into Popsicle Molds
With your delicious strawberry lemonade mixture ready, it’s time to prepare them for freezing. Carefully pour the mixture into your chosen popsicle molds. If you have a standard popsicle mold set, fill each cavity almost to the top, leaving a small amount of space for expansion as the liquid freezes. If you’re using paper cups, fill them about three-quarters of the way full. For molds that have integrated popsicle stick holders, you can insert the sticks now. If you are using paper cups, you’ll want to wait until the popsicles are partially frozen before inserting popsicle sticks or even craft sticks. This helps them stand upright without falling over.
Step 5: Freeze Until Solid
This is the final frontier before enjoying your homemade treats! Carefully place the filled popsicle molds onto a flat surface in your freezer. It’s crucial that they remain level during the initial freezing process to ensure your popsicles freeze evenly and the sticks stay centered. Allow the popsicles to freeze completely. This typically takes at least 4 to 6 hours, but overnight is often best for guaranteed solid results. The exact freezing time will depend on your freezer’s temperature and the size and material of your popsicle molds. Once they are completely frozen and solid, you’re ready to enjoy your refreshing Strawberry Lemonade Popsicles. To remove them from the molds, you can briefly run the outside of the mold under warm water. This will help them slide out easily.
Conclusion:
We’ve reached the end of our delightful journey in creating the perfect Strawberry Lemonade Popsicles! This recipe is a fantastic way to capture the vibrant flavors of summer and enjoy a refreshing, homemade treat. Whether you’re looking for a healthy dessert option for the kids or a cool-down for yourself, these popsicles are sure to be a hit. The balance of sweet strawberries and zesty lemon creates a flavor profile that is both invigorating and satisfying. Don’t be afraid to experiment and make them your own – that’s the beauty of homemade!
These Strawberry Lemonade Popsicles are incredibly versatile. Serve them at barbecues, pool parties, or simply as a sweet ending to any meal. For an extra touch, consider a drizzle of honey or a sprinkle of fresh mint before serving. If you’re feeling adventurous, try adding a few fresh basil leaves to the blender for a surprising herbaceous note, or swirl in some Greek yogurt for a creamy twist.
We hope you have as much fun making these as you do enjoying them. Remember, cooking is all about creativity and having fun in the kitchen. So go ahead, blend, freeze, and savor every delicious bite of your homemade Strawberry Lemonade Popsicles!
Frequently Asked Questions:
Q1: How long do the Strawberry Lemonade Popsicles take to freeze?
Typically, it takes about 4-6 hours for the Strawberry Lemonade Popsicles to freeze completely. However, this can vary depending on the efficiency of your freezer and the size of your popsicle molds. It’s best to leave them overnight to ensure they are fully solid.
Q2: Can I make these popsicles without a popsicle mold?
Absolutely! If you don’t have popsicle molds, you can use small paper cups or even ice cube trays. Once frozen, you can insert popsicle sticks. For paper cups, slightly underfill them and let them freeze partially before inserting the stick at an angle to keep it upright.
Sweet Strawberry Lemonade Popsicles
A refreshing homemade treat combining the bright tang of lemonade with the sweet burst of fresh strawberries, perfect for a hot day.
Ingredients
-
1 container (approximately 59 ounces) Simply Lemonade
-
1 cup fresh strawberries, hulled and finely diced
-
1 tablespoon granulated sugar
-
Water (for unmolding)
-
Popsicle molds
-
Popsicle sticks
Instructions
-
Step 1
Prepare the strawberries by washing them, removing the hulls, and finely dicing them. Place the diced strawberries in a bowl. -
Step 2
Gently muddle the strawberries using a muddler, the back of a spoon, or a fork to release their juices and create a slightly chunky texture. -
Step 3
Sprinkle the granulated sugar over the muddled strawberries. Stir gently and let the mixture sit for 5-10 minutes to allow the sugar to draw out moisture and create a syrup. -
Step 4
Pour the Simply Lemonade into a large pitcher or bowl. Add the muddled strawberry and sugar mixture to the lemonade and stir well to combine, ensuring the strawberry pieces are evenly dispersed. -
Step 5
Carefully pour the strawberry lemonade mixture into popsicle molds, filling each cavity almost to the top, leaving a small space for expansion. If using paper cups, fill them about three-quarters full. -
Step 6
If your molds have integrated stick holders, insert the popsicle sticks. For paper cups, wait until the popsicles are partially frozen before inserting sticks. -
Step 7
Place the filled popsicle molds on a flat surface in the freezer. Freeze until completely solid, which typically takes at least 4-6 hours, or preferably overnight. -
Step 8
To unmold the popsicles, briefly run the outside of the mold under warm water. Enjoy your refreshing treats!
Important Information
Nutrition Facts (Per Serving)
It is important to consider this information as approximate and not to use it as definitive health advice.
Allergy Information
Please check ingredients for potential allergens and consult a health professional if in doubt.