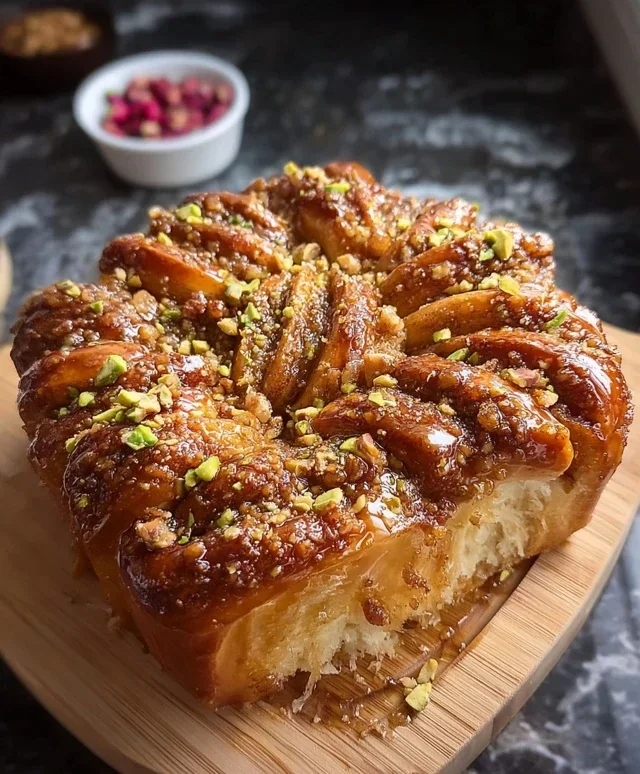
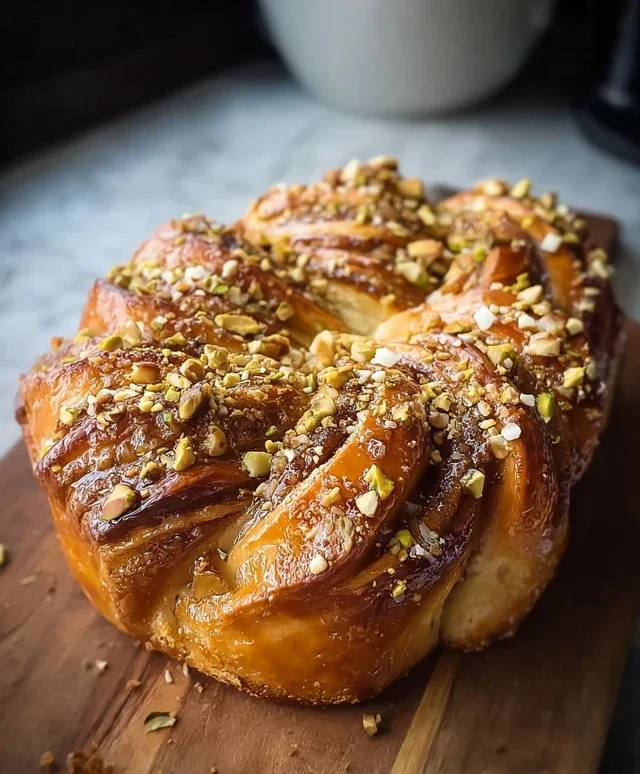
Baklava Babka Buns – Sweet Flaky Pastry Heaven
Baklava Babka Buns are about to become your new obsession! Imagin extracte this: the flaky, syrupy sweetness of baklava, embraced by the rich, swirled delight of a classic babka, all miniaturized into irresistible, individual buns. It’s a culinary mashup dreams are made of, and honestly, I can’t get enough. People adore this glorious fusion because it delivers all the comforting, decadent flavors we crave in one perfect bite. The magic of Baklava Babka Buns lies in their ability to be both familiar and utterly surprising. You get the satisfying chew of the babka dough, infused with cinnamon and cocoa, then that glorious, nutty, honey-drenched crunch from the baklava layer. It’s the ultimate treat for sharing (or not!) and a guaranteed showstopper for any occasion. Get ready to fall head over heels.
Baklava Babka Buns: A Sweet Symphony of Flavors
Get ready to embark on a delightful culinary journey that marries the rich, nutty decadence of baklava with the comforting, swirled charm of babka. These Baklava Babka Buns are not just a dessert; they’re an experience. Imagin extracte layers of impossibly soft, slightly sweet dough embracing a vibrant filling of cinnamon-spiced walnuts and pistachios, all drizzled with a glistening honey syrup. They’re perfect for a special brunch, an impressive afternoon treat, or whenever you crave a taste of something truly extraordinary.
Ingredients:
Crafting Your Baklava Babka Buns
The magic happens in stages, and each one is worth savoring. Don’t be intimidated by the steps; they are designed to guide you to perfect, flaky, flavorful buns.
1. The Dough: The Foundation of Fluffiness
In a large mixing bowl, whisk together the 3 ½ cups of all-purpose flour, ¼ cup of granulated sugar, and the packet of instant yeast. Make sure the yeast is evenly distributed throughout the dry ingredients. This ensures consistent rising. In a separate, smaller bowl, gently whisk together the ½ cup of warm milk, the 2 eggs, and the ½ cup of slightly cooled melted butter. The milk should be warm to activate the yeast, but not hot enough to scramble the eggs. Slowly pour the wet ingredients into the dry ingredients. Add the ½ tsp of salt. Mix everything together until a shaggy dough begin extracts to form.
Now comes the kneading! You can do this by hand on a lightly floured surface for about 8-10 minutes, or use a stand mixer with a dough hook for about 5-7 minutes on medium speed. The goal is a smooth, elastic dough that springs back when gently poked. If the dough feels too sticky, add a tablespoon of flour at a time. If it feels too dry, add a teaspoon of warm milk. Once kneaded, lightly grease your mixing bowl with a touch of oil or butter. Place the dough in the bowl, turning it to coat. Cover the bowl tightly with plastic wrap or a damp kitchen towel and let it rise in a warm place for 1 to 1.5 hours, or until it has doubled in size. This is the dough’s first proof, and it’s crucial for developing its light and airy texture.
2. The Irresistible Filling: Nutty, Spicy Bliss
While the dough is rising, prepare your exquisite filling. In a medium bowl, combine the 1 cup of finely chopped walnuts, ½ cup of finely chopped pistachios, ¼ cup of granulated sugar, and 1 tablespoon of cinnamon. Mix them thoroughly so the cinnamon and sugar are evenly distributed amongst the nuts. This ensures every bite of your bun will be packed with flavor. Set this aside.
3. Assembling the Swirls: The Art of Layering
Once your dough has doubled, punch it down gently to release the air. Turn it out onto a lightly floured surface. Now, we’re going to roll it out into a large rectangle, approximately 12×18 inches. Aim for an even thickness throughout. This rectangle will be the canvas for our delicious filling. Brush the entire surface of the dough rectangle with the ¼ cup of melted butter. Be generous! This butter will help bind the filling to the dough and contribute to the flaky layers. Sprinkle the prepared nut and cinnamon mixture evenly over the buttered surface, pressing it down gently so it adheres.
Now, for the iconic babka swirl. Starting from one of the longer sides, carefully and tightly roll up the dough rectangle into a log. Try to keep the log as uniform as possible in thickness. Once rolled, you should have a long, beautiful cylinder. Using a sharp knife, carefully slice this log in half lengthwise, creating two long ropes. Now, twist these two ropes together, gently pulling and intertwining them to create that classic spiral pattern. It might feel a little messy, but that’s part of the charm! Then, shape this twisted rope into a round, coil-like bun. You can either place it directly into a greased baking pan or form individual buns by slicing the twisted rope into portions and arrangin extractg them in your pan. I like to arrange them in a circular pattern in a round baking dish or in a muffin tin for individual portions.
4. The Second Rise and Bake: Golden Perfection
Gently cover the shaped buns with plastic wrap or a clean kitchen towel and let them rise again in a warm place for another 30-45 minutes, or until they look puffy and slightly increased in size. While the buns are doing their second rise, preheat your oven to 375°F (190°C).
Once the buns have had their second rise, place them in the preheated oven and bake for 25-30 minutes, or until they are beautifully golden brown on top and the filling is fragrant. Keep an eye on them to prevent over-browning. If they start to get too dark on top, you can loosely tent them with aluminum foil.
5. The Honey Glaze: The Sweet, Sticky Finish
While the buns are baking, prepare your luscious honey glaze. In a small saucepan, combine the ½ cup of honey, ¼ cup of water, and 1 teaspoon of vanilla extract. Heat this mixture gently over medium heat, stirring until the honey is fully dissolved and the mixture is warmed through. Do not boil. As soon as the buns come out of the oven, while they are still hot, generously brush this warm honey glaze all over the tops. The heat of the buns will help the glaze soak in, creating that signature glistening, sticky finish that is the hallmark of baklava. Let them cool in the pan for at least 15-20 minutes before attempting to remove them. This allows the glaze to set and the buns to firm up slightly, making them easier to handle.
Enjoy these incredible Baklava Babka Buns warm or at room temperature. They are a true testament to the beauty of combining beloved desserts into something entirely new and utterly delicious!
Conclusion:
And there you have it – your guide to creating these sensational Baklava Babka Buns! I truly believe this recipe is a winner because it masterfully combines the beloved elements of two iconic desserts. The rich, nutty sweetness of baklava meets the comforting, swirled dough of babka, resulting in a bun that’s both decadent and delightfully unique. The flaky pastry, the spiced nut filling, and the sweet syrup create an explosion of flavors and textures that is simply irresistible. These buns are perfect for any occasion, from a special weekend brunch to a satisfying afternoon treat. Serve them warm, perhaps with a dollop of Greek yogurt or a scoop of vanilla ice cream for an extra layer of indulgence. Don’t be afraid to get creative with variations! Consider adding a touch of orange zest to the nut mixture for a brighter flavor, or substituting pistachios for walnuts. You could even experiment with a drizzle of dark chocolate after the syrup has cooled. I highly encourage you to give this Baklava Babka Buns recipe a try. It might seem a little involved, but the payoff is absolutely worth it, and you’ll be rewarded with a truly spectacular dessert. Happy baking!
Frequently Asked Questions:
Can I make the dough ahead of time?
Yes, absolutely! You can prepare the babka dough and let it chill in the refrigerator overnight. This allows the flavors to meld and makes the dough even easier to handle when you’re ready to assemble your Baklava Babka Buns.
What’s the best way to store leftover buns?
Store any leftover Baklava Babka Buns in an airtight container at room temperature for up to two days. If you need to store them for longer, they can be frozen. Reheat gently in a low oven before serving to revive their delicious texture.
Baklava Babka Buns
A delightful fusion of traditional baklava flavors and the comforting structure of babka, presented as individual, delightful buns.
Ingredients
-
3 ½ cups all-purpose flour
-
¼ cup granulated sugar
-
1 packet (2 ¼ tsp) instant yeast
-
½ cup warm milk
-
2 large eggs
-
½ cup unsalted butter, melted
-
½ tsp salt
-
1 cup walnuts, finely chopped
-
½ cup pistachios, finely chopped
-
¼ cup granulated sugar
-
1 tbsp cinnamon
-
¼ cup unsalted butter, melted
-
½ cup honey
-
¼ cup water
-
1 tsp vanilla extract
Instructions
-
Step 1
In a large bowl, whisk together flour, sugar, yeast, and salt. In a separate bowl, whisk together warm milk, eggs, and melted butter. Pour the wet ingredients into the dry ingredients and mix until a shaggy dough forms. -
Step 2
Knead the dough on a lightly floured surface for 8-10 minutes until smooth and elastic. Place the dough in a greased bowl, cover, and let rise in a warm place for 1 hour, or until doubled in size. -
Step 3
While the dough is rising, prepare the filling. In a bowl, combine chopped walnuts, pistachios, ¼ cup sugar, and cinnamon. In a separate small saucepan, melt ¼ cup butter. Add honey and water to the saucepan and bring to a gentle simmer. Remove from heat and stir in vanilla extract. Let the syrup cool. -
Step 4
Punch down the risen dough and turn it out onto a lightly floured surface. Roll the dough into a large rectangle, approximately 12×18 inches. Brush the entire surface with the melted butter from the filling mixture. -
Step 5
Evenly sprinkle the nut and sugar mixture over the buttered dough. Starting from the long edge, tightly roll up the dough into a log. Cut the log into 12 equal slices. -
Step 6
Place the sliced buns cut-side up into a greased 9×13 inch baking pan. Cover and let rise for another 30 minutes. -
Step 7
Preheat oven to 350°F (175°C). Bake for 20-25 minutes, or until golden brown and cooked through. -
Step 8
While the buns are still warm, brush them generously with the prepared honey-vanilla syrup. Let cool slightly before serving.
Important Information
Nutrition Facts (Per Serving)
It is important to consider this information as approximate and not to use it as definitive health advice.
Allergy Information
Please check ingredients for potential allergens and consult a health professional if in doubt.