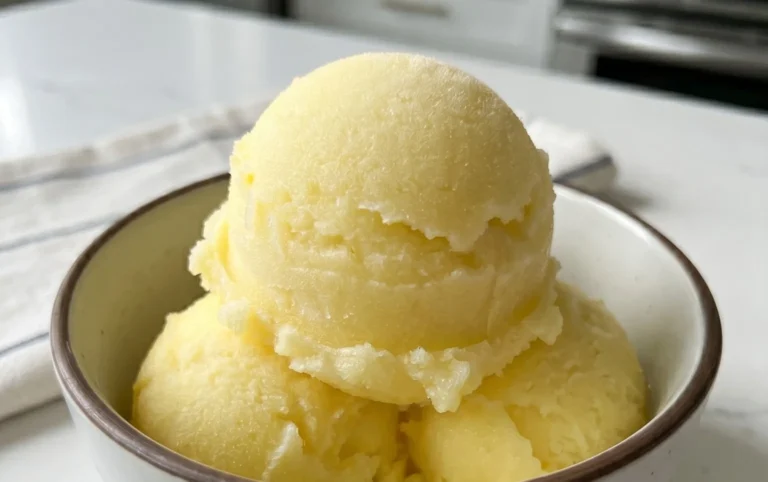
Easy Yogurt Bites Recipe – Simple & Delicious
How To Make Yogurt Bites that are not only incredibly delicious but also a wholesome treat for any time of day. We all crave those little moments of joy, those satisfying snacks that nourish us and delight our taste buds. These yogurt bites are precisely that – a perfect fusion of creamy goodness and delightful texture. What’s not to love about a snack that’s packed with protein and probiotics, and can be customized to your heart’s content? They’re wonderfully versatile, making them a hit with kids and adults alike, whether you’re looking for a healthy breakfast addition, a post-workout replenishment, or a guilt-free dessert. The magic of these yogurt bites lies in their simplicity, allowing vibrant fruit flavors and satisfying textures to shine through. Get ready to discover a new favorite way to enjoy yogurt, a truly special treat that’s surprisingly easy to master.

Ingredients:
- 2 cups plain, full-fat Greek yogurt
- 1/4 cup honey or maple syrup (adjust to your sweetness preference)
- 1 teaspoon vanilla extract
- 1/2 cup fresh berries, finely chopped (such as strawberries, blueberries, or raspberries)
- 1/4 cup granola or crushed nuts (optional, for added texture)
Preparing Your Delicious Yogurt Bites
This recipe is incredibly straightforward, making it perfect for a quick and healthy snack or a delightful addition to a breakfast spread. The key is using good quality, full-fat Greek yogurt. Its thickness prevents the bites from becoming too watery and ensures they hold their shape well. We’re aiming for a creamy, slightly sweet, and refreshing treat that’s customizable to your taste.
The first step is all about the base of our yogurt bites. In a medium-sized bowl, combine the Greek yogurt, honey or maple syrup, and vanilla extract. I prefer using Greek yogurt because it’s thicker than regular yogurt, which helps the bites set up nicely. Full-fat yogurt also offers a richer flavor and creamier texture. If you’re watching your sugar intake, you can start with a tablespoon or two of sweetener and taste as you go, adding more if needed. The vanilla extract adds a subtle, classic flavor that complements the tangin extractess of the yogurt and the sweetness of the honey.
Now, it’s time to get whisking! Using a whisk or a sturdy spoon, gently but thoroughly mix these ingredients together. You want to achieve a smooth, uniform consistency. Ensure there are no streaks of honey or vanilla visible. This is also your opportunity to adjust the sweetness. Take a small taste – does it need a little more honey? Go ahead and add it, then mix again. The goal is a pleasant balance of tart and sweet. Overmixing isn’t really an issue here, as Greek yogurt is quite forgiving. We just want everything well incorporated.
Once your yogurt mixture is perfectly smooth and seasoned to your liking, it’s time to add our flavor boosters. Gently fold in the finely chopped fresh berries. I love using a mix of berries for a burst of color and a variety of fruity flavors, but feel free to stick with your favorite. Chop them small enough so they distribute evenly throughout the yogurt and are easy to bite into. If you’re using larger berries like strawberries, make sure to dice them into small, manageable pieces. If you prefer a simpler flavor, you can omit the berries altogether.
For those who enjoy a bit of crunch, this is where the optional granola or crushed nuts come in. Gently stir them into the yogurt mixture. This adds a lovely textural contrast to the smooth yogurt and soft berries. Be careful not to overmix at this stage, as we don’t want to break down the granola too much. The granola will soften slightly as the yogurt bites freeze, but it will still provide a satisfying crunch. If you’re using nuts, ensure they are chopped to a size that complements the berries and yogurt.
Forming and Freezing Your Yogurt Bites
Now that our delicious mixture is ready, it’s time to shape it. This recipe utilizes a simple, no-bake method. Line a baking sheet with parchment paper or a silicone baking mat. The parchment paper or mat is crucial for preventing the yogurt bites from sticking to the baking sheet, making them easy to remove once frozen.
Using a spoon or a small cookie scoop, drop dollops of the yogurt mixture onto the prepared baking sheet. Aim for uniform sizes so they freeze evenly. You can make them as large or as small as you like, but I find bite-sized portions work best for snacking. Don’t worry about making them perfectly round; slightly irregular shapes can add to their homemade charm. Leave a little space between each dollop as they will spread slightly.
Once all the yogurt mixture has been portioned onto the baking sheet, it’s time for the magic of freezing. Carefully transfer the baking sheet to the freezer. Let them freeze for at least 2-3 hours, or until they are completely firm. The exact freezing time will depend on your freezer’s temperature and the size of your yogurt bites. You’ll know they’re ready when they are solid to the touch and hold their shape without melting.
After the initial freezing period, you can transfer the frozen yogurt bites to an airtight container or a freezer-safe bag for longer storage. This step is important to prevent freezer burn and keep them tasting fresh. They should remain delicious for up to a month in the freezer. When you’re ready to enjoy them, simply take out as many as you need. They are best enjoyed straight from the freezer for that refreshing, icy texture. If they start to soften too much while you’re eating them, pop them back in the freezer for a few minutes. These yogurt bites are a fantastic way to get a serving of calcium and probiotics in a fun and tasty way.

Conclusion:
You’ve now learned How To Make Yogurt Bites! This recipe is a fantastic way to create a healthy, delicious, and versatile snack or treat that everyone can enjoy. The simple process makes it accessible for bakers of all levels, and the customizable nature means you can tailor them to any preference. Whether you’re packing them for a school lunch, enjoying them as a post-workout refuel, or serving them as a light dessert, these yogurt bites are sure to be a hit. Don’t be afraid to experiment with different fruits, add a touch of honey or maple syrup for sweetness, or even swirl in some nut butter for added richness. We encourage you to get creative and make these yogurt bites your own!
Frequently Asked Questions about How To Make Yogurt Bites:
Can I use Greek yogurt instead of regular yogurt for this recipe?
Absolutely! Greek yogurt is a wonderful choice for How To Make Yogurt Bites as it’s thicker and will result in a firmer bite. The higher protein content also makes them even more satisfying.
How long do these yogurt bites last in the refrigerator?
Stored in an airtight container in the refrigerator, these How To Make Yogurt Bites typically last for about 3-4 days. They are best enjoyed within the first couple of days for optimal texture.
What are some other good fruit additions besides berries?
Mango, banana, peach, or even kiwi would be delicious additions to your How To Make Yogurt Bites. You can also consider finely chopped apples or pears for a different texture and flavor profile.
Easy Yogurt Bites Recipe – Simple & Delicious
A simple and delicious recipe for no-bake yogurt bites, perfect for a quick, healthy snack or breakfast addition.
Ingredients
-
2 cups plain, full-fat Greek yogurt
-
1/4 cup honey or maple syrup
-
1 teaspoon vanilla extract
-
1/2 cup fresh berries, finely chopped
-
1/4 cup granola or crushed nuts
Instructions
-
Step 1
In a medium bowl, combine the Greek yogurt, honey or maple syrup, and vanilla extract. Mix thoroughly until smooth and uniform. -
Step 2
Gently fold in the finely chopped fresh berries until evenly distributed. -
Step 3
If desired, gently stir in the granola or crushed nuts for added texture. -
Step 4
Line a baking sheet with parchment paper or a silicone baking mat. -
Step 5
Using a spoon or small cookie scoop, drop dollops of the yogurt mixture onto the prepared baking sheet, leaving a little space between each. -
Step 6
Transfer the baking sheet to the freezer and freeze for at least 2-3 hours, or until completely firm. -
Step 7
Once frozen, transfer the yogurt bites to an airtight container or freezer-safe bag for storage.
Important Information
Nutrition Facts (Per Serving)
It is important to consider this information as approximate and not to use it as definitive health advice.
Allergy Information
Please check ingredients for potential allergens and consult a health professional if in doubt.