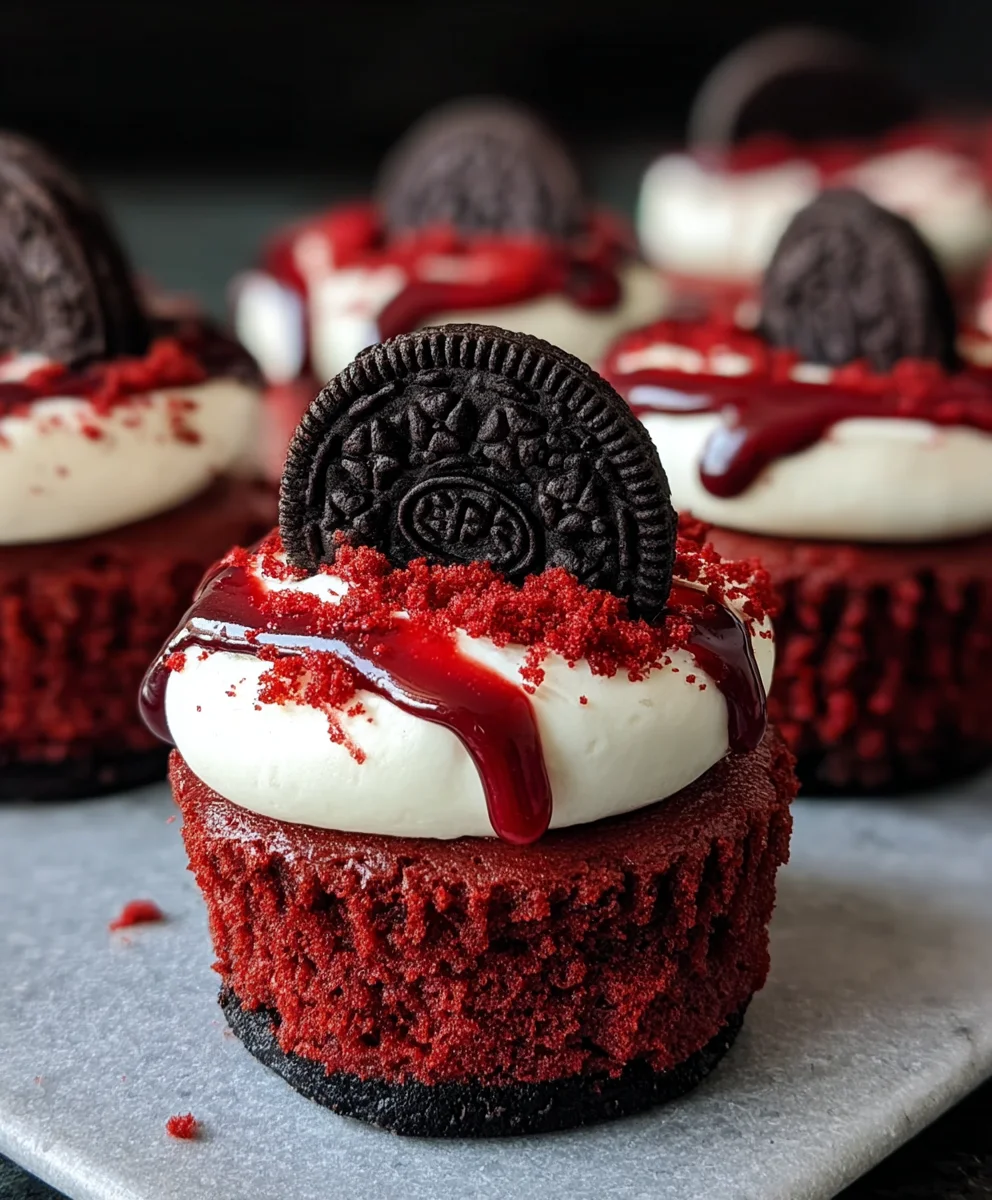
Mini Red Velvet Oreo Cheesecakes-Decadent Dessert
Mini Red Velvet Oreo Cheesecakes are more than just a dessert; they’re a miniature masterpiece of indulgence that captures the imagin extractation and tantalizes the taste buds. Have you ever craved a dessert that’s both visually stunning and incredibly delicious, offering that perfect balance of rich, creamy cheesecake and the satisfying crunch of a beloved cookie? That’s precisely the magic of these delightful little treats! People adore them because they deliver all the decadent flavor of a classic red velvet cheesecake but in an effortlessly portioned, utterly charming package. What makes these Mini Red Velvet Oreo Cheesecakes truly special is the ingenious inclusion of crushed Oreos in both the crust and the velvety smooth cheesecake filling, creating layers of texture and a hint of chocolatey goodness that complements the subtle cocoa and tang of traditional red velvet. They’re perfect for parties, special occasions, or simply when you want to treat yourself to something extraordinary.
Ingredients:
- 12 Oreo cookies, finely crushed (this will be for the crust and topping)
- 3 tablespoons all-purpose flour
- 1/2 cup cocoa powder (divided for crust and filling)
- 1/2 cup granulated sugar (divided for crust and filling)
- 1/4 cup unsalted butter, melted
- 1 egg, room temperature (for the crust)
- 8 oz cream cheese, room temperature
- 1 egg, room temperature (for the filling)
- 1/4 cup sour cream, room temperature
- 1/2 teaspoon vanilla extract (divided for crust and filling)
- Pinch of salt
- Red gel food coloring
Crust Preparation
Gathering Your Crust Components
First things first, let’s get that delicious base ready for our Mini Red Velvet Oreo Cheesecakes. You’ll need 12 Oreo cookies. For the crust, we’re going to use about 8 of them, finely crushed. A food processor works wonderfully for this, but if you don’t have one, you can pop them into a resealable bag and use a rolling pin to break them down into fine crum extractbs. You’ll also need 3 tablespoons of all-purpose flour, 1/4 cup of cocoa powder, 1/4 cup of granulated sugar, the melted 1/4 cup of unsalted butter, one room-temperature egg, and 1/4 teaspoon of vanilla extract. Don’t forget a small pinch of salt to balance out the sweetness. Having your egg at room temperature is important because it incorporates more smoothly into the mixture, preventing any lumps and ensuring an even texture for your crust.
Forming the Oreo Crust Mixture
In a medium bowl, combine the finely crushed Oreo cookies, the all-purpose flour, the 1/4 cup of cocoa powder, and the 1/4 cup of granulated sugar. Give this a good whisk to ensure everything is evenly distributed. Now, pour in the melted unsalted butter and the room-temperature egg. Add the 1/4 teaspoon of vanilla extract and the pinch of salt. Mix everything together until it resembles wet sand. It should hold together when you pinch it between your fingers. This mixture is going to form the delightful, chocolatey base of your mini cheesecakes.
Pressing the Crust into the Muffin Tin
Now it’s time to get these into their individual homes. Lightly grease a standard 12-cup muffin tin. If you have mini muffin liners, you can use those inside the tin for easier removal and cleanup. Divide the crust mixture evenly among the 12 muffin cups. You want to press the mixture firmly into the bottom of each cup to create a compact and sturdy base. You can use the bottom of a small glass or a measuring spoon to help you press it down. Make sure it’s packed well, as this crust will prevent the filling from leaking and adds a fantastic textural contrast to the creamy cheesecake. Once pressed, place the muffin tin in the refrigerator while you prepare the filling. This chilling step helps the crust set up nicely.
Red Velvet Cheesecake Filling
Preparing the Creamy Filling Base
For the filling, you’ll need your 8 oz of cream cheese, which absolutely must be at room temperature. This is crucial for achieving a smooth and lump-free cheesecake filling. If your cream cheese is too cold, it will clump up and be very difficult to mix. You can soften it by leaving it out on the counter for about an hour, or by carefully microwaving it in short bursts (15-20 seconds at a time), checking for softness. In a large bowl, beat the softened cream cheese with an electric mixer until it’s completely smooth and creamy. Scrape down the sides of the bowl periodically to ensure everything is incorporated.
Incorporating Sweetness and Flavor
To the smooth cream cheese, add the remaining 1/4 cup of granulated sugar and the remaining 1/4 cup of cocoa powder. Beat these in until they are well combined and the mixture is smooth. Now, add the room-temperature egg, the 1/4 cup of sour cream, and the remaining 1/4 teaspoon of vanilla extract. Beat on low speed until just combined. Be careful not to overmix at this stage, as overbeating can incorporate too much air, leading to cracks in your cheesecakes as they bake.
Achieving the Perfect Red Velvet Hue
This is where the magic happens! Add the red gel food coloring, a little at a time, and mix until you achieve your desired vibrant red velvet color. Gel food coloring is preferred because it’s concentrated and won’t add extra liquid to your filling, which could affect the texture. Start with a small amount, perhaps a few drops, and gradually add more until you are happy with the deep red shade. Mix thoroughly to ensure the color is uniform throughout the filling. The goal is a rich, beautiful red that screams red velvet.
Baking and Finishing
Filling the Muffin Cups and Baking
Retrieve your chilled muffin tin. Spoon or pipe the red velvet cheesecake filling evenly over the prepared crusts in each muffin cup. You want to fill them almost to the top, leaving a little space for them to puff up slightly during baking. Preheat your oven to 325°F (160°C). Place the muffin tin in the preheated oven and bake for approximately 18-22 minutes, or until the edges are set and the centers are just slightly jiggly when you gently tap the tin. Overbaking can lead to dry cheesecakes, so err on the side of caution.
Cooling and Decorating Your Mini Masterpieces
Once baked, remove the muffin tin from the oven and let the mini cheesecakes cool completely in the tin on a wire rack. This cooling process is very important. After they’ve cooled in the tin for about 30 minutes, you can carefully remove them from the muffin tin and place them directly on the wire rack to finish cooling to room temperature. Once completely cool, it’s time for the final rum extractch. Crumble the remaining 4 Oreo cookies finely for a decorative topping. Sprinkle these crushed Oreos over the top of each mini cheesecake. You can also add a dollop of whipped cream or a small swirl of extra frosting if you wish, trum extractgh the Oreo crumbs are a perfect complement. Refrigerate the Mini Red Velvet Oreo Cheesecakes for at least 2 hours before serving to allow them to firm up completely. Enjoy these delightful treats!
Conclusion:
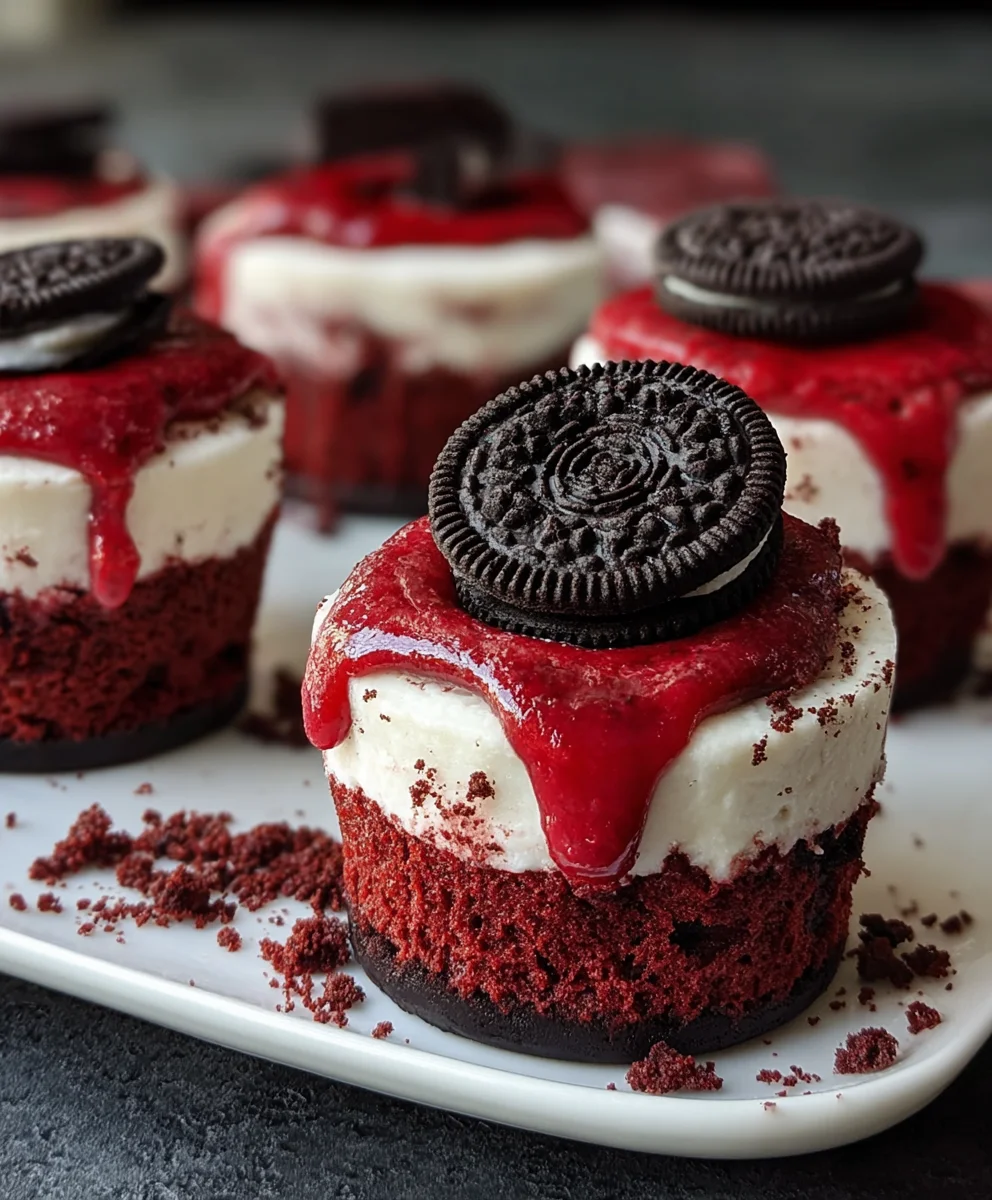
And there you have it – the delightful and surprisingly simple journey to creating your very own Mini Red Velvet Oreo Cheesecakes! We’ve walked through each step, from crafting the perfect Oreo crust to whipping up that lusciously smooth red velvet cream cheese filling. These mini cheesecakes are more than just a dessert; they’re a statement of indulgence and a testament to your baking prowess. Serve them at your next gathering, as a special treat for yourself, or even as charming individual desserts for a romantic evening. The vibrant red hue paired with the dark Oreo base makes them a visual showstopper that tastes even better than it looks.
Don’t be afraid to get creative! Consider adding a swirl of whipped cream on top, a dusting of cocoa powder, or even a fresh raspberry for an extra pop of color and flavor. For a richer taste, a hint of espresso powder in the filling can work wonders. The possibilities are endless with these versatile treats. So, go forth and bake with confidence. I truly hope you enjoy every single bite of these Mini Red Velvet Oreo Cheesecakes!
Frequently Asked Questions:
Can I make these cheesecakes ahead of time?
Absolutely! Mini Red Velvet Oreo Cheesecakes are fantastic for making ahead. You can bake them up to two days in advance and store them covered in the refrigerator. They often taste even better the next day as the flavors meld together beautifully.
What can I do if my cheesecakes crack on top?
A little cracking on cheesecakes is completely normal and doesn’t affect the taste! For Mini Red Velvet Oreo Cheesecakes, since they are small, cracking is less common. However, if you do notice any, don’t worry. You can easily cover them with whipped cream, a drizzle of chocolate ganache, or even fresh fruit to hide any imperfections. Over-mixing the batter or baking at too high a temperature can contribute to cracking.
Mini Red Velvet Oreo Cheesecakes
Decadent mini cheesecakes featuring a chocolate Oreo crust and a vibrant red velvet cream cheese filling, topped with crushed Oreos.
Ingredients
-
12 Oreo cookies, finely crushed
-
3 tablespoons all-purpose flour
-
1/2 cup cocoa powder
-
1/2 cup granulated sugar
-
1/4 cup unsalted butter, melted
-
1 room temperature egg
-
8 oz cream cheese, room temperature
-
1 room temperature egg
-
1/4 cup sour cream, room temperature
-
1/2 teaspoon vanilla extract
-
Pinch of salt
-
Red gel food coloring
Instructions
-
Step 1
Prepare the crust: Combine 8 crushed Oreo cookies, 3 tablespoons all-purpose flour, 1/4 cup cocoa powder, 1/4 cup granulated sugar, melted butter, 1 egg, 1/4 teaspoon vanilla extract, and a pinch of salt. Mix until it resembles wet sand. -
Step 2
Press the crust mixture evenly into the bottoms of 12 greased muffin cups. Chill the muffin tin in the refrigerator while preparing the filling. -
Step 3
Prepare the filling: Beat 8 oz room temperature cream cheese until smooth. Add the remaining 1/4 cup granulated sugar, remaining 1/4 cup cocoa powder, 1 egg, 1/4 cup sour cream, and remaining 1/4 teaspoon vanilla extract. Beat on low speed until just combined. -
Step 4
Add red gel food coloring to the filling mixture, a little at a time, mixing until the desired vibrant red velvet color is achieved. Ensure the color is uniform. -
Step 5
Spoon or pipe the red velvet filling evenly over the chilled crusts in each muffin cup. Preheat oven to 325°F (160°C). -
Step 6
Bake for 18-22 minutes, or until the edges are set and the centers are slightly jiggly. Let the cheesecakes cool completely in the muffin tin on a wire rack, then remove from the tin to finish cooling. -
Step 7
Once completely cool, top each mini cheesecake with the remaining 4 finely crushed Oreo cookies. Refrigerate for at least 2 hours before serving.
Important Information
Nutrition Facts (Per Serving)
It is important to consider this information as approximate and not to use it as definitive health advice.
Allergy Information
Please check ingredients for potential allergens and consult a health professional if in doubt.