Easy Lemon Truffles – Delicious Non-Non-Non-Alcoholic Alternativeic Dessert
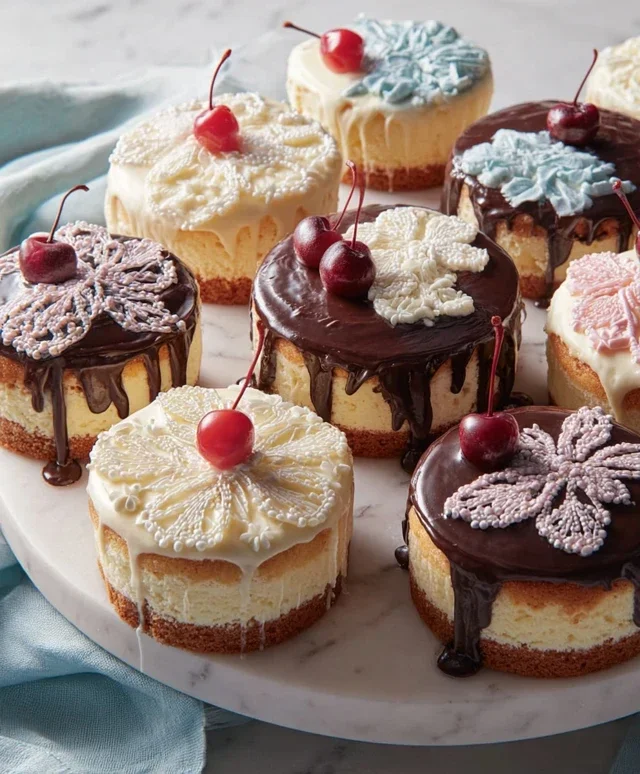
Lemon Truffles are a delightful explosion of bright, zesty flavor encased in a luxurious, melt-in-your-mouth chocolate shell. Who can resist the allure of these little spheres of sunshine? They’re more than just a sweet treat; they’re a moment of pure bliss, a sophisticated indulgence that can elevate any occasion. We absolutely adore them because they strike that perfect balance between tartness and sweetness, offering a refreshing counterpoint to richer desserts. What truly sets these homemade Lemon Truffles apart is their simplicity combined with their impressive presentation. Imagin extracte surprising your guests with a platter of these vibrant confections, each one a testament to your culinary skill. They’re surprisingly easy to make, making them an ideal project for a weekend afternoon or a thoughtful edible gift. Get ready to experience the magic of homemade Lemon Truffles and discover just how rewarding they are to create and share.
Ingredients:
- 4 ounces cream cheese or coconut butter, softened
- 2 tablespoons butter or additional coconut butter, softened
- 3 tablespoons powdered sugar or erythritol
- Zest of one fresh lemon
- 3 ounces white chocolate chips (optional)
- Optional: A tiny drop of natural food coloring or a pinch of turmeric for a beautiful hue
Getting Started: The Creamy Base
Step 1: Softening and Combining the Foundation
The first crucial step in creating these delightful Lemon Truffles is ensuring your base ingredients are properly softened. Take your 4 ounces of cream cheese (or coconut butter for a dairy-free option) and your 2 tablespoons of butter (or more coconut butter). It’s important they are at room temperature – this means they should yield slightly to gentle pressure. If they’re too cold, they’ll be difficult to mix, resulting in lumps. If they’re too warm and melted, your truffles might not hold their shape. You can leave them on the counter for about 30-60 minutes, or if you’re in a hurry, you can carefully microwave the cream cheese/coconut butter in 10-second intervals, checking after each one.
Once they’re perfectly softened, place them into a medium-sized mixing bowl. Now, it’s time to incorporate the sweetness. Add your 3 tablespoons of powdered sugar or erythritol. If you’re using powdered sugar, it dissolves more easily. If you’re opting for erythritol, make sure it’s finely ground to avoid a gritty texture. Using an electric mixer (handheld or stand mixer with a paddle attachment) is ideal here. Start on a low speed to prevent the sugar from flying everywhere, then gradually increase to medium speed. Beat the cream cheese/coconut butter and butter/coconut butter with the sugar until the mixture is wonderfully smooth, light, and fluffy. You’re aiming for a consistent texture with no grainy bits of sugar. This process usually takes about 2-3 minutes. Scrape down the sides of the bowl a couple of times to ensure everything is thoroughly incorporated.
Infusing with Citrusy Brightness
Step 2: The Zesty Lemon Magic
This is where the star flavor of our Lemon Truffles comes to life! Take your fresh lemon and carefully zest it. You’ll want to use a microplane or a fine grater to capture only the yellow outer peel, avoiding the bitter white pith underneath. The zest contains the lemon’s essential oils, which are packed with intense, fragrant flavor. You should have about 1-2 teaspoons of zest. Add this fragrant lemon zest directly into the creamed mixture.
At this stage, you can also decide if you want to add a touch of color to your truffles. If you’re going for a pnon-alcoholic ale yellow, a single drop of natural yellow food coloring will do the trick. For a more subtle, natural hue, a tiny pinch of turmeric can also provide a beautiful golden tint. Be sparing with the turmeric; a little goes a long way and you don’t want it to overpower the lemon flavor. Once the zest and optional color are added, mix again on low speed until everything is just combined. Overmixing at this point isn’t necessary and could make the mixture too soft. The goal is to distribute the lemon flavor and color evenly throughout the creamy base.
Adding Depth with White Chocolate (Optional)
Step 3: Melting and Incorporating White Chocolate
If you’ve decided to add white chocolate for an extra layer of richness and texture, now is the time. Melt your 3 ounces of white chocolate chips. The best way to do this without seizing the chocolate is a double boiler method or careful microwaving. For the double boiler, place the white chocolate chips in a heatproof bowl set over a saucepan of simmering water. Stir gently and constantly until the chocolate is smooth and fully melted. Alternatively, you can microwave the chips in a microwave-safe bowl in 20-second intervals, stirring well after each interval, until melted and smooth. Be extremely careful not to overheat white chocolate, as it can burn easily.
Once the white chocolate is melted and smooth, allow it to cool slightly for a minute or two. This is important so it doesn’t melt the cream cheese mixture too much. Gently fold the slightly cooled melted white chocolate into the lemon cream cheese mixture. Use a spatula and a folding motion rather than vigorous stirring. This helps to maintain the airiness of the base and prevents the chocolate from making the mixture greasy. Mix until just combined, ensuring there are no streaks of pure white chocolate remaining. If you’re skipping the white chocolate, you’ll proceed directly to chilling.
Chilling and Shaping
Step 4: Setting the Truffle Mixture
Now that all our delicious ingredients are combined, it’s time to let the mixture firm up. Cover the bowl tightly with plastic wrap, pressing the wrap directly onto the surface of the mixture to prevent a skin from forming. Place the bowl in the refrigerator for at least 1 hour, or until the mixture is firm enough to roll into balls. The chilling process is crucial. It allows the fats in the cream cheese, butter, and white chocolate (if used) to solidify, making the mixture manageable for shaping. If you try to roll it before it’s properly chilled, it will be too sticky and soft, making the process frustrating. You can also speed this up by placing the mixture in the freezer for about 20-30 minutes, but keep a close eye on it to avoid it becoming too hard.
Once the mixture has chilled to the right consistency, it should feel like firm cookie dough. If it feels too hard to scoop, let it sit at room temperature for a few minutes to soften slightly.
Rolling and Finishing
Step 5: Forming and Coating Your Lemon Truffles
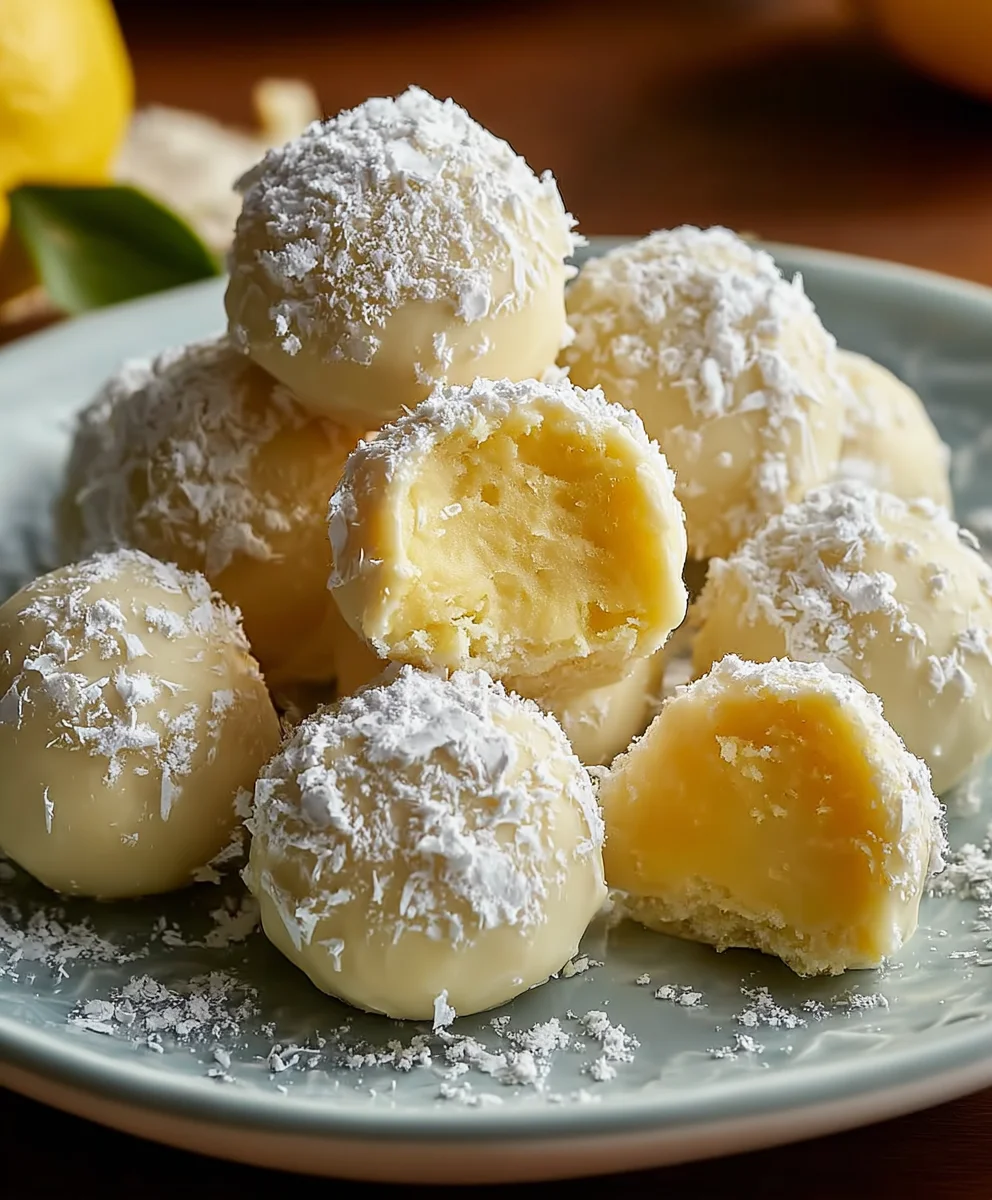
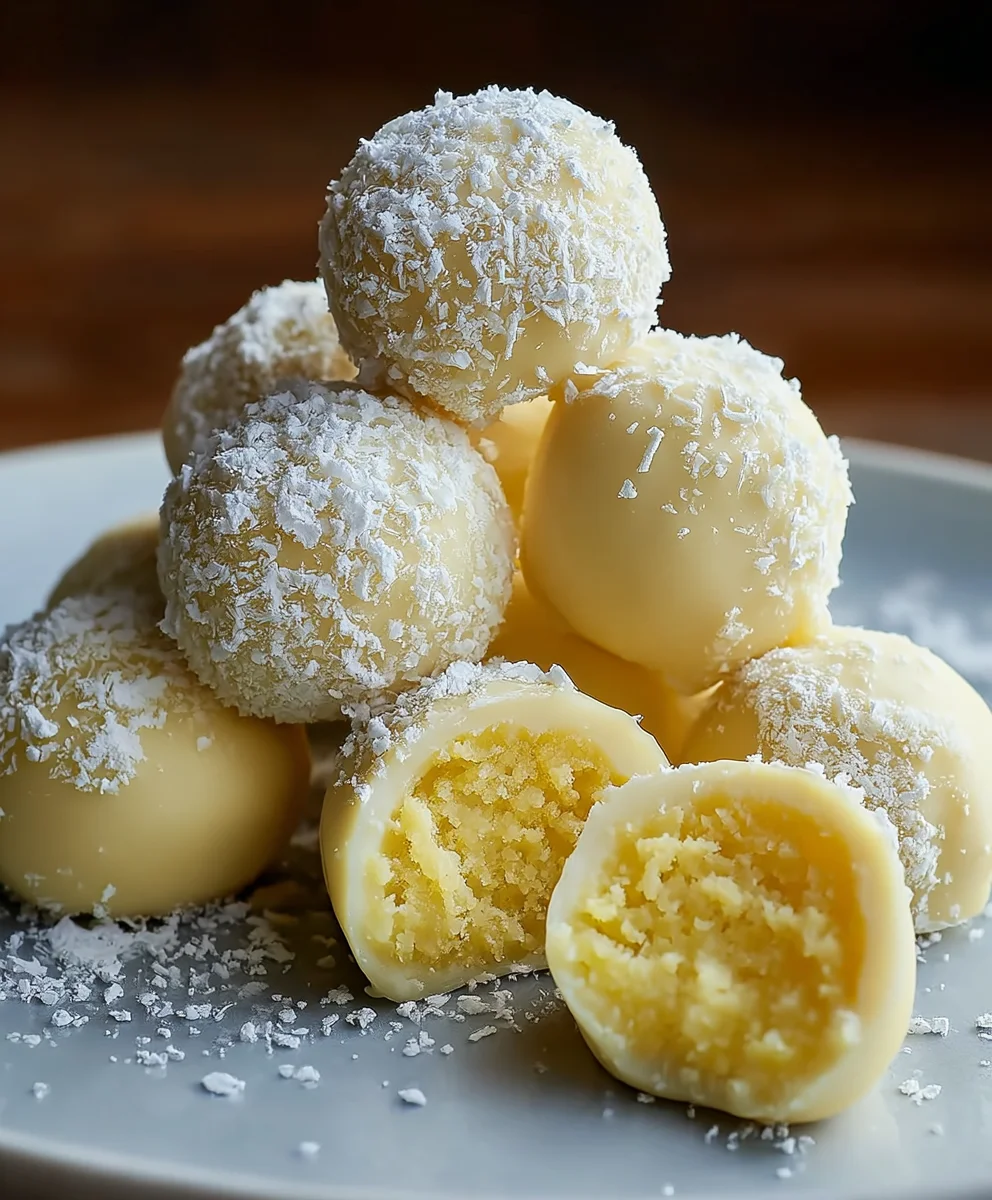
Prepare a small baking sheet or plate by lining it with parchment paper. This will prevent the truffles from sticking. Have your hands slightly damp or lightly dusted with a bit more powdered sugar or erythritol. Using a small spoon or a cookie scoop, scoop out portions of the chilled mixture – about 1 tablespoon each. Roll each portion between your palms to form smooth, round balls. Work relatively quickly to prevent your body heat from softening the mixture too much. If the mixture becomes too soft, simply pop it back into the refrigerator for another 15-20 minutes.
Place the rolled truffles onto the prepared baking sheet. Once you’ve rolled all of them, you can serve them as is for a soft, melt-in-your-mouth experience. Alternatively, for a more polished look and a delightful crunch, you can roll them in a coating. Some popular options include extra powdered sugar, finely shredded coconut, or even a dusting of finely chopped pistachios for a pop of color and crunch. If you used white chocolate, you could even drizzle them with a bit of melted dark chocolate for contrast. For best results, place the finished truffles back in the refrigerator for about 15-30 minutes to allow them to firm up slightly before serving. Enjoy these bright, zesty treats!
Conclusion:
I hope you’ve enjoyed learning how to make these delightful Lemon Truffles! This recipe is wonderfully straightforward, allowing you to create a gourmet treat right in your own kitchen. The bright, zesty flavor of lemon combined with the rich, creamy chocolate is simply irresistible. Whether you’re a seasoned baker or just starting out, these Lemon Truffles are a fantastic project that yields impressive results. They’re perfect for adding a touch of elegance to any occasion or simply as a personal indulgence. Don’t be afraid to experiment and make them your own!
For serving suggestions, these Lemon Truffles are best enjoyed chilled, allowing their flavors to fully develop. They make a beautiful addition to a dessert platter, a thoughtful homemade gift, or a delightful accompaniment to a cup of coffee or tea. Consider garnishing them with a dusting of powdered sugar or some finely grated lemon zest for an extra flourish.
As for variations, feel free to infuse your chocolate ganache with other citrus notes like lime or orange, or even add a hint of floral flavor with a touch of lavender extract. For a bit of crunch, try rolling some of the finished truffles in toasted coconut or finely chopped pistachios. The possibilities are truly endless when it comes to personalizing these little gems! So go ahead, give them a try, and I’m sure you’ll be delighted with your delicious homemade Lemon Truffles.
Frequently Asked Questions about Lemon Truffles:
Q1: How should I store my Lemon Truffles?
It’s best to store your Lemon Truffles in an airtight container in the refrigerator. This helps maintain their firm texture and prevents them from absorbing any unwanted odors. They can be stored this way for up to a week, though they are most enjoyable within the first few days of making them.
Q2: Can I make Lemon Truffles with white chocolate?
Absolutely! While this recipe uses dark or milk chocolate for a balanced flavor, white chocolate works beautifully as a base for Lemon Truffles. You might want to slightly reduce the amount of lemon zest or juice when using white chocolate, as its sweetness can be more pronounced.
Easy Lemon Truffles
Delicious and easy-to-make non-alcoholic lemon truffles, perfect for a refreshing dessert.
Ingredients
-
4 ounces cream cheese or coconut butter, softened
-
2 tablespoons butter or additional coconut butter, softened
-
3 tablespoons powdered sugar or erythritol
-
Zest of one fresh lemon
-
3 ounces white chocolate chips (optional)
-
A tiny drop of natural food coloring or a pinch of turmeric for a beautiful hue (optional)
Instructions
-
Step 1
Soften cream cheese/coconut butter and butter/coconut butter. Combine softened ingredients in a bowl with powdered sugar/erythritol. Beat with an electric mixer until smooth, light, and fluffy (about 2-3 minutes). -
Step 2
Zest one fresh lemon, ensuring to avoid the white pith. Add lemon zest to the creamed mixture. Optionally, add a drop of natural food coloring or a pinch of turmeric for color. Mix on low speed until just combined. -
Step 3
If using, melt white chocolate chips using a double boiler or microwave. Allow to cool slightly, then gently fold into the lemon mixture until just combined. -
Step 4
Cover the bowl tightly with plastic wrap, pressing it directly onto the surface of the mixture. Refrigerate for at least 1 hour, or until firm enough to roll into balls. -
Step 5
Line a baking sheet with parchment paper. Scoop out about 1 tablespoon of the chilled mixture and roll into smooth balls between your palms. Place truffles on the prepared baking sheet. -
Step 6
Serve as is, or roll in desired coatings like powdered sugar, shredded coconut, or chopped pistachios. Refrigerate for 15-30 minutes before serving to firm up.
Important Information
Nutrition Facts (Per Serving)
It is important to consider this information as approximate and not to use it as definitive health advice.
Allergy Information
Please check ingredients for potential allergens and consult a health professional if in doubt.