Easy St Patrick’s Day Cookies – Quick & Fun Recipe
Easy St. Patrick’s Day Cookies are the perfect way to inject a little festive fun into your kitchen without any fuss. As March rolls around, the craving for something green, sweet, and celebratory strikes, and these delightful cookies answer the call beautifully. We all love a good reason to bake, and St. Patrick’s Day provides that opportunity with vibrant colors and cheerful vibes. What makes these Easy St. Patrick’s Day Cookies so special is their incredible simplicity. They’re designed for bakers of all skill levels, proving that you don’t need to be a pastry chef to create something that looks and tastes amazing. Imagin extracte the delight on your family’s faces, or the impressed smiles at a potluck, all thanks to these simple yet show-stopping treats. Let’s get baking and spread some emerald cheer!

Easy St. Patrick’s Day Cookies
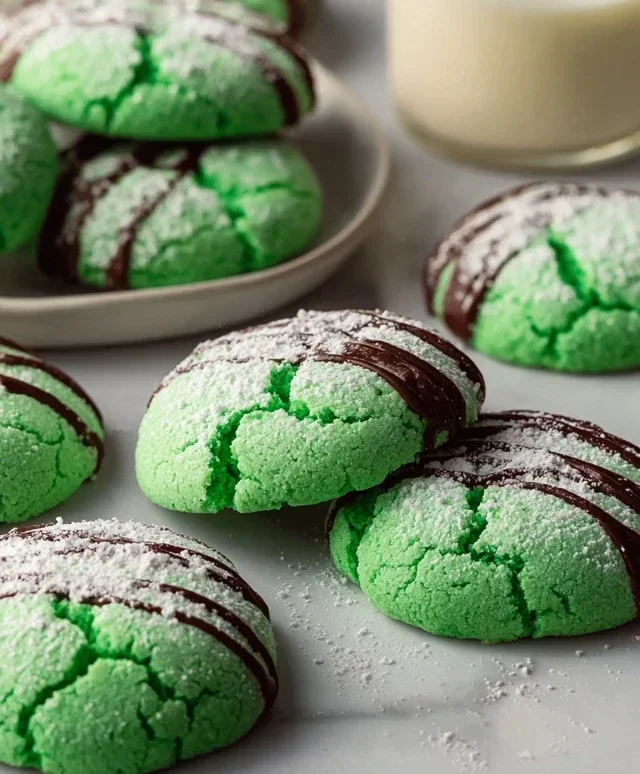
Looking for a quick and festive way to celebrate St. Patrick’s Day? These Easy St. Patrick’s Day Cookies are your answer! They require minimal ingredients, are incredibly simple to whip up, and the vibrant green color is sure to bring a smile to everyone’s face. Forget complicated doughs and hours of decorating; these cookies are all about effortless fun and deliciousness. They’re perfect for a last-minute treat for the kids, a potluck contribution, or simply to add a touch of Irish cheer to your day. The secret to their simplicity is using a white cake mix as the base, which ensures a tender and slightly cakey texture that pairs beautifully with the sweet, light frosting. Let’s get baking!
Ingredients:
Get Ready to Bake!
Before we dive into mixing our ingredients, it’s a great idea to preheat your oven and prepare your baking sheets. This will save you time and ensure your cookies bake evenly. Preheat your oven to 350 degrees Fahrenheit (175 degrees Celsius). Line your baking sheets with parchment paper. This is a lifesaver for easy cleanup and prevents the cookies from sticking, which is especially helpful when you’re working with a softer dough.
Mixing the Dough
This is where the magic happens, and it’s incredibly straightforward. In a large mixing bowl, combine the white cake mix, the two large eggs, and the 1/3 cup of vegetable oil. You can use an electric mixer on medium speed, or if you’re feeling energetic, a sturdy whisk or wooden spoon will do the job perfectly. Mix these ingredients together until they are just combined and a dough starts to form. Don’t overmix at this stage; we’re just looking to incorporate everything.
Now for the fun part – the color! Add the 1/4 teaspoon of Kelly green gel food coloring to the dough. Gel food coloring is fantastic because it provides intense color without adding extra liquid, which could alter the cookie’s texture. Start with a small amount, and if you desire a deeper green, you can always add a tiny bit more. Mix the food coloring in thoroughly until the dough is a uniform, cheerful green. You’ll see the dough transform into a festive St. Patrick’s Day hue.
Forming the Cookies
Once your dough is a beautiful green, it’s time to shape the cookies. For this recipe, we’re going for a simple, classic drop cookie shape. Using a tablespoon or a small cookie scoop, drop rounded spoonfuls of dough onto your prepared baking sheets. Leave about 2 inches of space between each cookie, as they will spread slightly while baking. You can gently flatten the tops of the cookies with the back of a spoon if you prefer a flatter cookie, but it’s not necessary. The slightly rounded tops will bake up beautifully.
Baking to Perfection
Now, carefully place your baking sheets into the preheated oven. Bake for 8 to 10 minutes, or until the edges of the cookies are just set and lightly golden. Keep a close eye on them, as cake mix cookies can bake quickly. We’re aiming for a cookie that is slightly soft in the center – this is what keeps them tender and delicious. Overbaked cookies can become dry and crum extractbly.
Once they are baked, remove the baking sheets from the oven. Let the cookies cool on the baking sheets for about 5 minutes. This is an important step because it allows them to firm up enough to be moved without falling apart. After the initial cooling period on the sheet, carefully transfer the cookies to a wire rack to cool completely. They need to be entirely cool before you move on to the frosting.
Creating the Simple Glaze
While your cookies are cooling, we’ll prepare the simple, sweet glaze. In a small bowl, whisk together the 3 tablespoons of granulated sugar and the 6 tablespoons of powdered sugar. This combination provides a lovely sweetness and a touch of texture from the granulated sugar.
Gradually add a tablespoon or two of water to the sugar mixture, whisking continuously until you achieve a smooth, drizzling consistency. You’re looking for a glaze that is thick enough to coat the back of a spoon but thin enough to pour or drizzle easily. If it’s too thick, add water a tiny bit at a time. If it’s too thin, add a bit more powdered sugar.
Decorating for St. Patrick’s Day
Once your cookies are completely cool, it’s time to add the finishing touch. You can either dip the tops of the cookies into the glaze, or if you prefer a more delicate touch, use a spoon to drizzle the glaze over the tops. For an extra festive look, you can even sprinkle a few green sanding sugars or a pinch of edible gold glitter onto the wet glaze before it sets. Let the glaze set completely before stacking or serving your delightful St. Patrick’s Day cookies. Enjoy the luck of the Irish!
Conclusion:
There you have it – the perfect recipe for Easy St. Patrick’s Day Cookies that are as delightful to make as they are to eat! These cookies are a fantastic way to bring a touch of festive cheer to your St. Patrick’s Day celebrations without any fuss. Their simple ingredients and straightforward steps make them ideal for bakers of all skill levels, from complete begin extractners to seasoned pros looking for a quick and satisfying treat. The cheerful green hue and customizable decorations mean you can create something truly special that will impress your family and friends.
These versatile cookies are wonderful on their own, but they also pair beautifully with a glass of cold milk, a cup of coffee, or even a festive green smoothie. For an extra touch, consider serving them alongside some sbeef hamrock-shaped brownies or a rainbow fruit platter for a complete St. Patrick’s Day dessert spread. Don’t be afraid to get creative with the decorations! You can use green and white frosting, sprinkles, edible glitter, or even add small candy coins for an authentic touch.
I truly encourage you to give this Easy St. Patrick’s Day Cookies recipe a try. It’s a guaranteed way to add a little bit of magic and a whole lot of deliciousness to your holiday!
Frequently Asked Questions:
Can I make these cookies ahead of time?
Absolutely! These cookies can be baked a day or two in advance and stored in an airtight container at room temperature. If you plan to decorate them, it’s best to do so once they have cooled completely, and then store them carefully to avoid smudgin extractg the frosting.
What if I don’t have green food coloring?
No worries! While green is traditional for St. Patrick’s Day, you can adapt this recipe to any color you prefer. You could also omit the food coloring altogether and simply enjoy the delicious vanilla flavor. They will still be wonderfully tasty!
Can I add other flavors to the cookie dough?
Yes, you can! Feel free to add a teaspoon of peppermint extract for a refreshing twist, or even some finely grated lemon zest for a subtle citrus note. Just remember that adding too many wet ingredients might alter the dough consistency, so start with small additions.
Easy St. Patrick’s Day Cookies
Simple and festive green cookies perfect for St. Patrick’s Day celebrations.
Ingredients
-
1 box (15.25 oz) white cake mix (about 3 cups)
-
2 large eggs
-
1/3 cup vegetable oil
-
1/4 teaspoon Kelly green gel food coloring
-
3 tablespoons granulated sugar
-
6 tablespoons powdered sugar
Instructions
-
Step 1
In a large bowl, combine the white cake mix, eggs, and vegetable oil. Mix until well combined. -
Step 2
Add the Kelly green gel food coloring and mix until the dough is evenly colored. -
Step 3
Roll the dough into small balls and place them on a baking sheet lined with parchment paper. -
Step 4
In a small bowl, combine the granulated sugar and powdered sugar. This will be the coating. -
Step 5
Roll each cookie ball in the sugar mixture until well coated. -
Step 6
Bake in a preheated oven at 350°F (175°C) for 8-10 minutes, or until the edges are lightly golden. -
Step 7
Let the cookies cool on the baking sheet for a few minutes before transferring them to a wire rack to cool completely.
Important Information
Nutrition Facts (Per Serving)
It is important to consider this information as approximate and not to use it as definitive health advice.
Allergy Information
Please check ingredients for potential allergens and consult a health professional if in doubt.