Homemade Fried Apple Pies Recipe-Best Ever
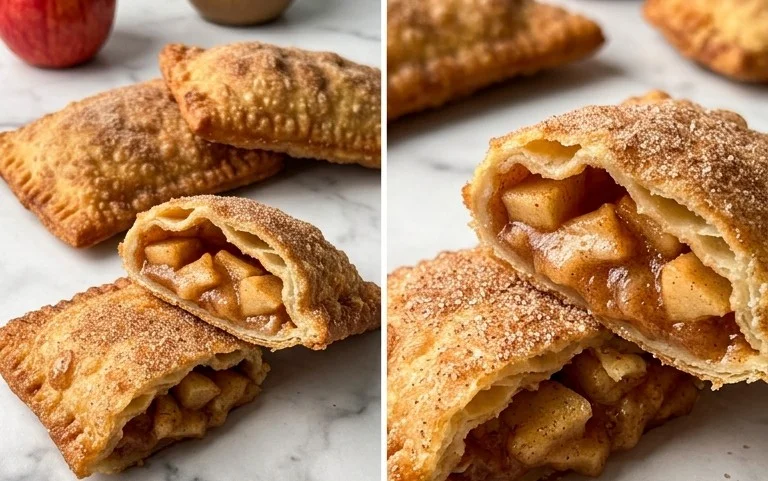
The Best Fried Apple Pies Recipe (Homemade) is more than just a dessert; it’s a comforting embrace, a nostalgic journey back to simpler times, and a delicious adventure for your taste buds. There’s something undeniably magical about that first bite: the crisp, golden exterior yielding to a warm, gooey center bursting with sweet, tender apples, all kissed with cinnamon and spice. We all have those childhood memories, perhaps of a grandmother’s kitchen or a summer fair, where a perfectly fried apple pie was the ultimate treat. What makes our homemade fried apple pies so special? It’s the carefully balanced sweetness of the apples, the flaky, shatteringly crisp crust that holds its shape, and that irresistible fried finish that no baked pie can quite replicate. Get ready to create your own cherished memories with this truly exceptional recipe for the best fried apple pies.
The Best Fried Apple Pies Recipe (Homemade)
There’s something incredibly nostalgic and comforting about a warm, homemade fried apple pie. The crisp, golden-brown crust gives way to a sweet, spiced apple filling that just melts in your mouth. Forget those store-bought imposters; making your own fried apple pies is surprisingly achievable and so rewarding. Today, I’m sharing my go-to recipe that delivers perfect results every time, with a flaky, tender crust and a burst of apple goodness.
This recipe balances the tartness of Granny Smith apples with the sweetness of Honeycrisp, creating a filling that’s just right. The dough comes together easily, and the frying process is straightforward, leaving you with a batch of delicious pies that will disappear fast. So, gather your ingredients, put on some music, and let’s get baking (and frying)!
Ingredients:
Preparing the Apple Filling
The heart of any great apple pie is its filling, and this one is no exception. We want tender, flavorful apples that aren’t mushy.
Making the Pie Dough
A flaky, tender crust is what elevates a good fried apple pie to the best. This dough recipe is simple and uses the “cut-in” method for that desired texture.
Assembling and Frying the Pies
Now for the fun part – putting it all together and achieving that perfect golden-brown finish.
Glazing and Serving
The finishing touch is a simple, sweet glaze that complements the warm, spiced apples perfectly.
Conclusion:
You’ve now got the secrets to crafting the absolute best fried apple pies right in your own kitchen! This recipe truly stands out because of its perfectly crisp, golden-brown crust that gives way to a warm, tender, and wonderfully spiced apple filling. It’s the ultimate comfort dessert, bringin extractg together simple ingredients for an extraordinary treat that will have everyone asking for seconds. I absolutely encourage you to give this homemade fried apple pies recipe a try – you won’t be disappointed!
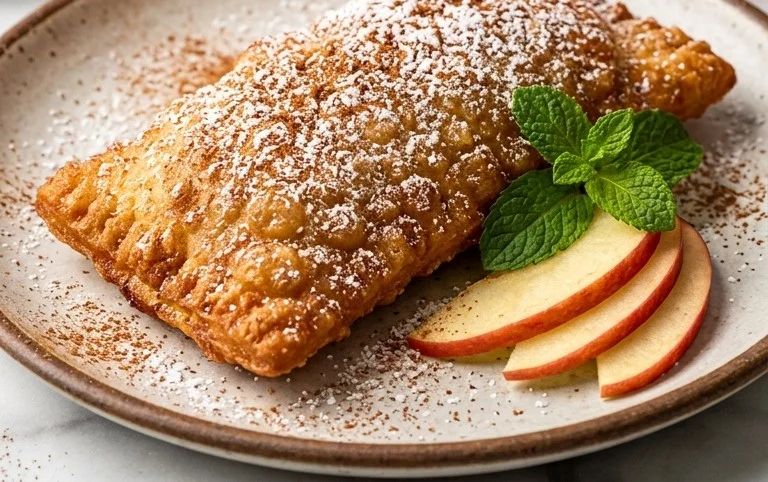
These delightful pies are fantastic served warm, perhaps with a scoop of vanilla ice cream melting into the filling, or a drizzle of caramel sauce. For a simpler enjoyment, a dusting of powdered sugar is also a beautiful touch. Don’t be afraid to get creative with variations! You could add a pinch of nutmeg or a dash of allspice to the apple mixture for extra warmth, or even fold in a handful of chopped pecans or walnuts for a delightful crunch. Experiment with different types of apples, like Granny Smith for tartness or Honeycrisp for sweetness, to find your perfect blend.
Frequently Asked Questions:
Can I make the apple filling ahead of time?
Absolutely! You can prepare the apple filling up to 2 days in advance and store it in an airtight container in the refrigerator. This makes assembling the pies even quicker when you’re ready to fry them.
What’s the best way to store leftover fried apple pies?
For the best texture, it’s ideal to eat fried apple pies fresh. However, if you have leftovers, let them cool completely and store them in an airtight container at room temperature for up to 2 days. They might lose some of their crispness, but they’ll still be delicious, especially when gently reheated in a toaster oven or oven.
Can I bake these instead of frying?
While this recipe is specifically designed for frying to achieve that iconic crispiness, you can adapt it for baking. Bake at around 400°F (200°C) for 20-25 minutes, or until golden brown. The texture will be different, more like a traditional baked hand pie, but still tasty!
The Best Fried Apple Pies Recipe (Homemade)
Delicious homemade fried apple pies with a perfectly flaky crust and a sweet, spiced apple filling.
Ingredients
-
2 large apples, peeled, cored, and diced (1 granny smith and 1 honeycrisp recommended)
-
1/4 cup brown sugar
-
1/2 teaspoon cinnamon
-
1 teaspoon vanilla
-
2 teaspoons apple cider (or apple juice)
-
1 teaspoon cornstarch
-
2 cups self-rising flour, sifted
-
4 Tablespoons unsalted butter, cubed
-
2 egg yolks
-
1/3 cup HOT milk
-
1/4 teaspoon salt
-
1/2 teaspoon vanilla extract
-
1 Tablespoons milk
-
1/2 cup powdered sugar
-
Vegetable or canola oil, for frying
Instructions
-
Step 1
In a medium bowl, combine diced apples, brown sugar, cinnamon, 1 teaspoon vanilla, apple cider, and cornstarch. Stir to coat and set aside. -
Step 2
In a separate bowl, whisk together sifted self-rising flour and salt. Cut in the cubed butter with a pastry blender or your fingers until the mixture resembles coarse crumbs. -
Step 3
In a small bowl, whisk together egg yolks and 1/3 cup hot milk. Gradually add this mixture to the flour mixture, stirring until a soft dough forms. Turn dough onto a lightly floured surface and knead briefly until smooth. -
Step 4
Divide the dough into 6 equal portions. On a lightly floured surface, roll each portion into a thin circle. Spoon a portion of the apple filling onto one half of each circle, leaving a border. Fold the other half over to create a half-moon shape. Crimp the edges with a fork to seal. -
Step 5
Heat vegetable or canola oil in a deep skillet or pot to 350°F (175°C). Carefully fry the apple pies for 2-3 minutes per side, until golden brown and cooked through. Drain on paper towels. -
Step 6
In a small bowl, whisk together 1/2 cup powdered sugar, 1/2 teaspoon vanilla extract, and 1 tablespoon milk until smooth and drizzleable. Drizzle over the warm fried apple pies.
Important Information
Nutrition Facts (Per Serving)
It is important to consider this information as approximate and not to use it as definitive health advice.
Allergy Information
Please check ingredients for potential allergens and consult a health professional if in doubt.