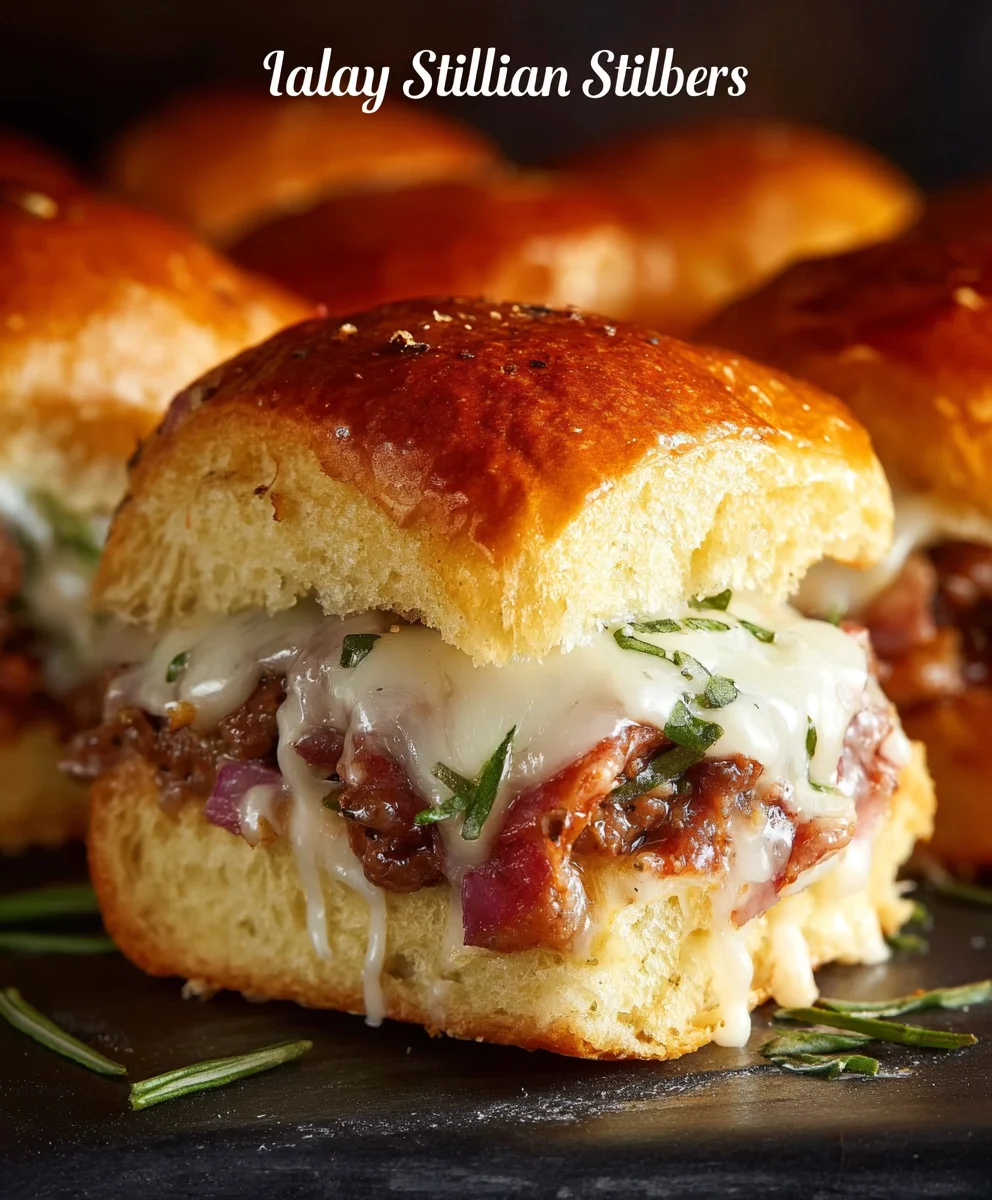
Juicy Beef Italian Sliders- Easy & Flavorful
Italian Sliders are more than just a snack; they are a miniature explosion of beloved Italian flavors, conveniently packed into a handheld delight. If you’ve ever craved the savory richness of a classic Italian sub but wished for a more approachable and shareable format, then these Italian Sliders are your culinary dream come true. What is it about these little wonders that captures our hearts and taste buds? It’s the perfect harmony of textures and tastes – the tender, often sweet, slider buns embracing layers of savory Italian meats like beef salami and beef pepperoni, creamy mozzarella, tangy provolone, and often a delightful kick from marinated peppers or a drizzle of balsamic glaze. They are incredibly satisfying without being overwhelmingly heavy, making them ideal for game days, casual get-togethers, or even a fun weeknight dinner. The magic of Italian Sliders lies in their adaptability and their undeniable comfort food appeal, promising a burst of authentic Italian goodness in every bite.
Ingredients:
- 12 Hawaiian rolls, split horizontally
- ⅓ cup mayonnaise
- 12 slices provolone cheese
- ½ pound hard beef beef salami, coarsely chopped
- ½ pound beef beef pepperoni, coarsely chopped
- ½ pound beef beef ham, coarsely chopped
- ¼ cup butter, melted
- ½ teaspoon garlic powder
- ½ teaspoon dried oregano
- ½ teaspoon dried basil
- 8 ounce bag shredded lettuce
- ½ cup red onion, finely diced
- ½ cup chopped banana peppers
- ¼ cup mayonnaise
- ¼ cup dill relish
Preparing the Italian Slider Filling
Mixing the Meats
The heart of these Italian sliders lies in the robust meat mixture. In a medium-sized bowl, combine the coarsely chopped hard beef salamialami, beef pepperonieroni, and beef hamf ham. Give everything a good stir to ensure the different meats are evenly distributed. This blend provides a fantastic depth of flavor and a satisfying texture that is key to authentic Italian sliders.
Crafting the Creamy Binder
Next, we’ll create the creamy binder that will hold our delicious meat mixture together and add another layer of flavor. In a separate smaller bowl, combine ⅓ cup of mayonnaise with the chopped banana peppers. The banana peppers bring a delightful tang and mild heat that beautifully complements the savory meats. Stir these together until well incorporated. This mixture will not only add moisture but also a pleasant brininess that cuts through the richness of the meats.
Combining and Seasoning
Now it’s time to bring our filling components together. Add the creamy mayonnaise and banana pepper mixture to the bowl with the chopped meats. Also, add the finely diced red onion. The red onion provides a crisp bite and a subtle sharpness that enhances the overall profile of the sliders. Stir everything thoroughly, ensuring that the mayonnaise mixture evenly coats all the meat and onion pieces. This is where all those wonderful flavors start to meld. To further elevate the taste, sprinkle in the garlic powder, dried oregano, and dried basil. These classic Italian herbs are essential for achieving that signature Italian flavor we’re aiming for in our sliders. Mix again until all the seasonings are evenly distributed throughout the filling. You should be able to smell the fragrant herbs already!
Assembling and Baking the Italian Sliders
Preparing the Rolls and Cheese
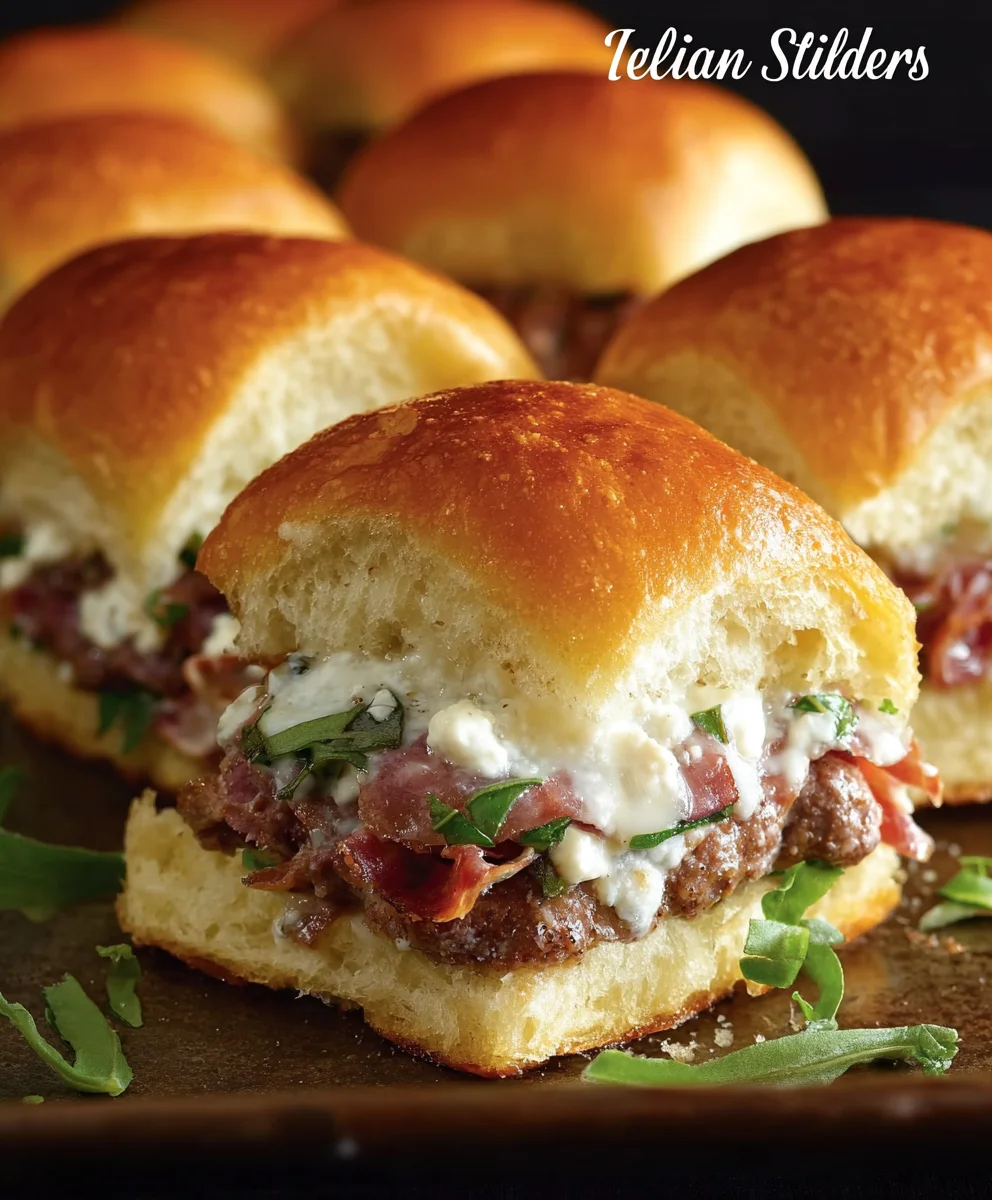
Take your Hawaiian rolls and carefully separate the tops from the bottoms. Lay the bottom halves of the rolls in a single layer on a baking sheet. This will be the foundation of our delicious Italian sliders. Now, artfully arrange 12 slices of provolone cheese, one slice per roll bottom, ensuring each piece of bread is well covered. The provolone cheese will melt beautifully, creating a gooey, cheesy layer that’s irresistible.
Layering the Meat Filling
Carefully spoon the prepared meat mixture evenly over the provolone cheese on each of the bottom roll halves. Aim for a generous but manageable amount on each slider base so they don’t become too top-heavy. You want a good ratio of meat to bread in every bite. Press down gently on the meat mixture with the back of your spoon to help it adhere to the cheese and bread.
Creating the Garlic Butter Topping
In a small bowl, melt the ¼ cup of butter. Once melted, stir in the ¼ cup of mayonnaise and the ¼ cup of dill relish. This might seem like an unusual combination, but trust me, it’s a flavor powerhouse for the tops of our sliders. The mayonnaise adds a creamy richness, the dill relish brings a tangy, slightly sweet, and herbaceous note that cuts through the fat of the butter and complements the Italian flavors. Whisk these ingredients together until smooth and well combined.
Baking to Golden Perfection
Generously brush or spoon this delicious garlic butter and relish mixture over the top halves of the Hawaiian rolls. Make sure to cover the entire surface of the roll tops for maximum flavor. Place the brushed top halves onto the bottom halves, completing the assembly of your Italian sliders. Cover the baking sheet loosely with aluminum foil. Bake in a preheated oven at 350°F (175°C) for about 15-20 minutes, or until the cheese is melted and gooey, and the rolls are lightly toasted. For the last 5 minutes of baking, remove the foil to allow the tops to get slightly golden and crisp.
Adding the Fresh Finish
Once your Italian sliders are out of the oven and have cooled slightly, carefully lift the top halves. Divide the 8-ounce bag of shredded lettuce evenly among the sliders. The crisp, cool lettuce adds a fantastic textural contrast to the warm, savory filling and melted cheese. Gently place the top halves back onto the sliders. Serve immediately and enjoy the explosion of Italian-inspired flavors!
Conclusion:
And there you have it – a delightful journey into creating these irresistible Italian Sliders! We’ve covered how to build layers of savory flavor, from the zesty Italian sausage to the melty mozzarella and the crisp slider buns. These Italian Sliders are perfect for any occasion, whether it’s a game day gathering, a casual dinner, or a potluck. Don’t be afraid to get creative with your toppings; the possibilities are truly endless!
For serving, these Italian Sliders are fantastic on their own, but they also pair wonderfully with a side of crispy fries, a fresh garden salad, or even a warm bowl of tomato soup. You can also serve them with extra marinara sauce for dipping – a definite crowd-pleaser!
As for variations, consider swapping the Italian sausage for ground beef seasoned with Italian herbs, or try adding some sautéed bell peppers and onions to the filling. For a vegetarian option, crum extractbled plant-based Italian sausage or a blend of ricotta and spinach would be delicious. The key is to have fun and make these Italian Sliders your own. We encourage you to try this recipe and share your own unique twists!
Frequently Asked Questions:
Can I make the Italian Slider filling ahead of time?
Absolutely! You can prepare the seasoned meat and cheese mixture for your Italian Sliders up to 24 hours in advance. Store it in an airtight container in the refrigerator. When you’re ready to assemble, simply warm it slightly before spreading it onto the buns. This makes them even quicker to prepare on the day of your event.
What are some other topping ideas for Italian Sliders?
Beyond the classic mozzarella, consider adding a sprinkle of Parmesan cheese, a dollop of pesto, some thinly sliced provolone, or even a few sliced pepperoncini for a little kick. Caramelized onions or sautéed mushrooms would also add a wonderful depth of flavor to your Italian Sliders.
Juicy Beef Italian Sliders – Easy & Flavorful
These easy and flavorful Italian sliders are packed with a delicious blend of beef salami, pepperoni, and ham, topped with melted provolone cheese and a creamy, tangy relish mixture. Perfect for parties or a quick weeknight meal!
Ingredients
-
12 Hawaiian rolls, split horizontally
-
⅓ cup mayonnaise
-
12 slices provolone cheese
-
½ pound hard beef salami, coarsely chopped
-
½ pound beef pepperoni, coarsely chopped
-
½ pound beef ham, coarsely chopped
-
¼ cup butter, melted
-
½ teaspoon garlic powder
-
½ teaspoon dried oregano
-
½ teaspoon dried basil
-
8 ounce bag shredded lettuce
-
½ cup red onion, finely diced
-
½ cup chopped banana peppers
-
¼ cup mayonnaise
-
¼ cup dill relish
Instructions
-
Step 1
In a medium bowl, combine the coarsely chopped hard beef salami, beef pepperoni, and beef ham. Stir well to distribute the meats evenly. -
Step 2
In a separate small bowl, mix ⅓ cup of mayonnaise with the chopped banana peppers and finely diced red onion. Stir until well combined. -
Step 3
Add the mayonnaise mixture to the bowl with the meats. Sprinkle in the garlic powder, dried oregano, and dried basil. Mix thoroughly until all ingredients are evenly coated. -
Step 4
Lay the bottom halves of the Hawaiian rolls on a baking sheet. Top each with a slice of provolone cheese. Spoon the meat mixture evenly over the cheese on each roll bottom. -
Step 5
In a small bowl, melt ¼ cup of butter. Stir in ¼ cup of mayonnaise and ¼ cup of dill relish until smooth. Generously brush this mixture over the top halves of the Hawaiian rolls. -
Step 6
Place the brushed top halves onto the bottom halves to complete the sliders. Cover the baking sheet loosely with aluminum foil and bake at 350°F (175°C) for 15-20 minutes, or until the cheese is melted and gooey, and the rolls are lightly toasted. Remove foil for the last 5 minutes. -
Step 7
Once cooled slightly, lift the top halves of the sliders and divide the shredded lettuce evenly among them. Replace the top halves and serve immediately.
Important Information
Nutrition Facts (Per Serving)
It is important to consider this information as approximate and not to use it as definitive health advice.
Allergy Information
Please check ingredients for potential allergens and consult a health professional if in doubt.